A chronological history of my:
Jade Green / Grey 1992 Trans Am Convertible
Page 4
With the car now legal and seeing more time in public, the unfinished interior and lack of tunes is really starting to get to me.
While originally I wasn't planning on going extreme with the stereo, a few weeks worth of reading on http://www.fiberglassforums.com led me down the path of custom car stereo again. After placing an order for good fiberglass supplies I realize how horrible the Bondo brand stuff is. This in combination with the fact the regular contact cement doesn't hold up well under hot temperatures will lead me to redo and change up some of the items I've all ready finished.
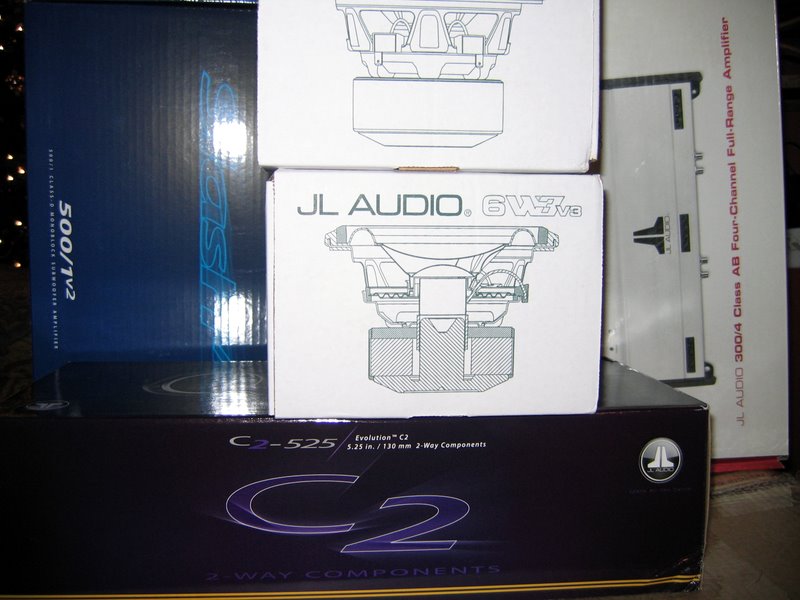
Step one is to develop a plan and get the items needed. Main stereo components will consist of all JL Audio components: C2-525 components for the doors or kick panels, 6W3's 6.5" subs for the doors, 13TW5 for the sub, 500/1v2 powering the sub, and a 300/4v2 running the front stage.
While the old Sony looks really nice in the HUmount kit shown on earlier pages, it's getting pretty old and won't handle an iPod very well. I searched around different brands and man have things changed since I was list into this. Sony by all accounts doesn't make top quality stuff anymore, there's a lot of ugly receivers out there, and to really get the control I'm after I would have to go to a screen type unit. Seems the 1 or 1.5 DIN units make controlling a large collection of music more difficult then it needs to be. Even the Alpine unit purposely built to only control an iPod has a lot of complaints about controlling an iPod.
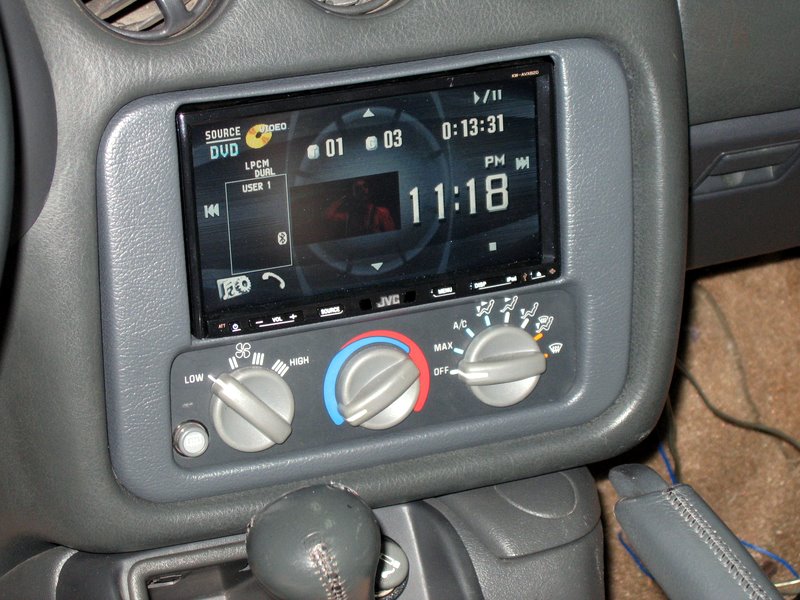
About the only double-din model I could find that had a removable face, 4v+ outputs, and no navigation was the JVC AVX820.

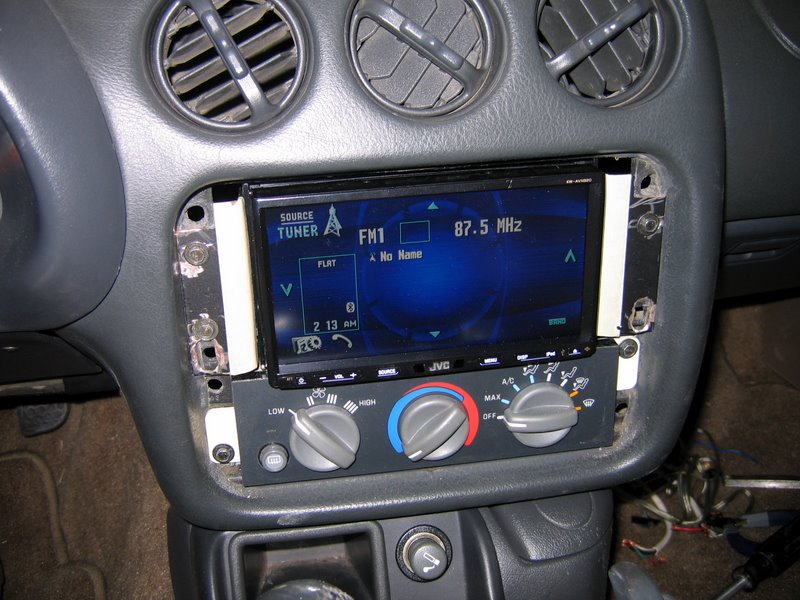
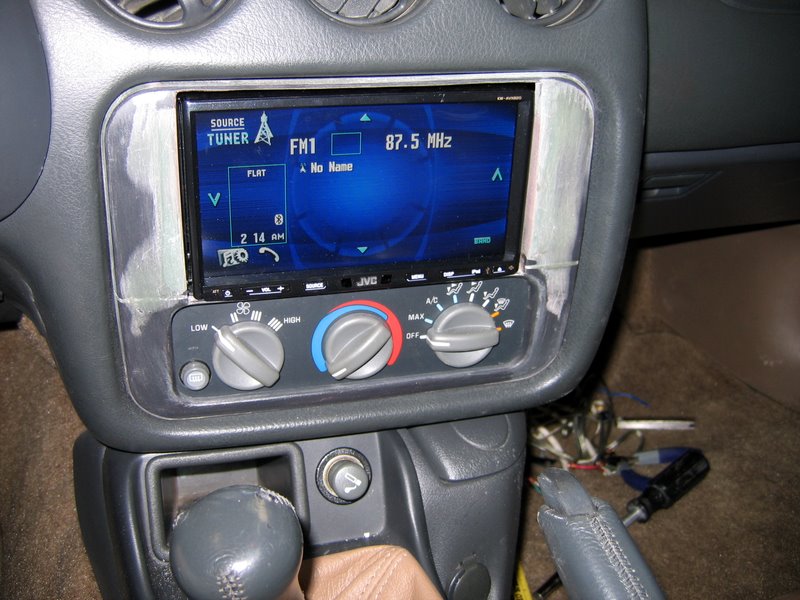
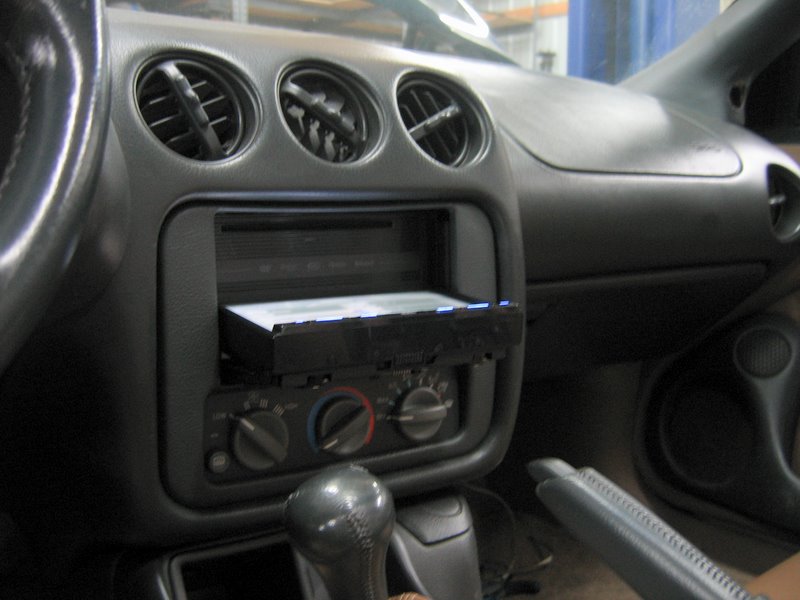
I've seen plenty of people put double-din's in 4th gen dashes so I knew it would fit. Hell, you can even buy pre-made trim rings to go around the unit to keep it looking stock. I figured I would get the unit mounted and see how hard it would be to make my own trim ring or at worst buy one of the pre-made models. Got the mounts bent and installed:

With the face installed. Just barely enough room for this unit.
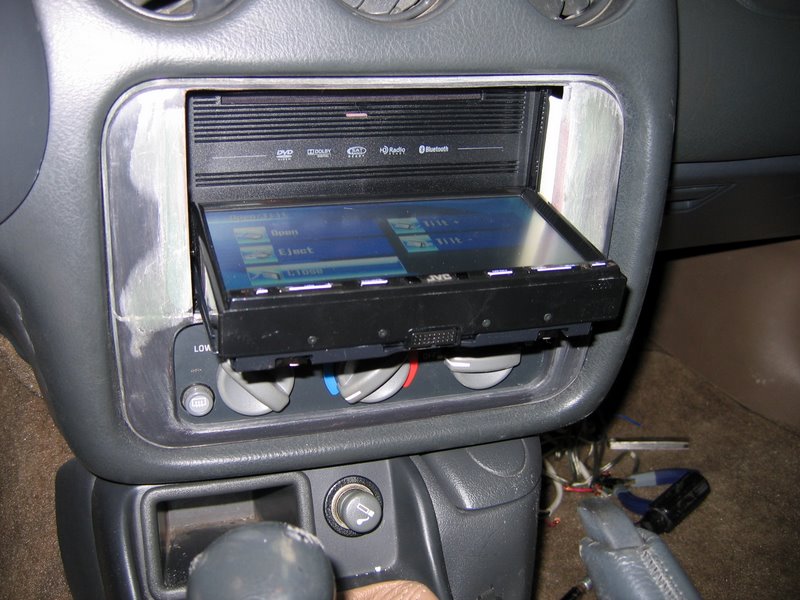
I'm not sure if there's such a thing as "over-sized" double-din, but this radio is significantly taller then any of the pictures I've seen of other units installed in a 4th gen dash. Even if the face was stationary, there's no way any of the pre-made trim rings would fit. Once you add in that the face gets slightly taller as it motorizes out I'm stuck making my own trim ring.
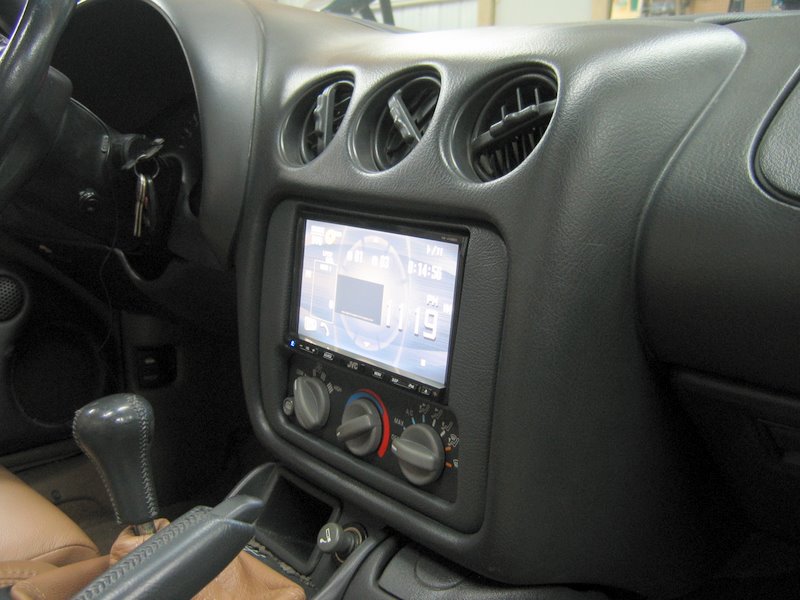
Two stock rings, a lot of Dremel wheels, some filler, and a lot of sanding later I had a trim ring.
Getting the lines straight and the gaps right was pretty difficult. I had to keep adjusting the radio mounts in order to have some type of line along the bottom and still have a line on the top. Of course leaving enough room for the face to move just added to my troubles.
The only issue I still need to work out is clearance on the top foam part of the dash. Outside of the car and top line of the trim ring is straight, but the portion of the dash it goes against is not. The stock trim ring has enough "meat" along this area to push the foam dash out of the way and keep the straight line. With the trim ring being so thin, the dash is more powerful and bows the top every so slightly.
Next up is covering this piece in vinyl. I moved on from the regular contact cement to "Landau Top" professional cement. Works the same, but doesn't fail under sunlight and heat. The vinyl I've been using is a perfect match to the seat leather, but is too dark to match the dash. I've been dying the other pieces I've done with the darkest color SEM makes, but under flash and fluorescent it appears too light against the dash. It's been acceptable under normal lighting conditions, but all the other pieces have been on different plains of view. IE, the other pieces were at different angles from the dash and wasn't noticeable. With the trim ring laying directly on top of the dash I'm not happy with it. I'll probably recover it with no dye, along with all the other pieces I've done (most of which need to be recovered due to glue failures anyway). If the darker then the dash look doesn't work either, I guess I'll start figuring out sewing/pattern making and just cover the whole dash.
Anyway, here's some views of the trim ring covered.
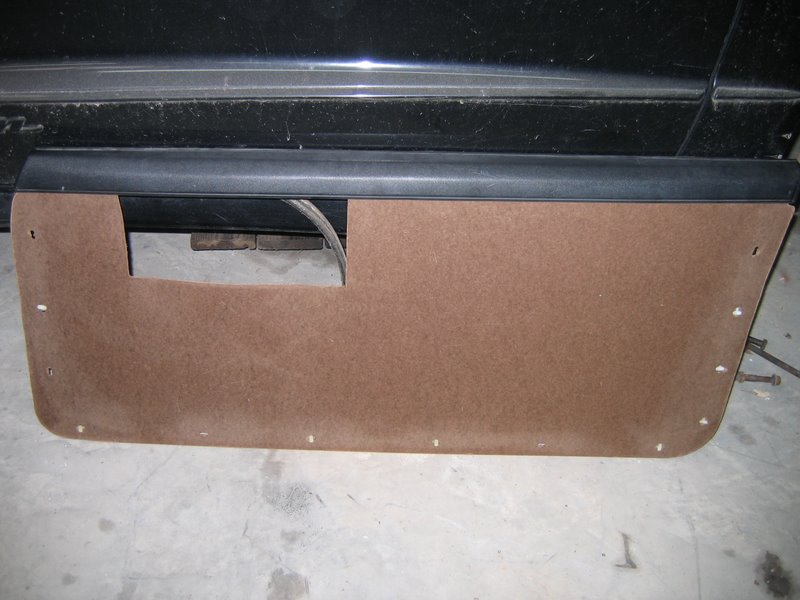
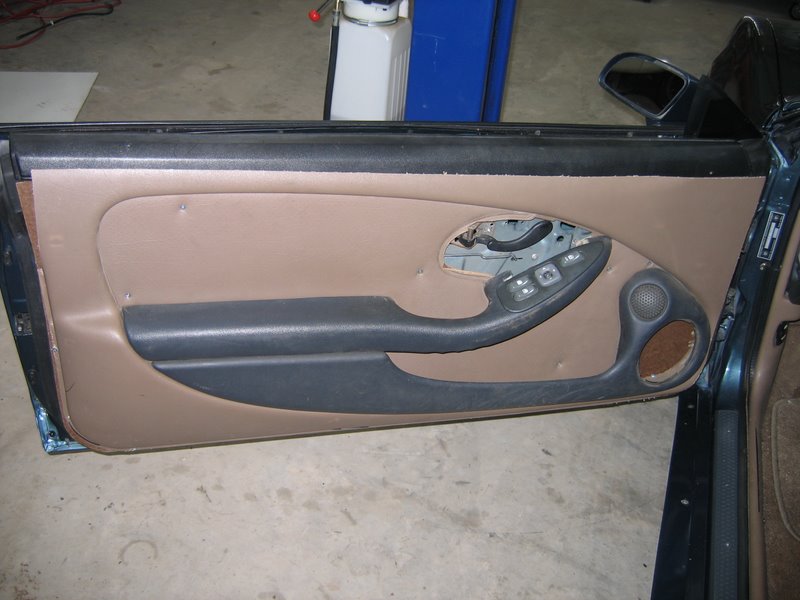
As you can see from some of the pictures above, I've started working on getting the 4th gen door panels in the car. The door panels are kind of like the a-pillars. Many people have said how easy they are, but few show pictures. Those that show pictures don't show any of the problem areas. Again like the a-pillars, you can make them fit with trimming, but they are not going to look stock. Here's a picture of the 4th gen panel I was playing with before the wreck:
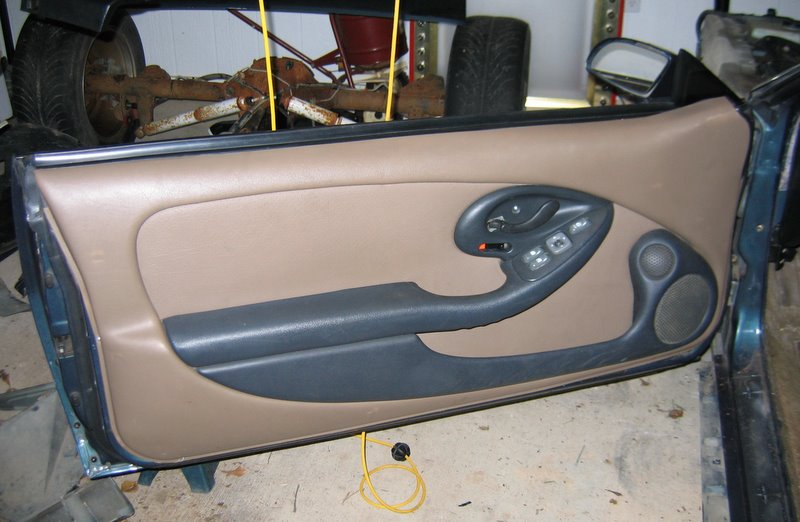
Looks great right? Sure in that picture. It's tweaked all kinds of ways to get it to fit, there's exposed screws holding the edges down, there's up to a 1" gap at the bottom, the door metal is cut, and the door wouldn't shut with the kick-panels/sill plates in place. After once again jumping into this, I realized that I'm going to have to make my own.
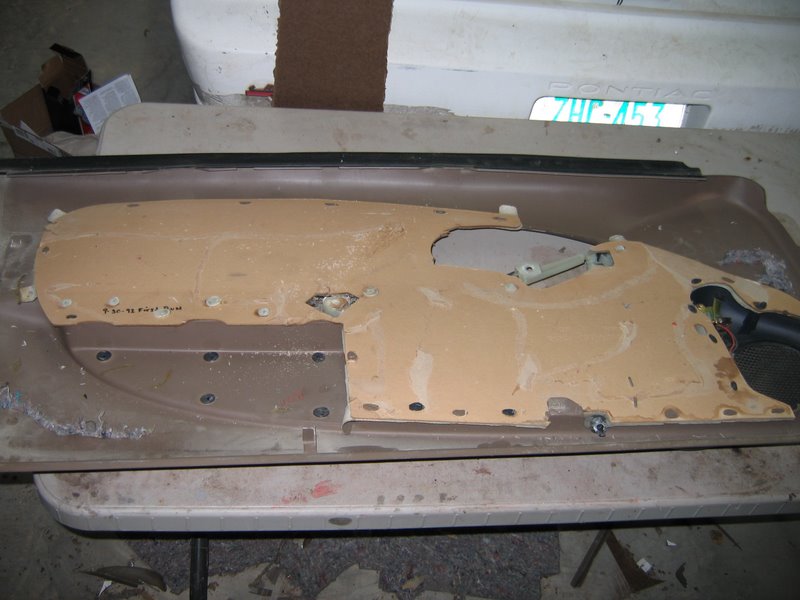
I started by getting some thin panel board, coated on the back side for water protection. I cut it to match the stock 3rd gen panels (which were cardboard anyway). I drilled out all the holes for the stock plastic clips and attached the stock upper trim.
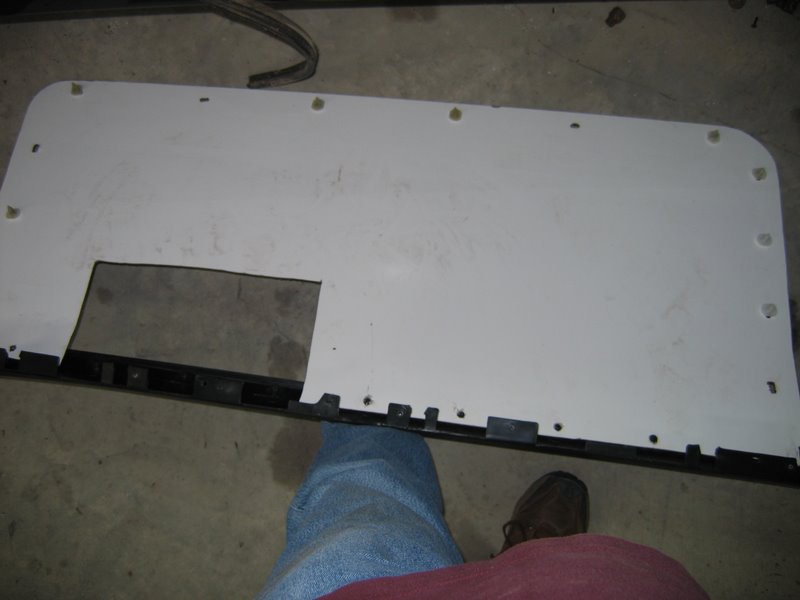
Test fitted to the door. My base fits just like the stock panel.
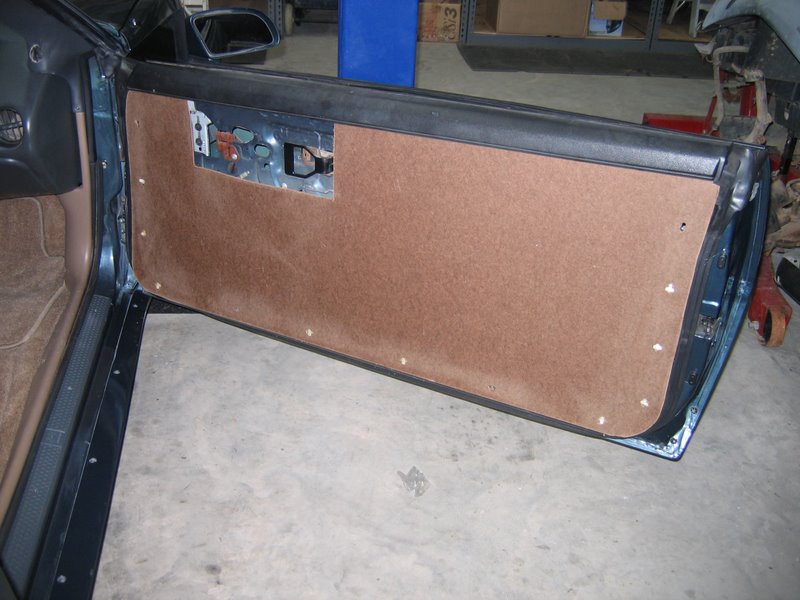
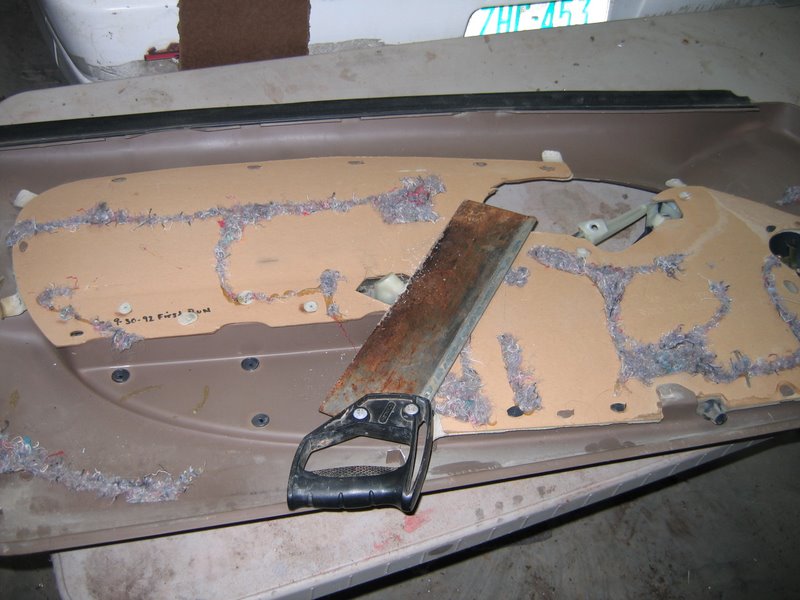
I struggled for a bit trying to figure out the best way to recreate the 4th gen look on a blank canvas. I then realized I could just mold the main section of the 4th gen panels to the 3rd gen base. This would give me the 4th gen look with the standard attachment and fit of the 3rd gen panel. Step one would be cutting all the tabs and pieces of the 4th gen panel to make it flat.
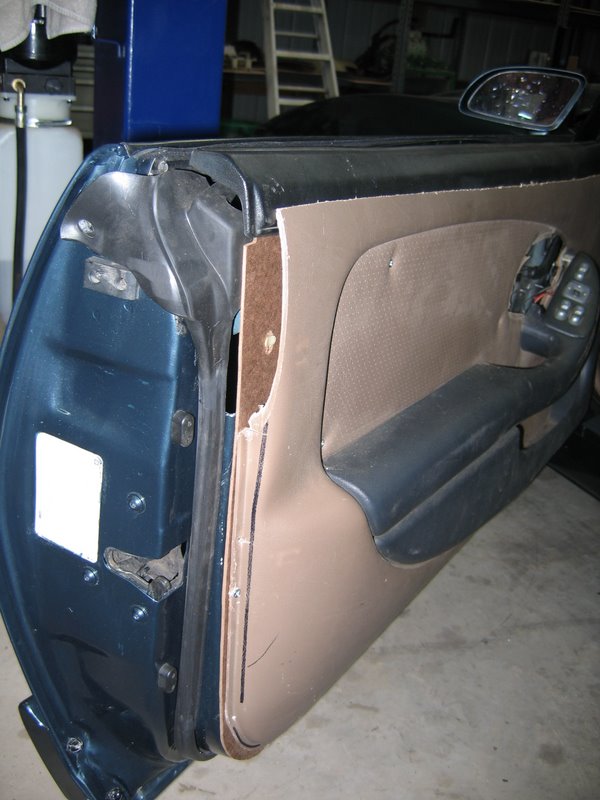
I then trimmed everything that was deeper then the cardboard insert. I then lined up where I wanted it to sit and screwed it down.
I trimmed around the front and rear edges of the door to allow the door to open and shut with no issues.
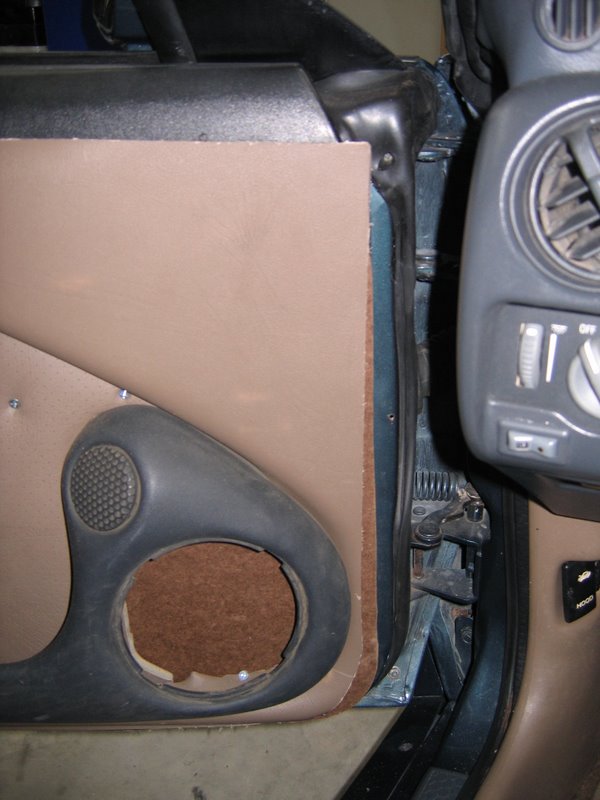
The plan is to further clean up the edges and fiberglass them to the panel board in a nice clean consistent edge. Once that's done I'll cut out the middle of the panel board and strip the attached pieces of the 4th gen panel. I'm still trying to decide if I want to put the component set in the kick panels and leave the doors stock looking with just a 6.5" woofer, or go ahead and go radical and put all three speakers in the doors.
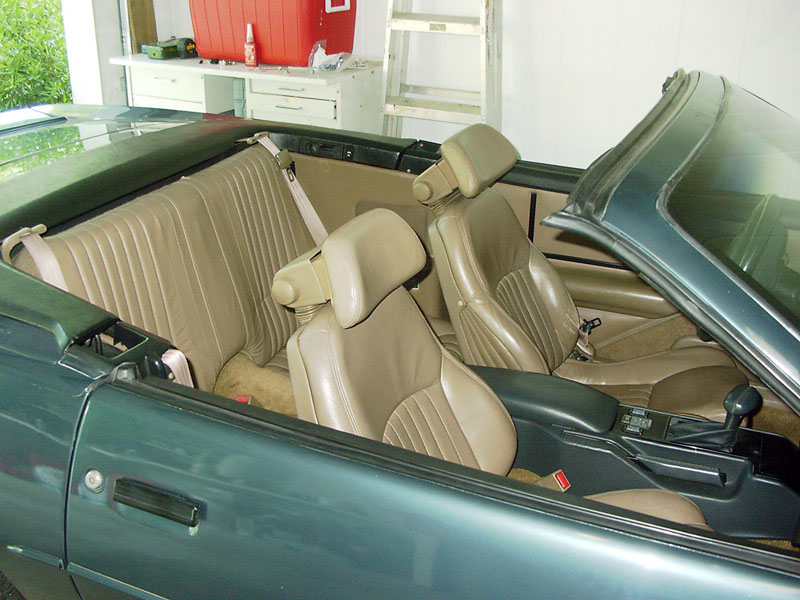
On to the sub. Bass in a convertible is always tough. I've got the 6.5" subs for the doors, but was trying to find a way to get low bass up front. I could have put the sub or subs in the trunk, but you lose a lot trying to fire through the top and into the cabin. The best bet is to put the subs in the cabin, but that usually means ditching the rear seats and that's not something I wanted to do. Chances are no one will ever sit back there, but I happen to like the look and did spend money on the leather covers. These new thin mount subwoofers let me do some thinking. After some rough measurements I decided to try something a little different. I'm going to try putting the sub IN the back seat.
The stock rear seat consists of a hard plastic back shell, a thick foam cushion, and a cover. The goal is to have the sub mounted into hard back piece, a fiberglass box in the shape of the cushion, and the seat cover slipped back over the top.
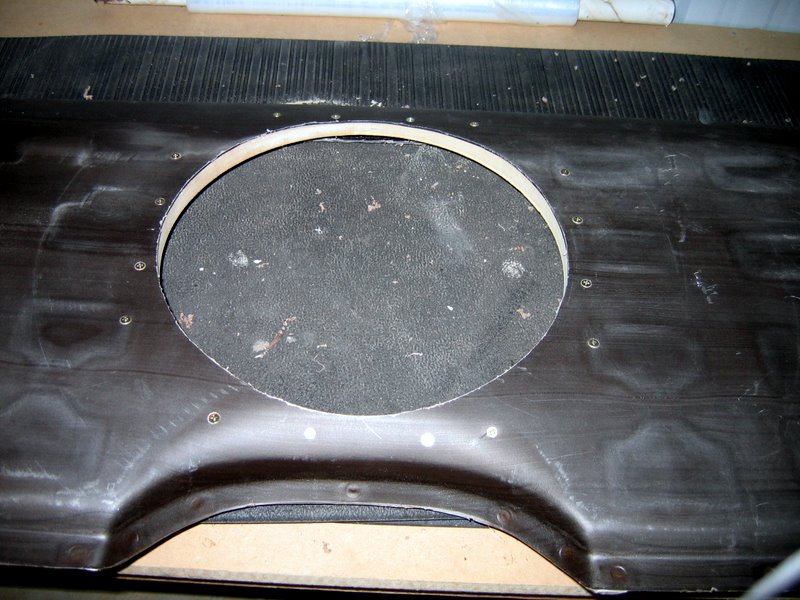
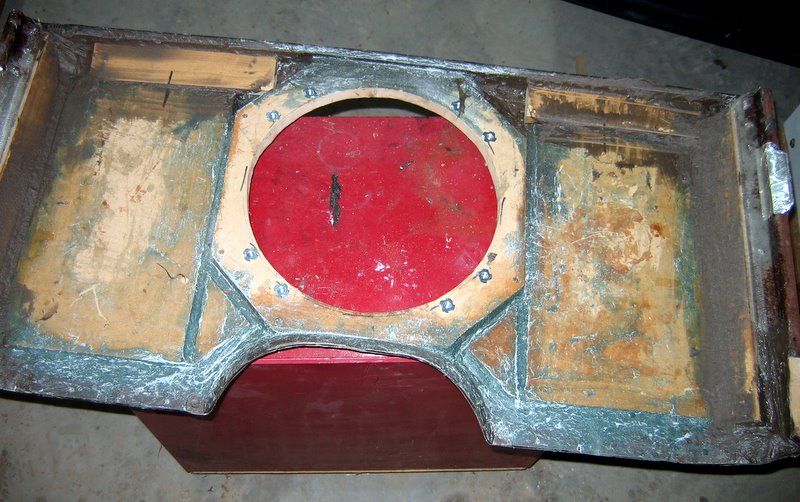
First up is to cut out all the hollow ribs used to give the back piece support:
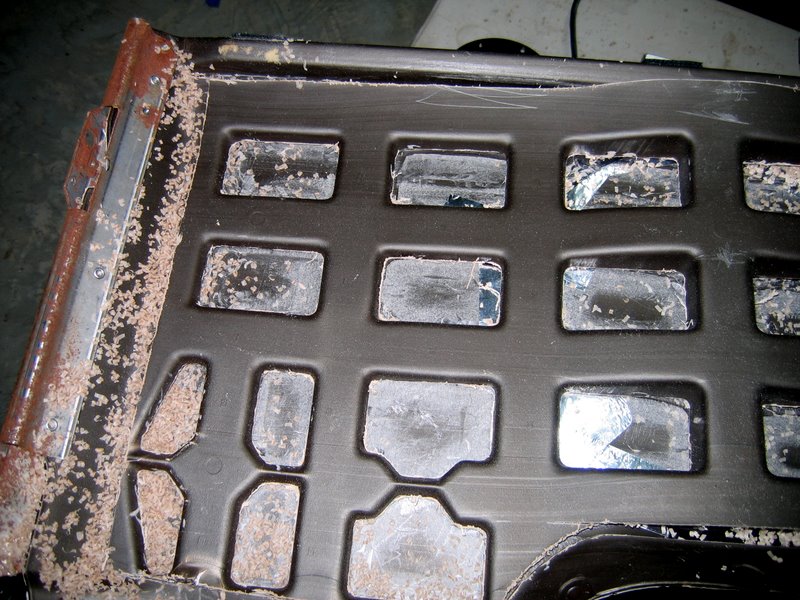
Then I routed out hole for the sub. The hole is for the outside edge of the sub as it will recess into the piece to be flush with the back:
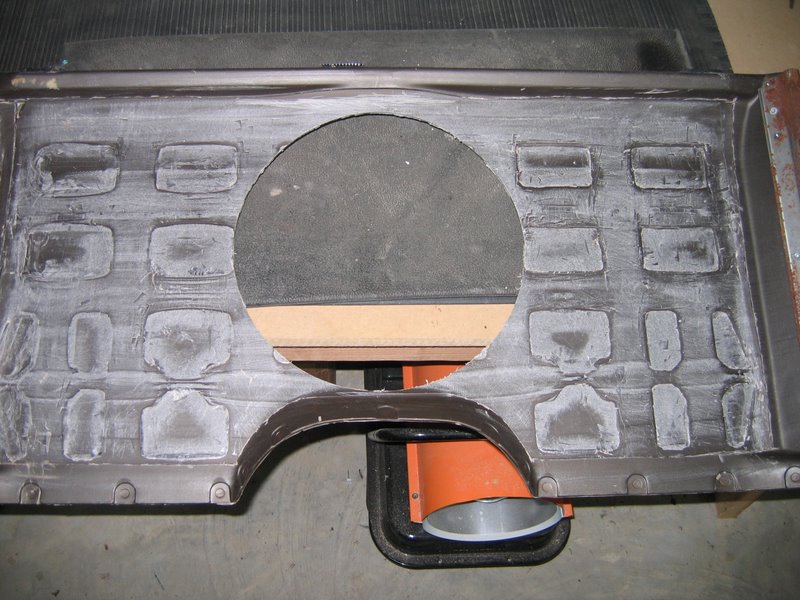
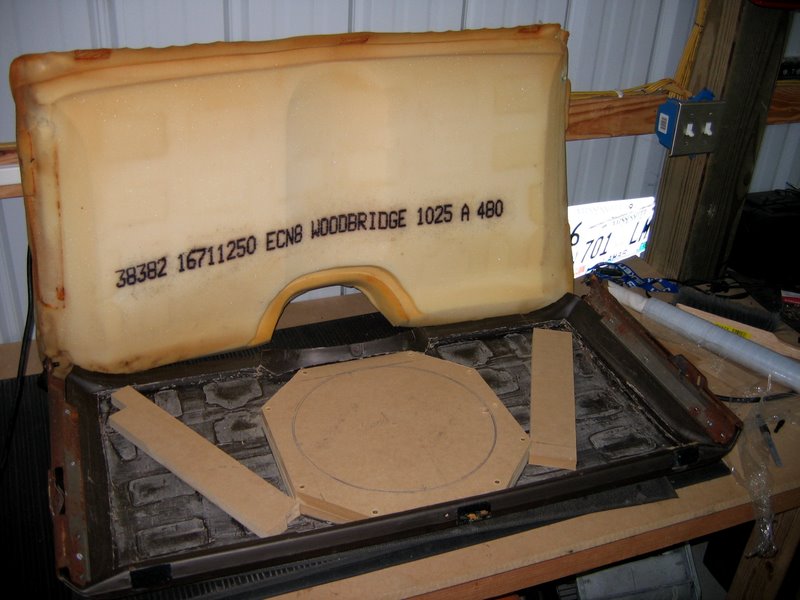
I then routed out a piece of MDF for the sub to recess into:
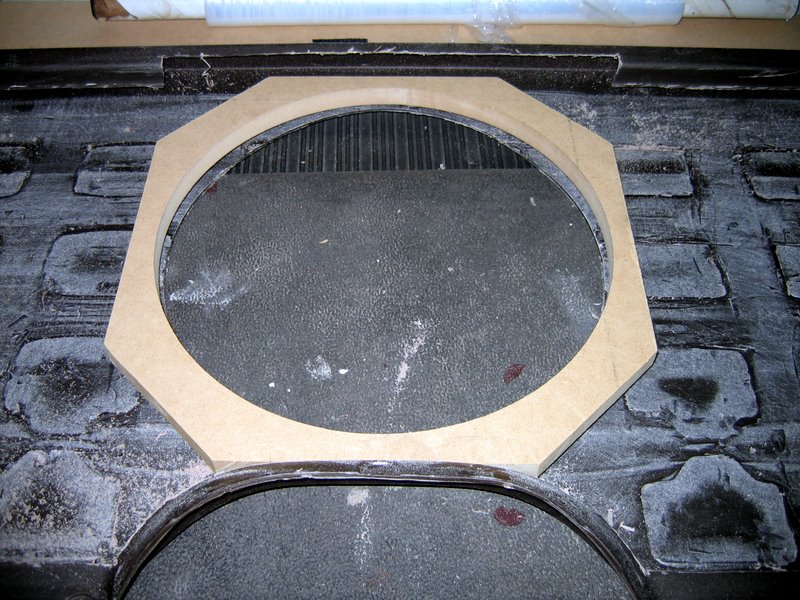
You can see that the back of the seat plastic is curved. An hour or so on the belt sander and the MDF is contoured to fit:
Here's the ring attached to the seat back:
Next is to place a second piece of MDF that the sub will actually mount to, plus some scrap pieces along the sides. These will take approximate the size of the ribs I removed when I place the stock foam back on.
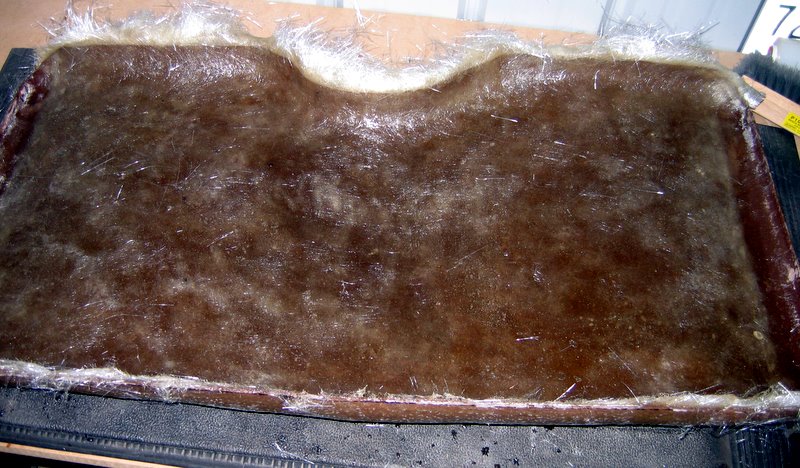
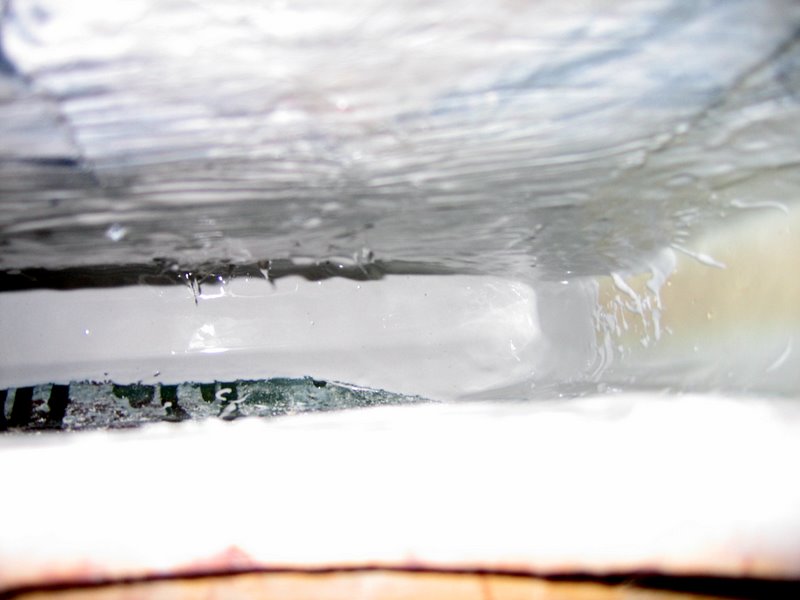
After placing the seat foam back in place, I wrapped it in plastic wrap to help get a consistent shape and pre-compress the foam. The goal is to have an approximation of the foam shape when the seat cover is on.
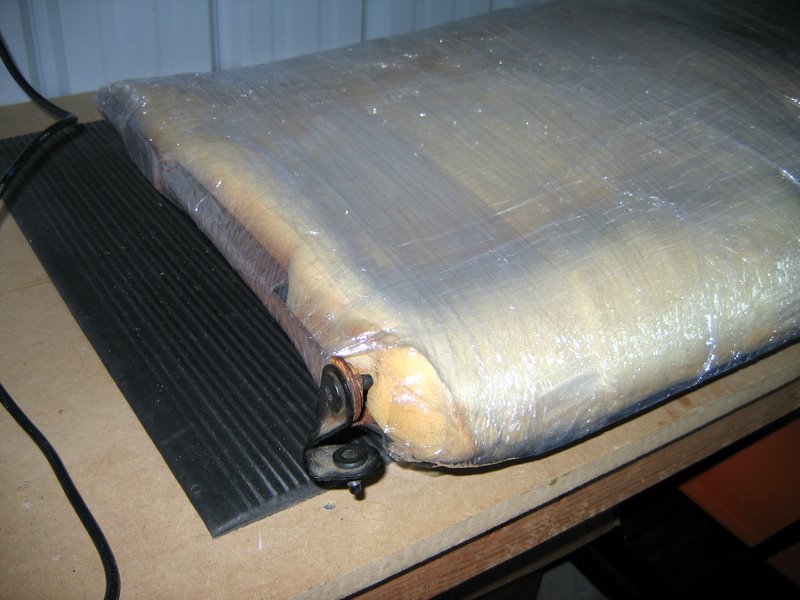
I then wrapped this in a fleece blanket.
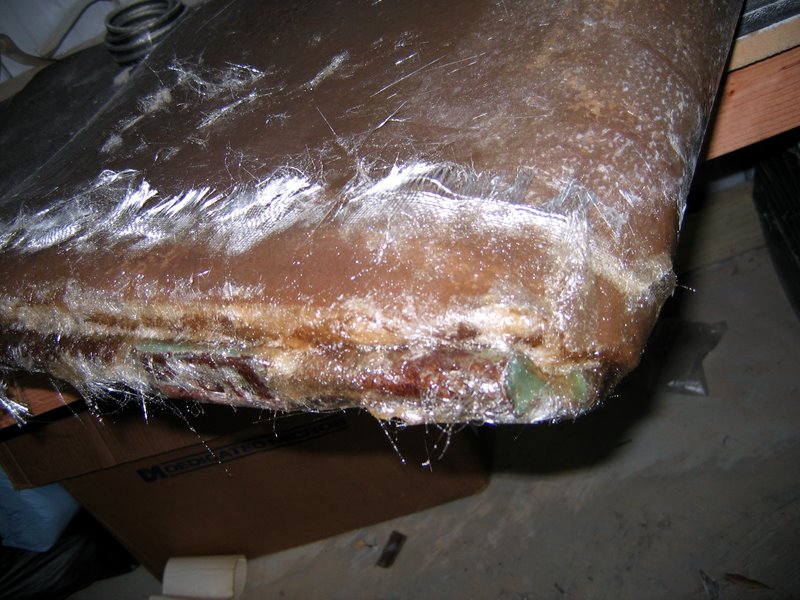
I then spread straight fiberglass resin into the fleece. The fleece absorbs a lot of resin, so this took quite a bit.
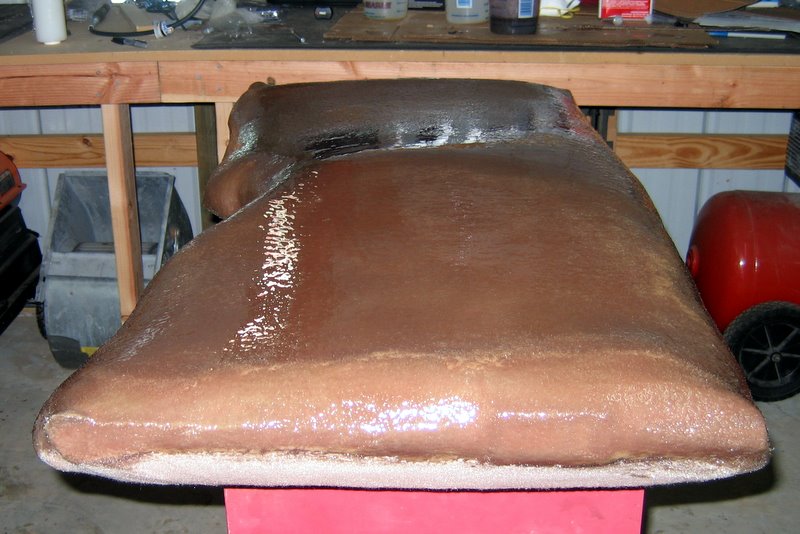
No need to coat the backside and this is going to be just for a front shell. Once hard, I cut out the shell and now had a hollow seat back in two pieces.
The back side get wood and duraglass for strength:
While the front gets multiple layers of fiberglass matt:
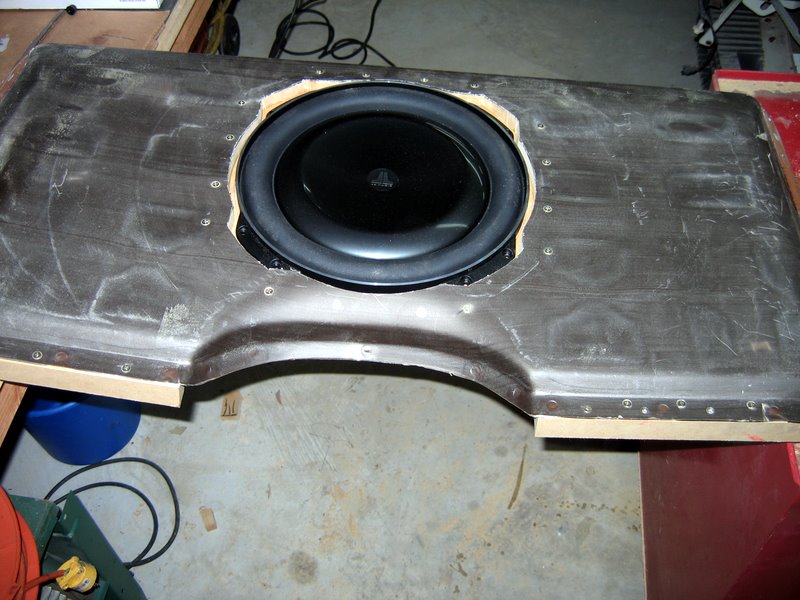
While waiting for some of the layer to dry I did cut out the wings into the back recess area and test fit the sub:
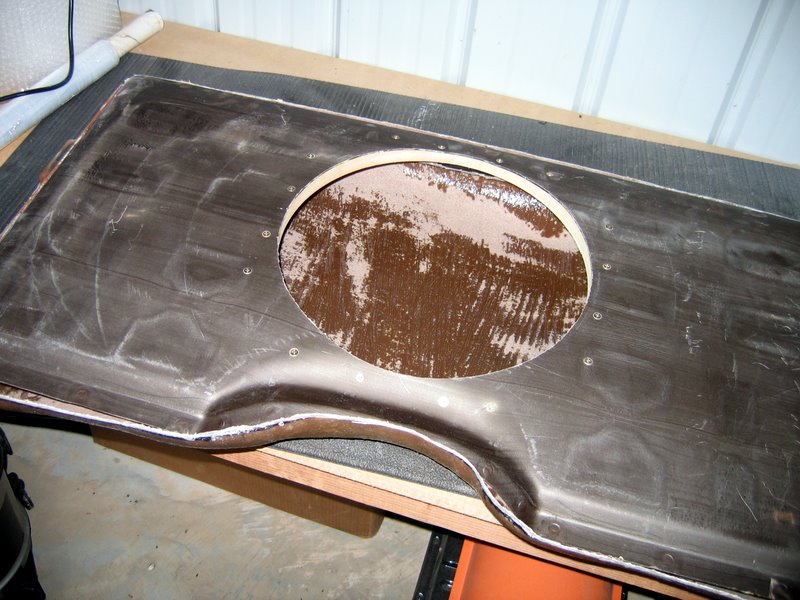
With the two haves completed, it was now time to join them together. Large gaps along the top and bottom were filled with fiberglass matt and duraglass. Once this was set, I cut out the sides that were centering the top and filled those in with glass.
Once all the edges for sealed from the outside, I sanded it all down and and used some duraglass to smooth it out and make a consistent shape.
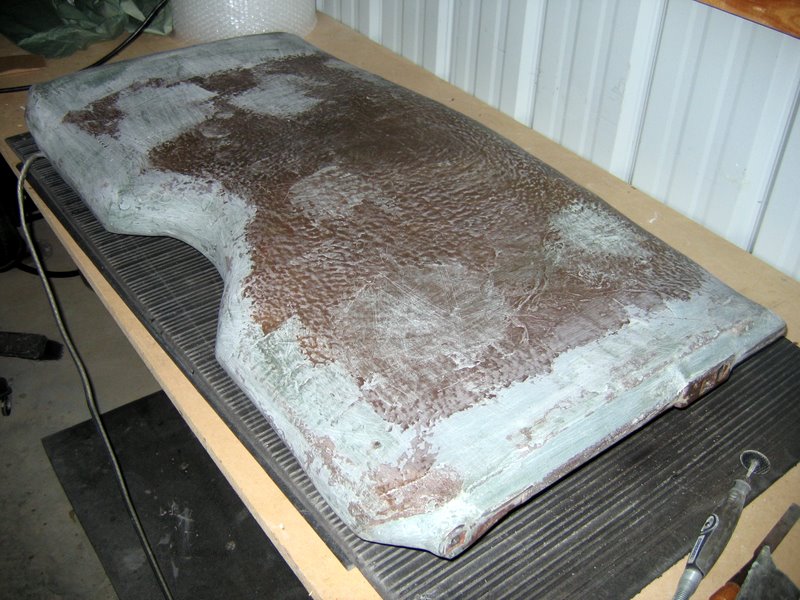
To make sure the box was perfectly sealed, I used a "milkshake" mixture poured into the sub opening. Milkshake is a fiberglass resin/filler mixture that hardens quick, self levels, and fills in any holes.
Had a scare when I went to put the stock seat cover on as a test fit. This was the cover that came off of this rear seat and not my custom one. It wouldn't fit! I'm not sure why the size of this rear seat is different then the one on my car, but I had visions of having to start over or sanding for hours. I removed my existing seat from the car and test fitted the new cover. It was too big! Crazy, but the seat in the car is a lot bigger then the seat I build my sub box out of. So good news, I had enough room to put 1" foam on the box. Good if someone does ever sit back there, plus it helps smooth the cover out more.
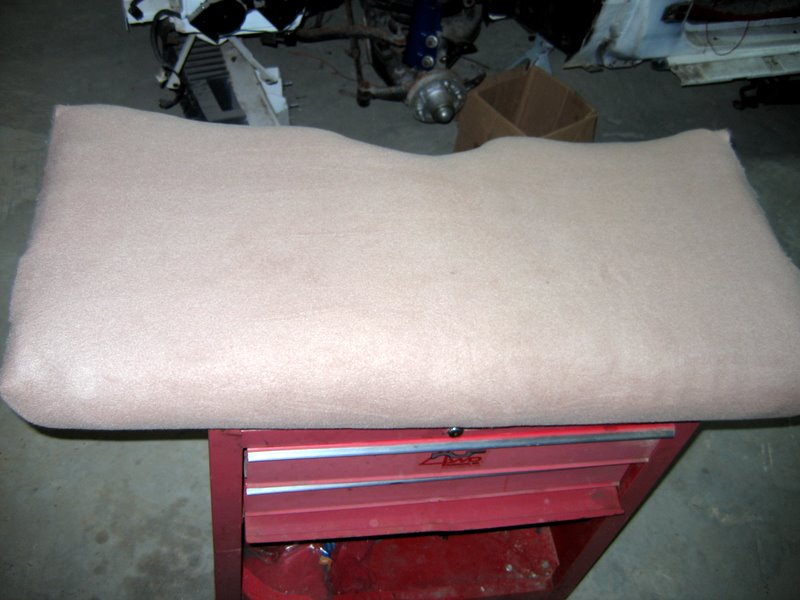
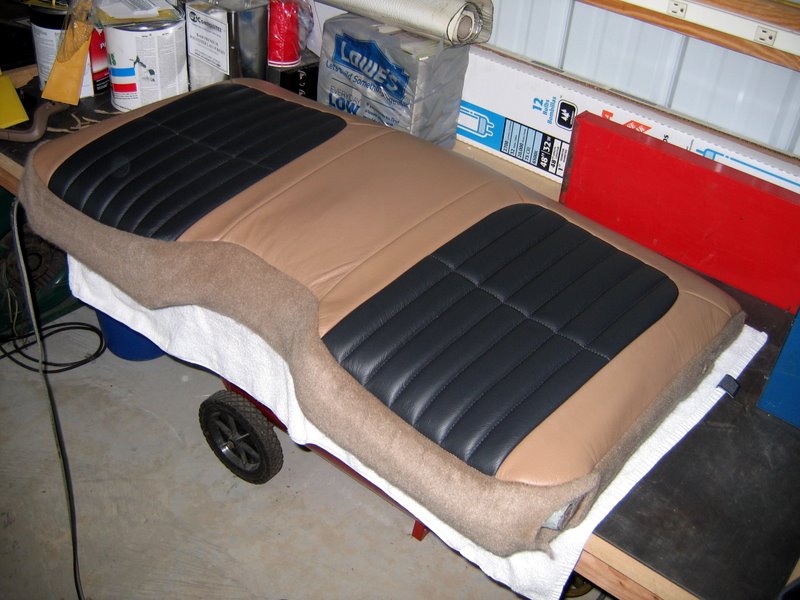
Here's the new seat cover fitted outside of the car:
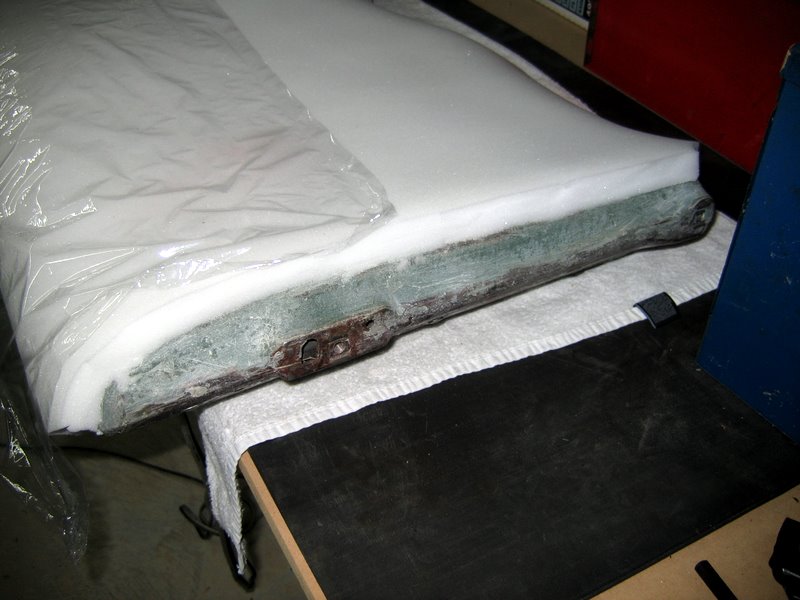
Next step was some new seat brackets. The top half of the sub is clear, firing into the opening for the convertible top, but the bottom half was flat against the sheet-metal of the car. I needed to pull the seat forward a little to give the sub some excursion room. Top seat bracket consists of a mirror image flat piece of metal. Left side lines up to the bolt holes in the seat, right side allows the stock latch to bolt to the bracket.
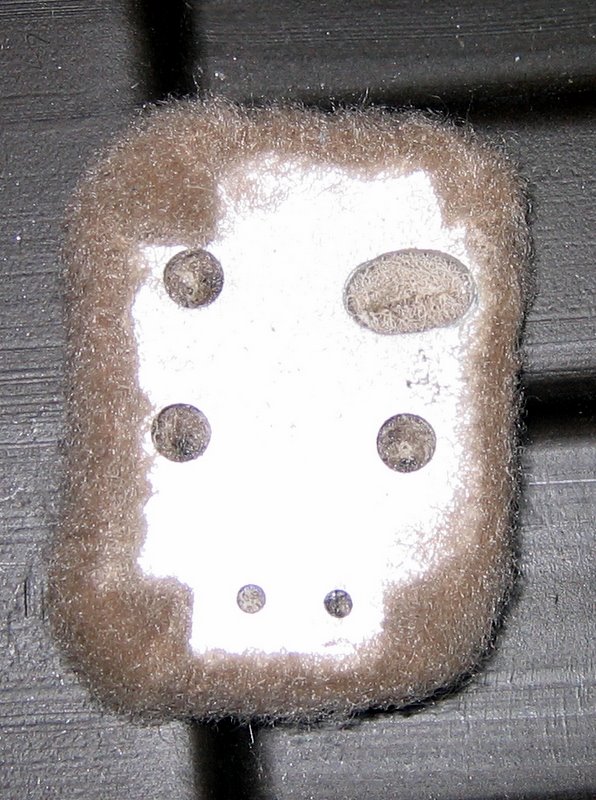
Holes are 1.5" apart. Wrapped in carpet and installed on the seat you are hard pressed to notice the difference.
The bottom bracket is a simple metal strap with holes 2" apart.
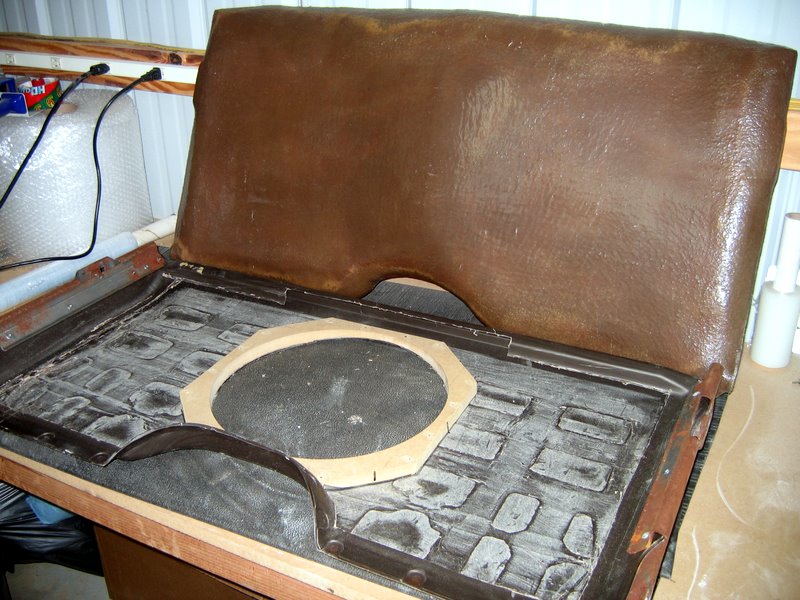
Finished product installed in the car:
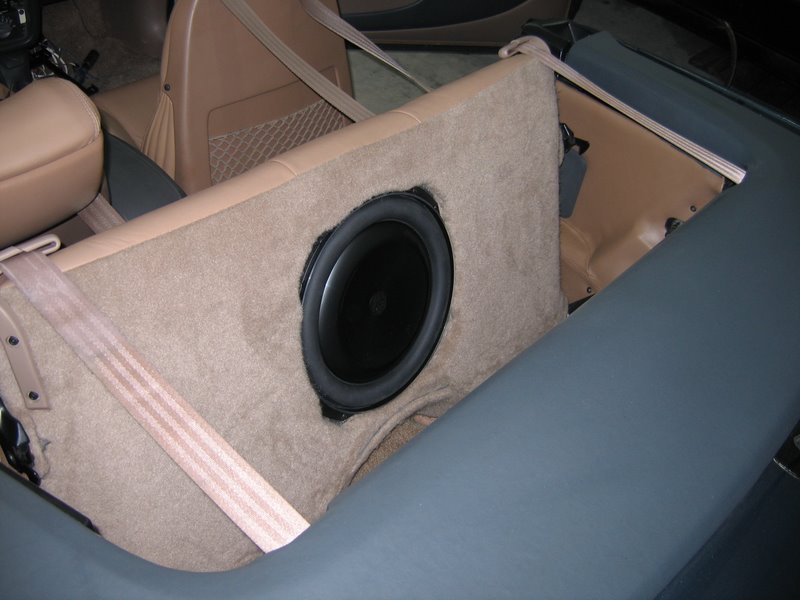
With the seat back and locked, you can see how much room it has.
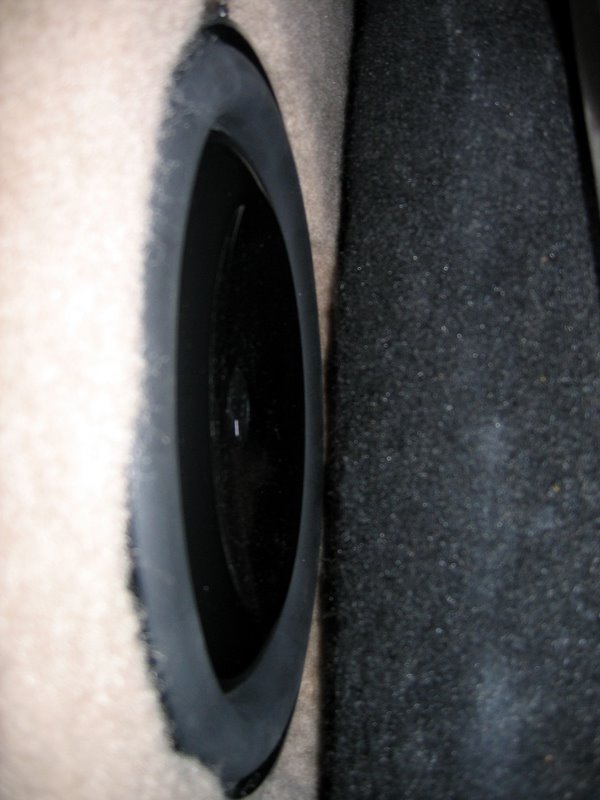
Here's the view everyone else has. Sub? What sub?
All right. I had tested the seat-sub out and
found that the tonneau cover and trunk lid vibrated like crazy. I set up some
tables covered in blankets and pulled both so I could work on them.
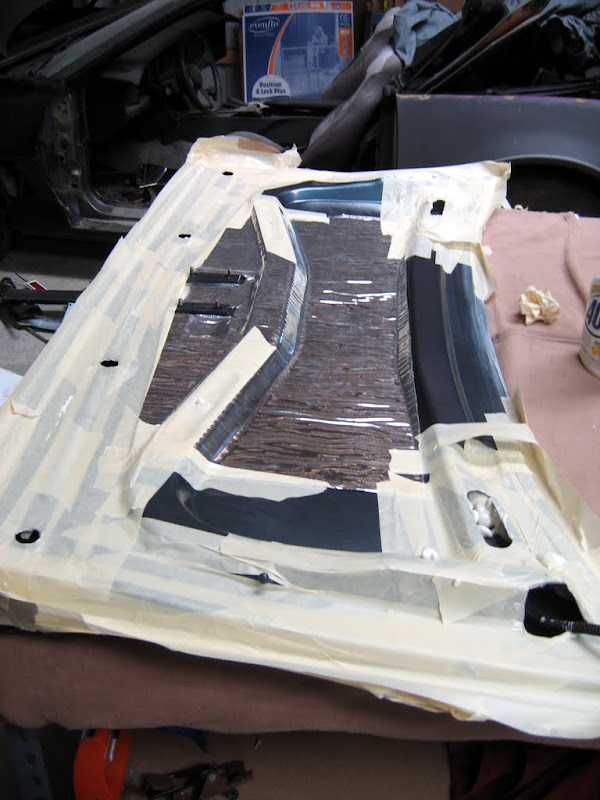
I started by laying the inside of the trunk lid with
RAAMmat. Some quick taps
showed me that with the outer layer was still vibrating like crazy. So I taped
up most taped up all the edges and filled all cavities with spray foam.
Rest of the RAAMmat installed, without getting into the area where it seals. You
can see the foam is now in.
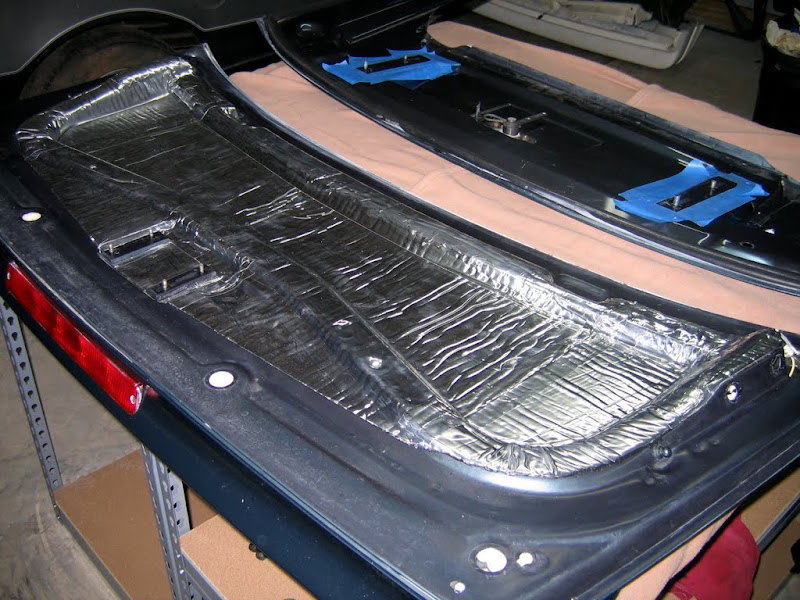
Repeat for the trunk lid. It has the seal on it, so I was able to run it right
up to it. Since the mat closed up all the holes, I could use less tape when
filling it with foam.
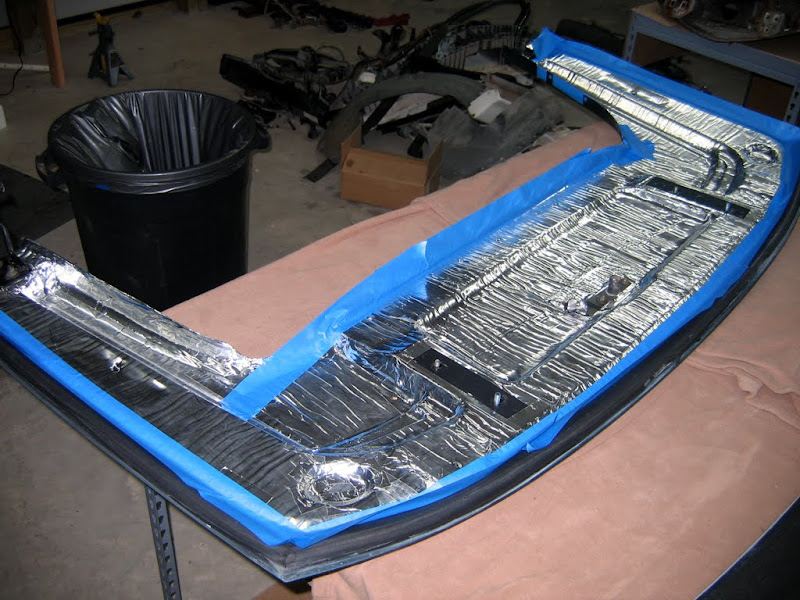
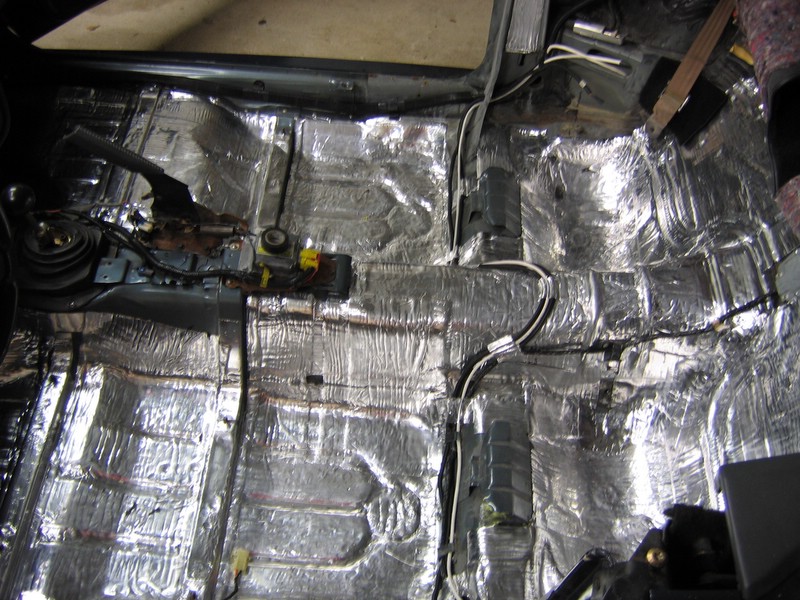
Pulled the carpet up in the rear and laid matt anywhere it covered. I'll get the
rest of the trunk later.
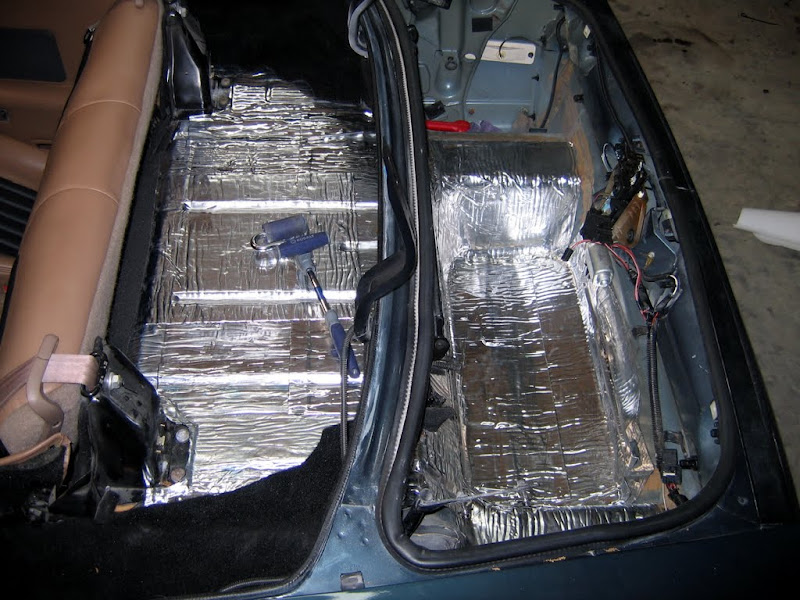
The rest of the interior was all ready done when I was doing the initial build
of the car.
Used the Raam Audio ensolite and spray glue to line the trunk area:

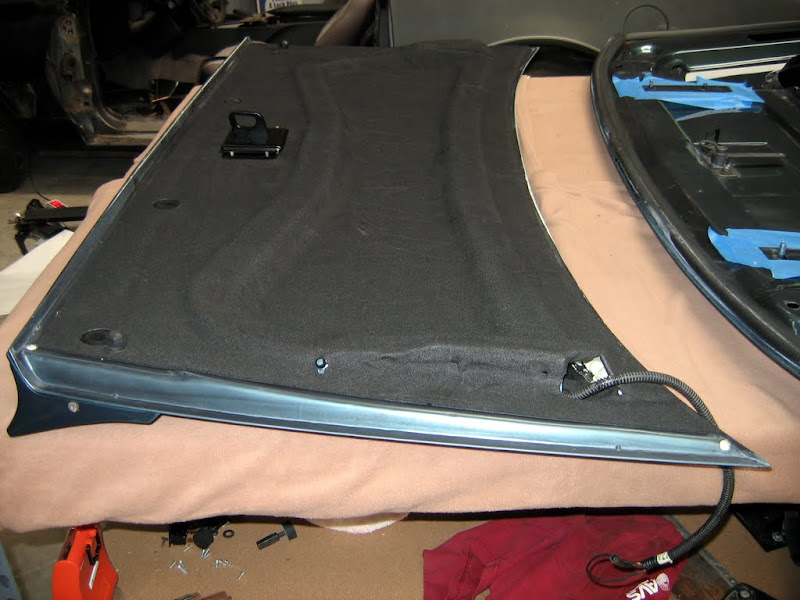
Used the ensolite peal-n-stick to cover the trunk lid and tonneau cover.
Remarkable stuff and easy to work with and shape. I thought about doing
fiberglass trim panel, but this helps the sound/noise and finishes it off well.
Lines are from where the material was folded during shipping and have mostly
expanded back out.
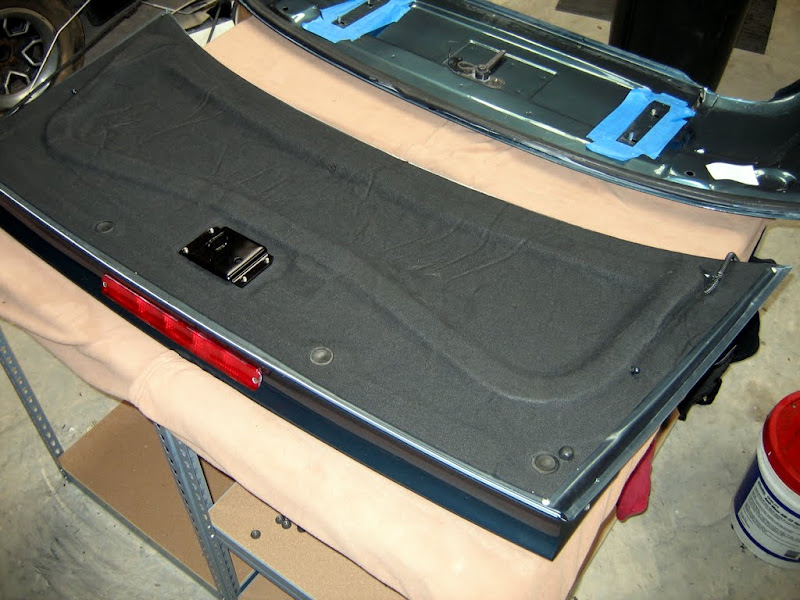
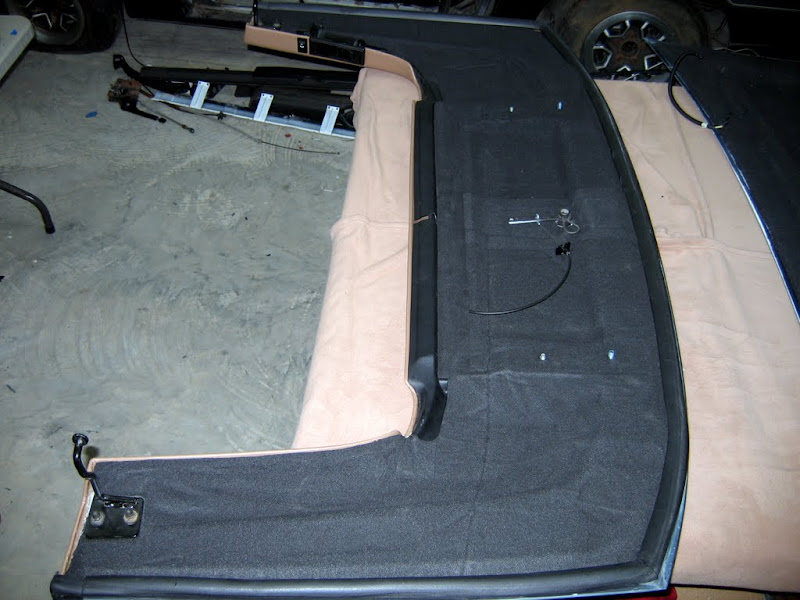
Since the gray vinyl I had been using doesn't quite match under fluorescent &
flash, I needed to recover the tonneau panel. I still haven't picked a new vinyl
yet, so I decided to try out the matching tan I had.

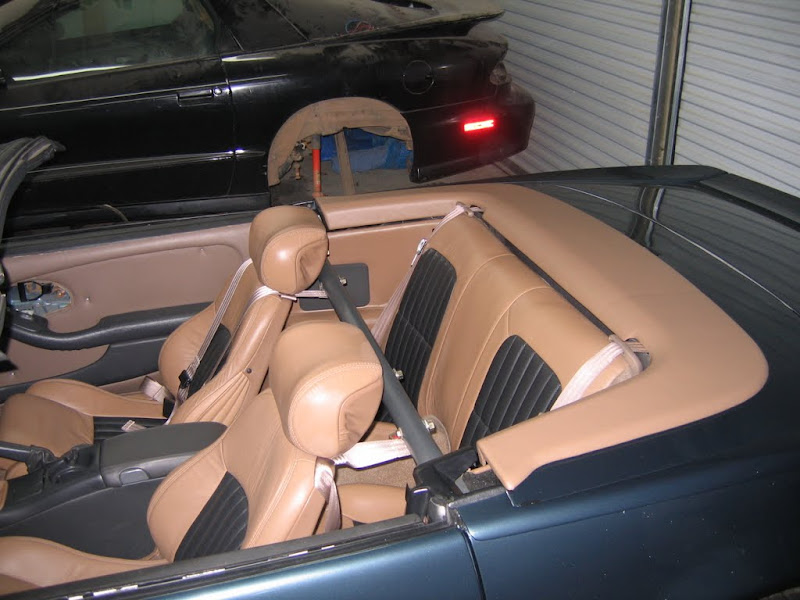
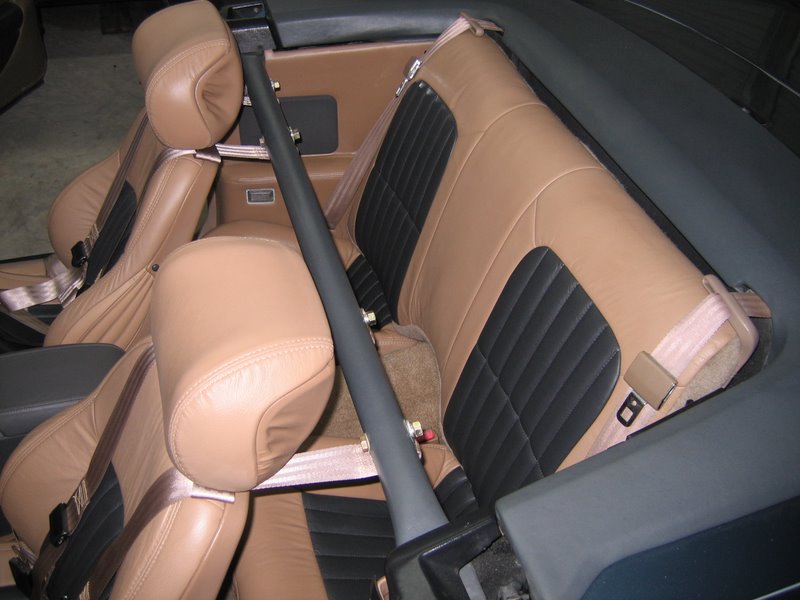
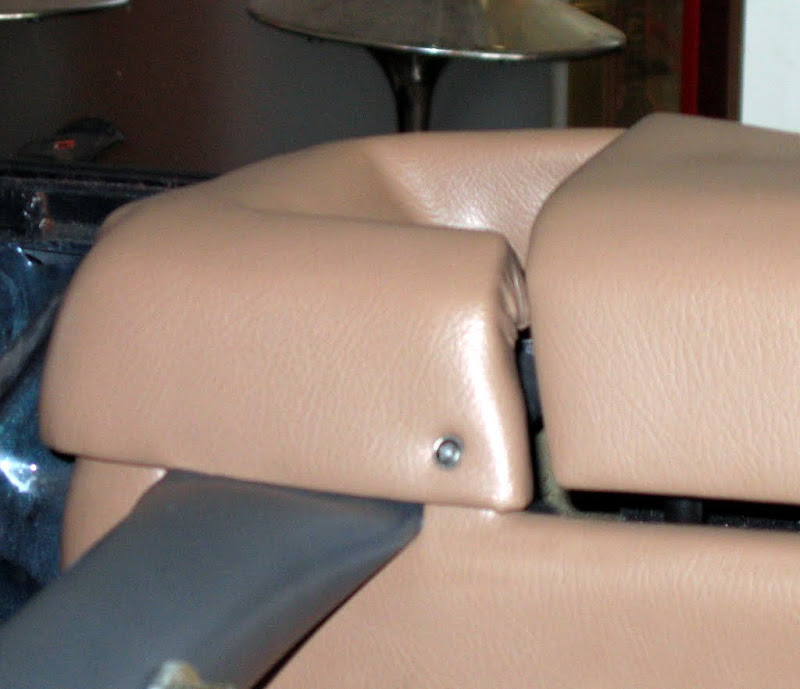
Really like the look it added. Almost a Ferrari style flare to it. I finally
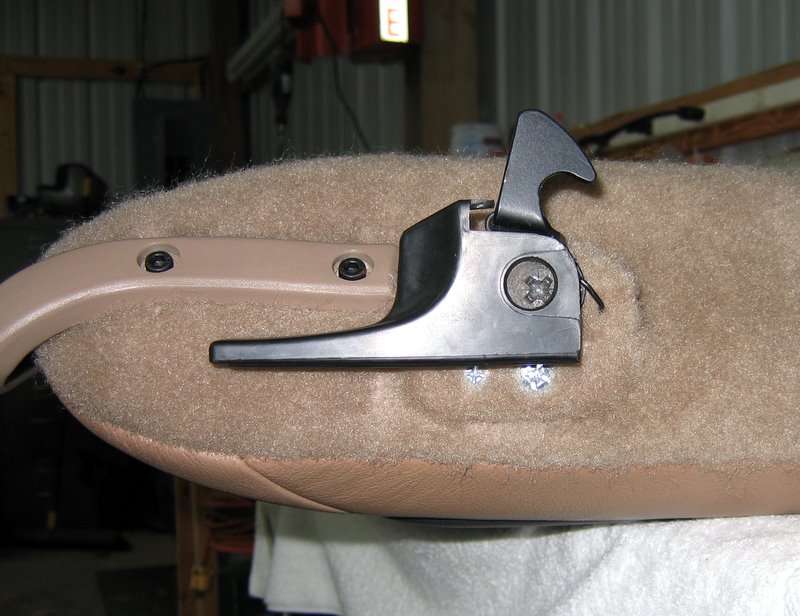
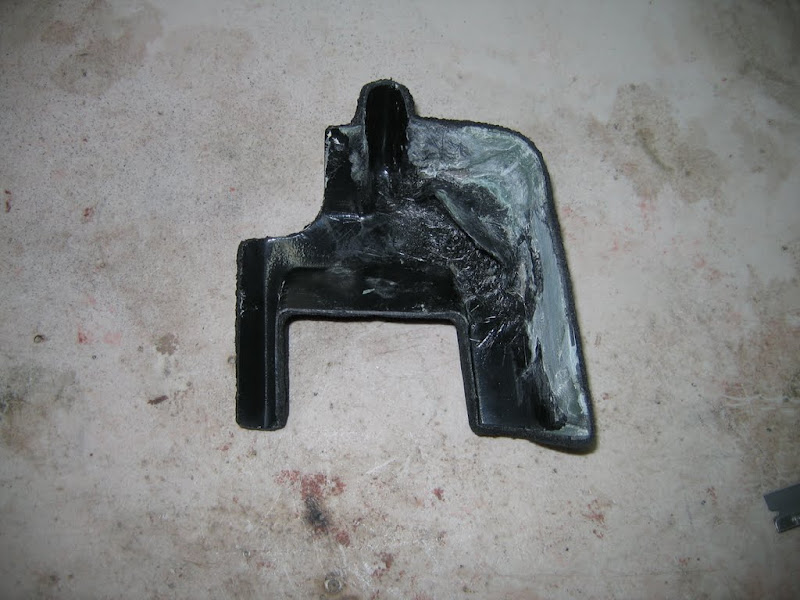
decided to do something with the seatbelt trim that butts up against the tonneau
cover. Stock they have a hole that the seatbelt retracts into. It's also two
pieces to allow you to slip it on without removing the seatbelts. You can see
them in this stock picture:
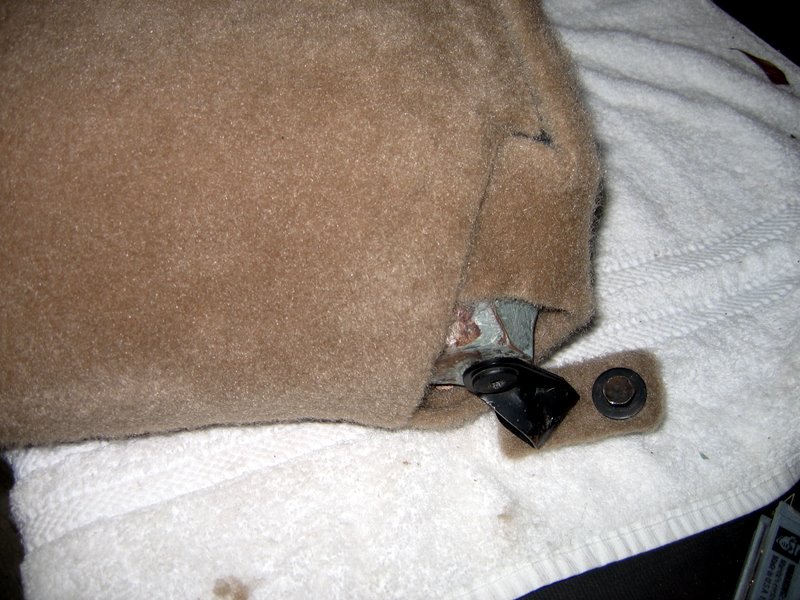
The black plastic blended with the gray vinyl, but completely clashed with the
new tan. That and I really didn't need holes in them since I switched to a
harness bar and new belts. So, I joined the two together and removed the hole.
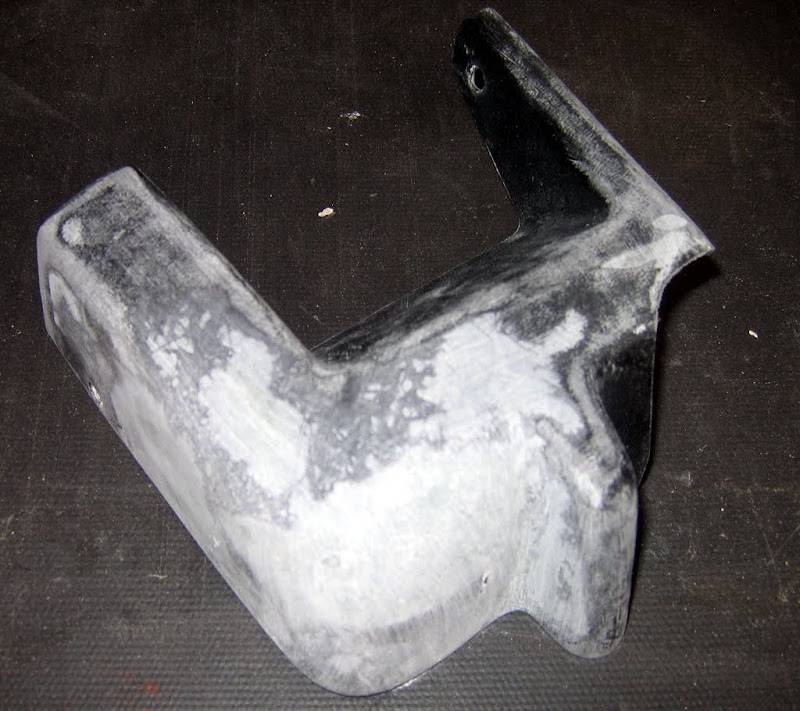
Wrapped in ensolite. I've found it makes a nice base for vinyl to give you that
high end soft feel. (and makes it easier to hide imperfections from showing
through)

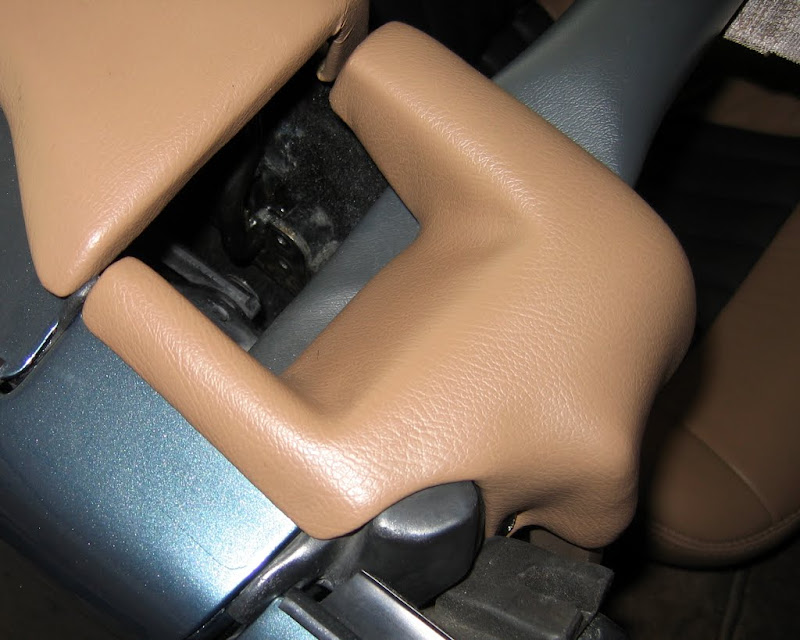
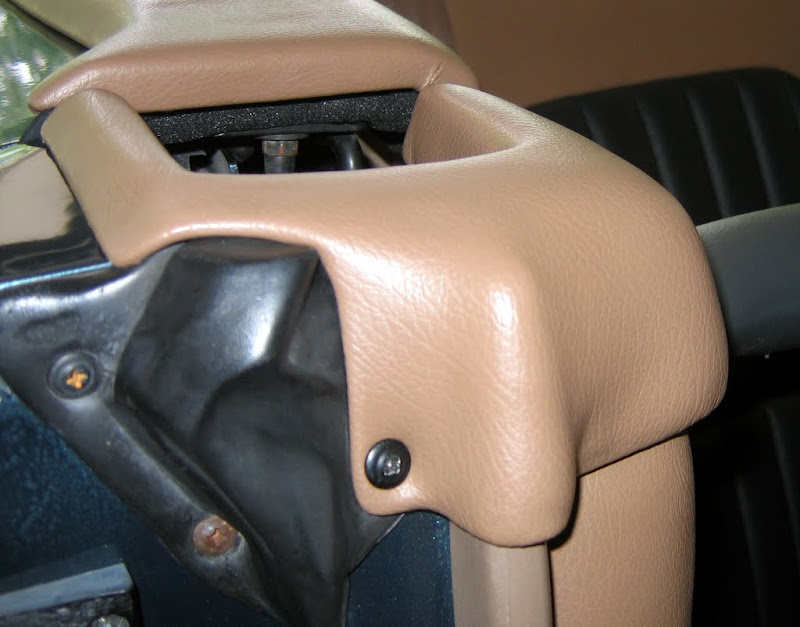
Wrapped in vinyl and installed. I didn't use contact cement sticking the
ensolite to the piece and it pulled up after I put the vinyl on. I knew it would
hold the vinyl down, but I didn't think about the vinyl pulling the ensolite up.
It actually turned out well though. I probably should have shaped the piece like
this to begin with.
Click to go to Page 5 --->