A chronological history of my:
Jade Green / Gray 1992 Trans Am Convertible
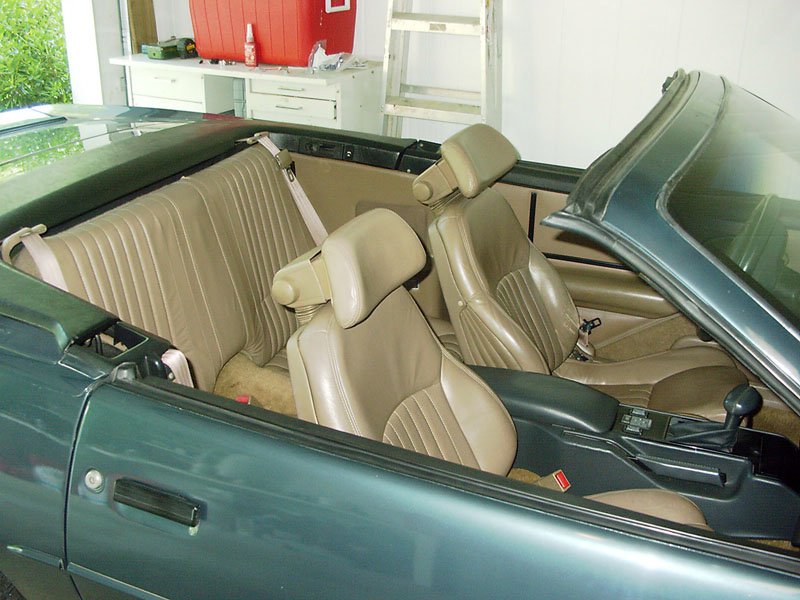
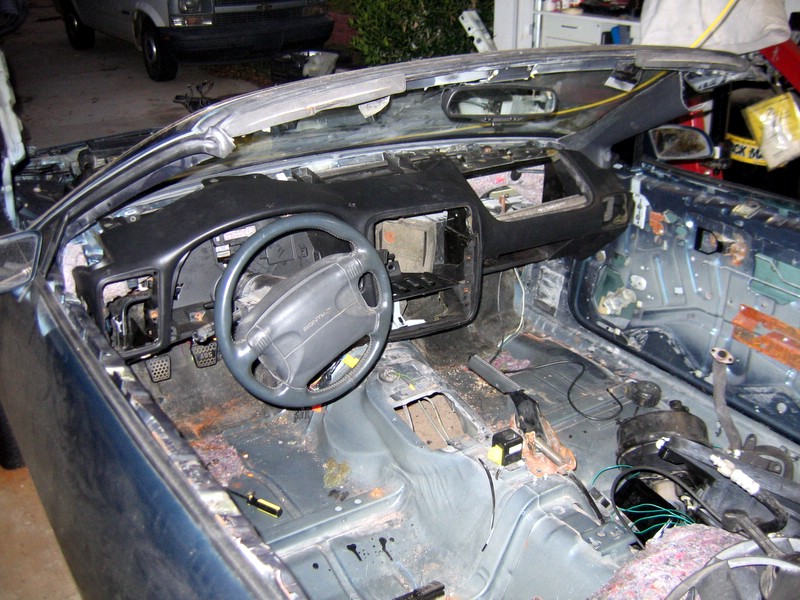
Here's a picture of the stock interior. Pretty much everything was original.
The car only had 58,000 miles, but the paint was not the best. A lot of scratches and small bumps.
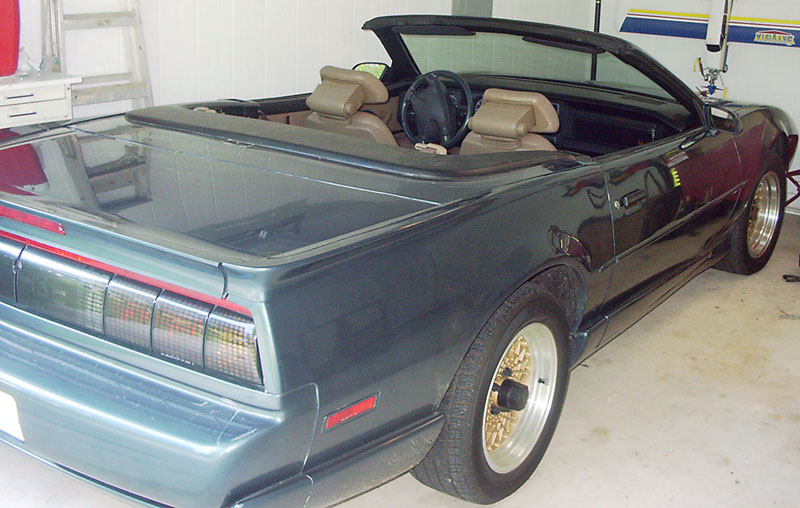
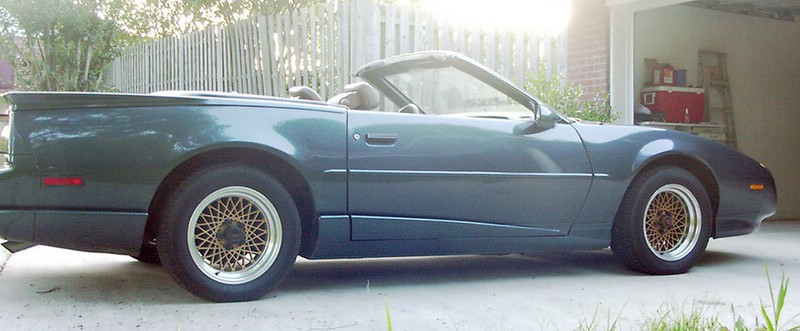
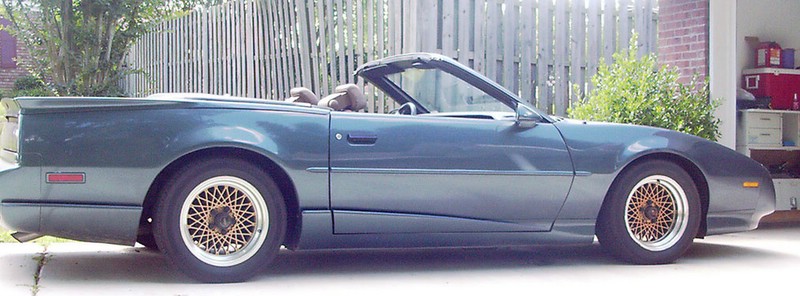
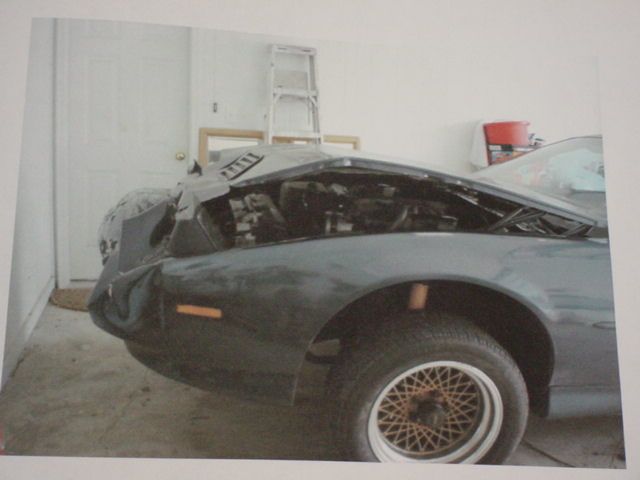
Stock side profile. Way too high!
Step one: Lower the car. This was accomplished with Ground-Control weight jacks and KONI shocks.
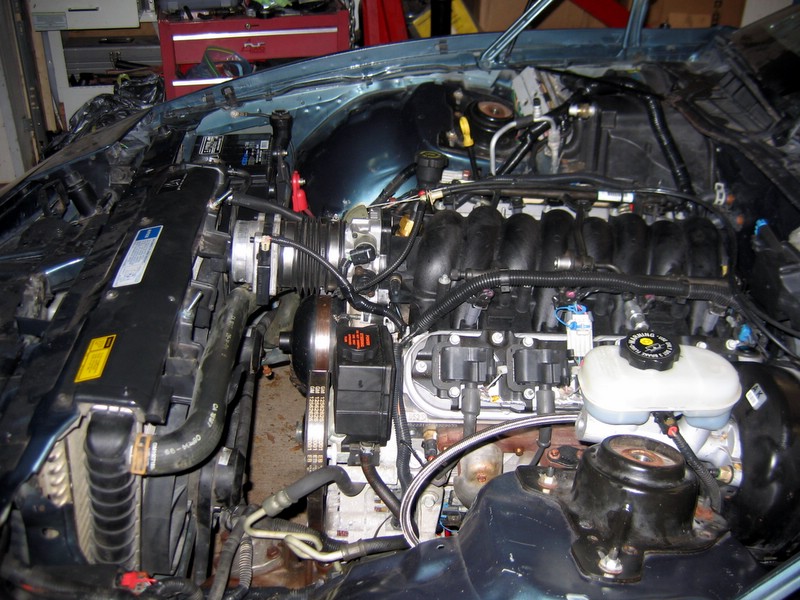
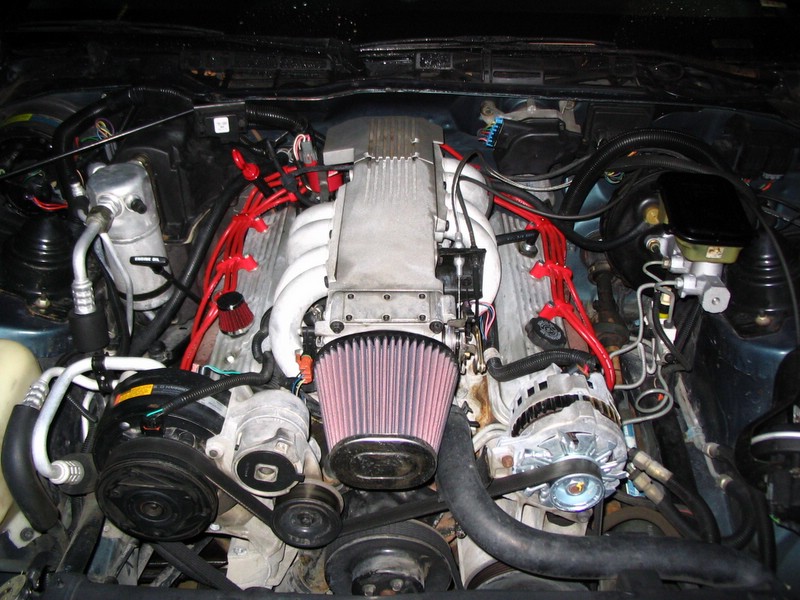
Original plan was to keep the TPI for a while, so step two was rip everything out of the engine compartment I didn't need and clean it up a bit. The picture below shows !AIR, new plug routing, !AIRBOX, !EVAP, MAP sensor moved to firewall, and breather filter in place of cover to TB hose.
Step 4: Buy a 93 TA for the T56 6-speed and assorted parts. Car had a blown engine and a lot of miles, but the T56 was recently rebuilt.
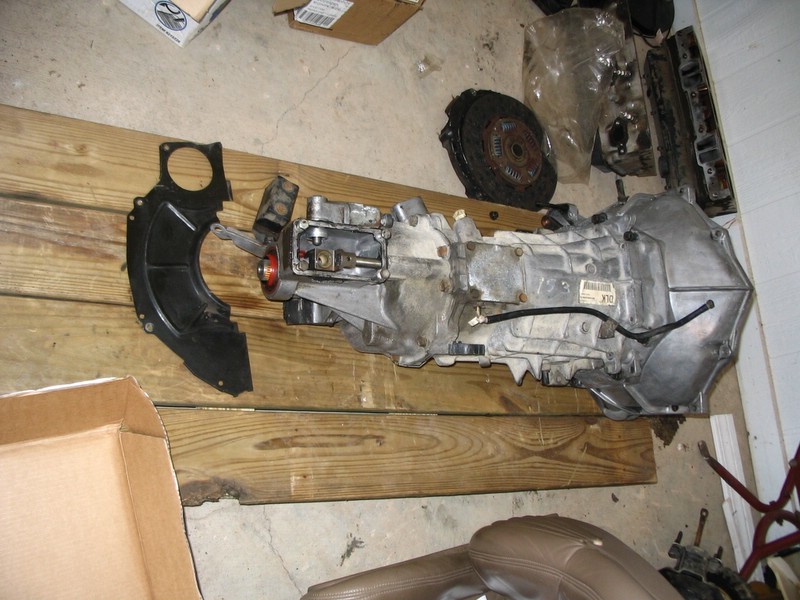
Installed the new pedals and removed the auto shifter.
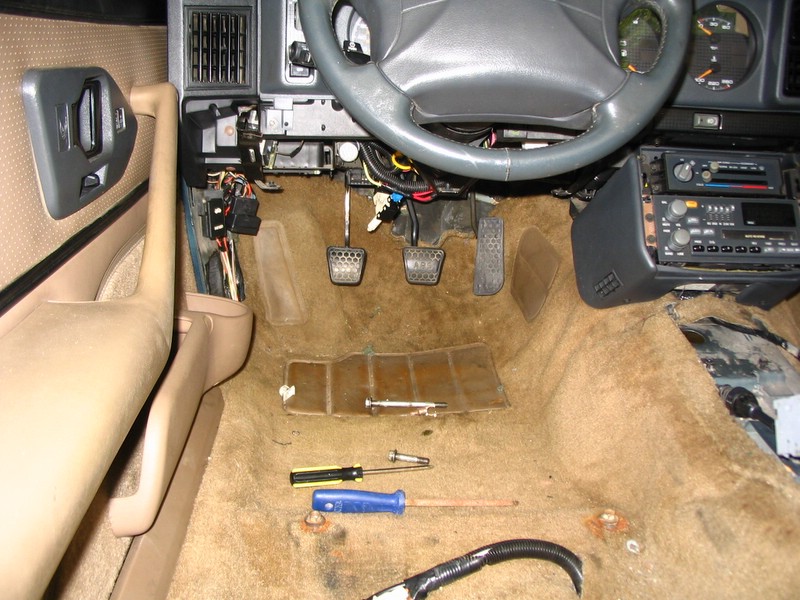
Step 5: Miss a turn describing how to swap in a 6-speed.
Ouch! Luckily the smaller oak trees slowed me down enough that I didn't hit the 'big' oak tree.
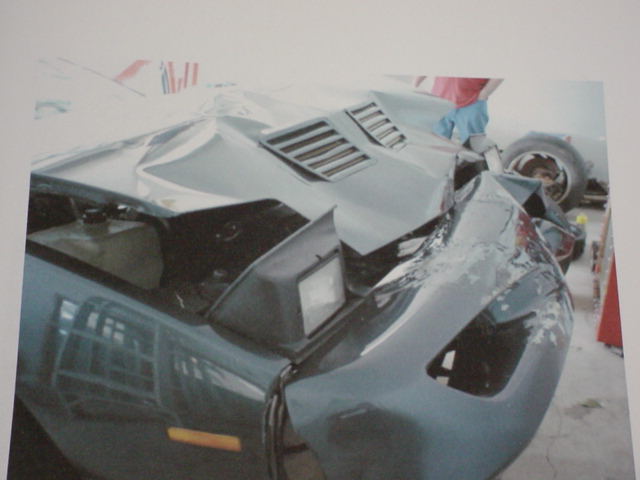
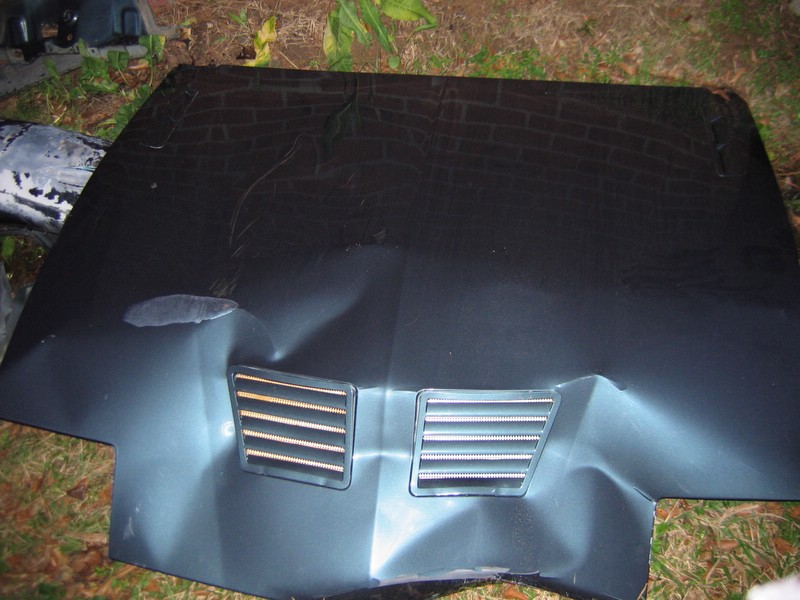
Amazingly the vents in the hood were still good.
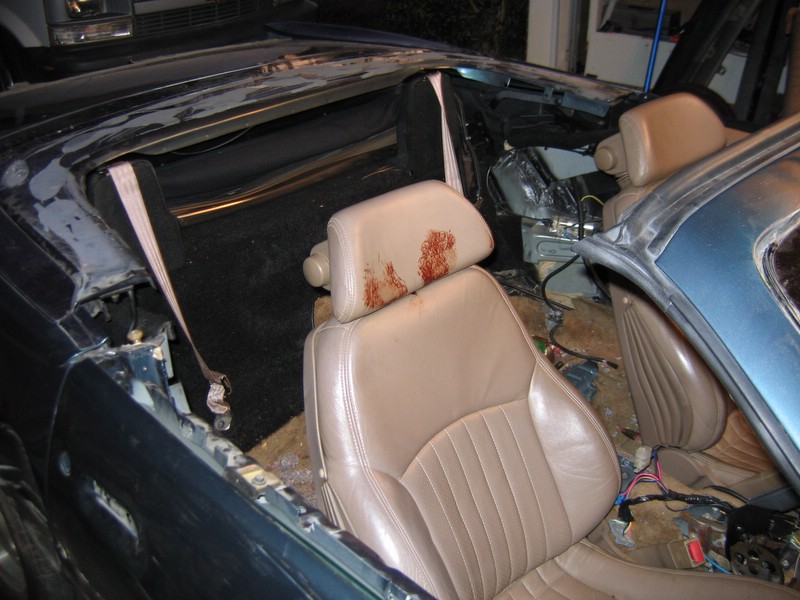
I had some bruising, my friend (big guy) wasn't so lucky. He hit his head on the top latch.
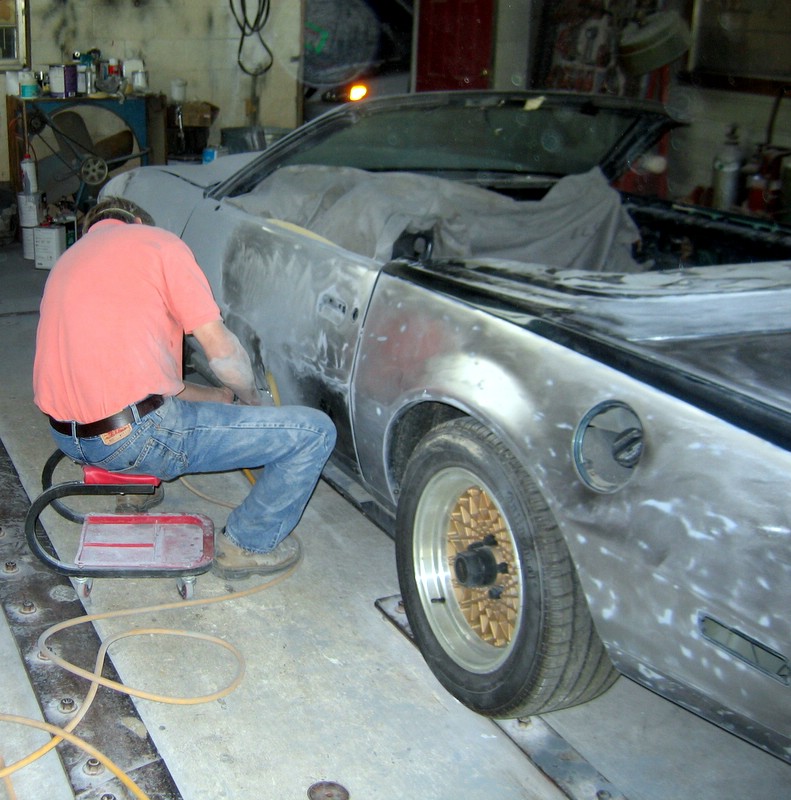
Insurance was very nice ( I was surprised). The car was totaled (by them) and I purchased it back from them for not too much money. This left a lot of the settlement left to put back in the car. I decided to do it right and have the the entire car stripped back down to metal. I worked out a pretty good deal for body work and paint, I have to tear it apart and put it back together though.
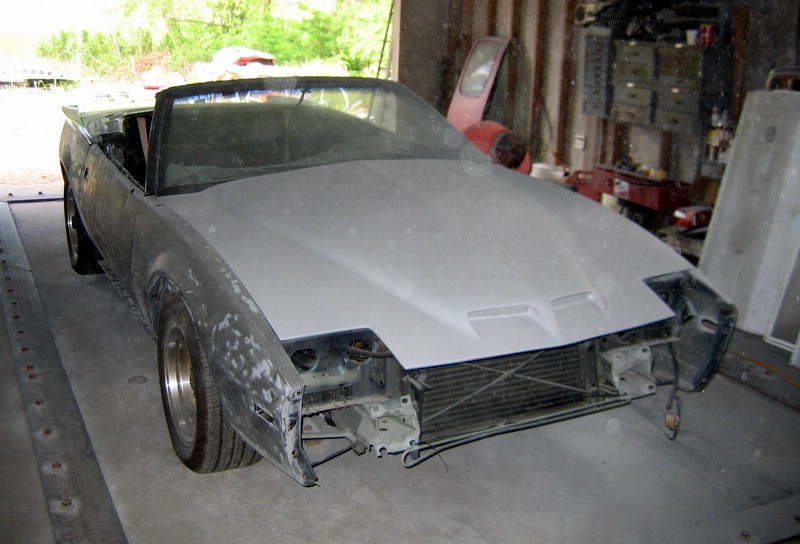
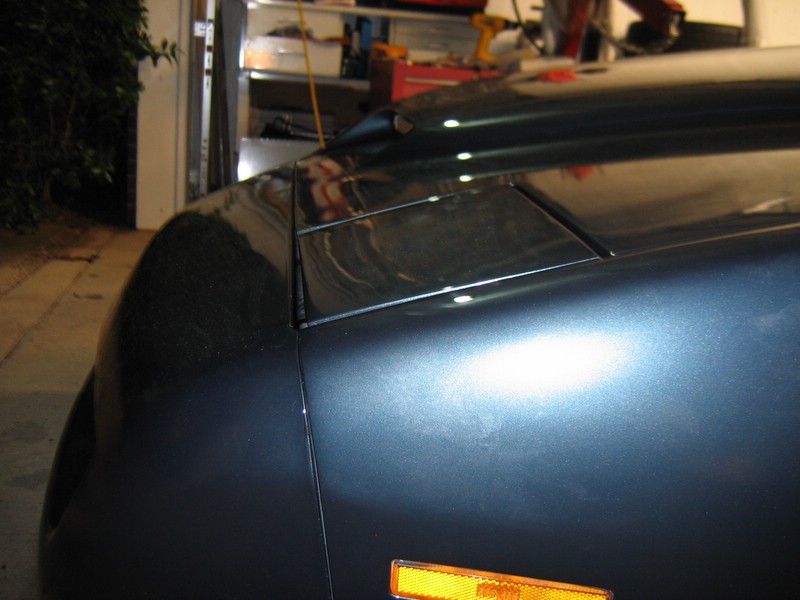
What's the point of a wreck if you don't use it as an excuse to modify? Here's the ASC RA1 hood in primer. My body guy was real good. We managed to save the fenders, doors, and headlights. New GM parts for the front bumper, front GFX, air-dam, and front support brackets. Used for the impact bar and side GFX.
Since the TA came with a drum rear, I also saved the rear from the 93 parts car. With a bunch of free space in the garage, now was a good time to fix it up. BMR panhard bar and control arms, control arm relocation brackets, new hard lines, Earl's braided lines, new brakes, and everything was cleaned and painted.
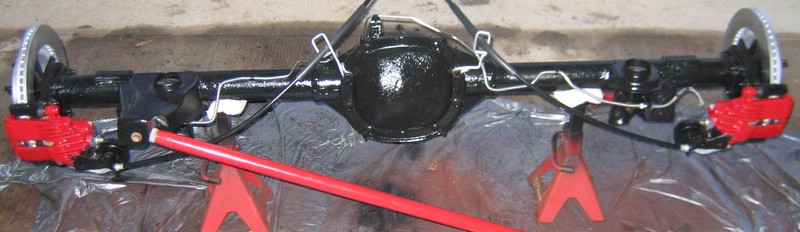
Nice shot showing the painted calipers and rotors (it's pretty hard to paint all of the rotor except for the friction area!). Painted red to match the future Z06 front brake upgrade.
More time on my hands. Got a buffer and plastic polish. It's hard to capture, but left is polished and right is not. You can also see that I removed the DOT letters for a smoother look.
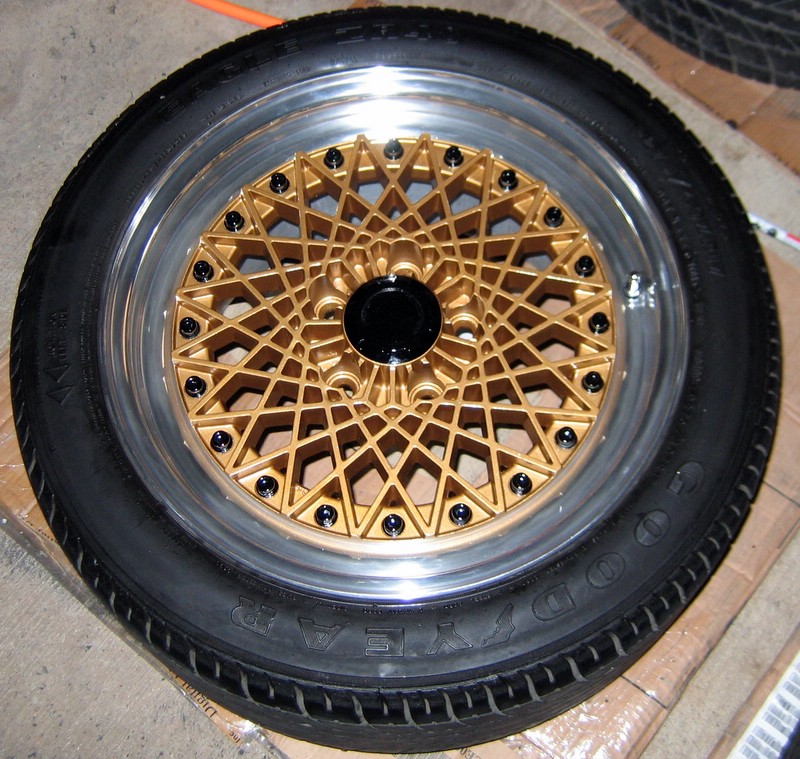
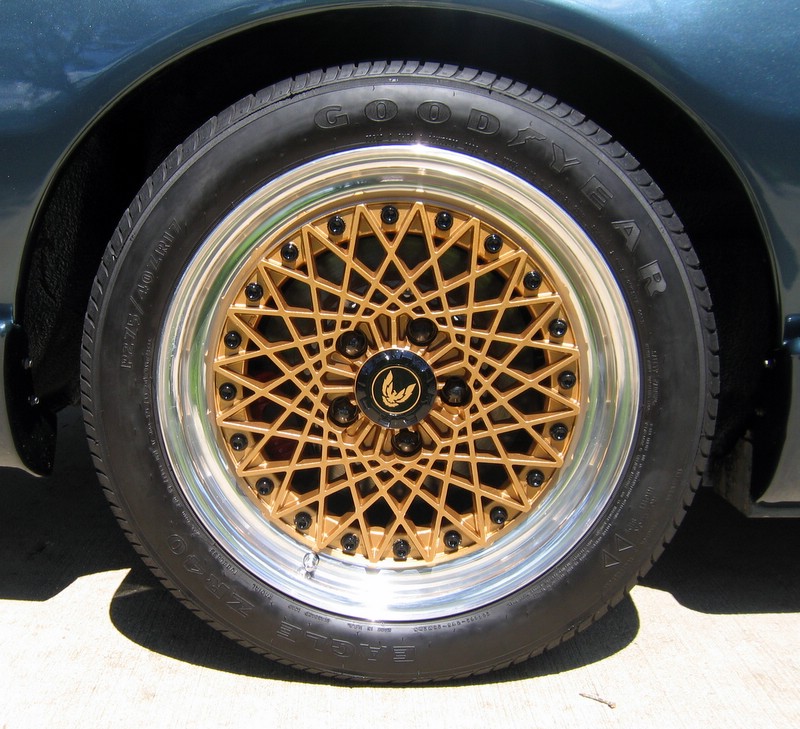
New rims! I really wanted to go for a stock look and was planning to get some re-released Firehawk Ronals. Once I found out they wouldn't clear the Z06 brakes I had all ready been purchasing parts for, I turned my attention to the ROH Snypers. Since the 4th gen rear is wider, I was thinking about running 3rd gen offset in the front and 4th gen offset in the rear. While debating that I found these gems below! A guy was running them on a newer camaro so I knew they would fit. They were close enough to the stock rims I couldn't pass them up.
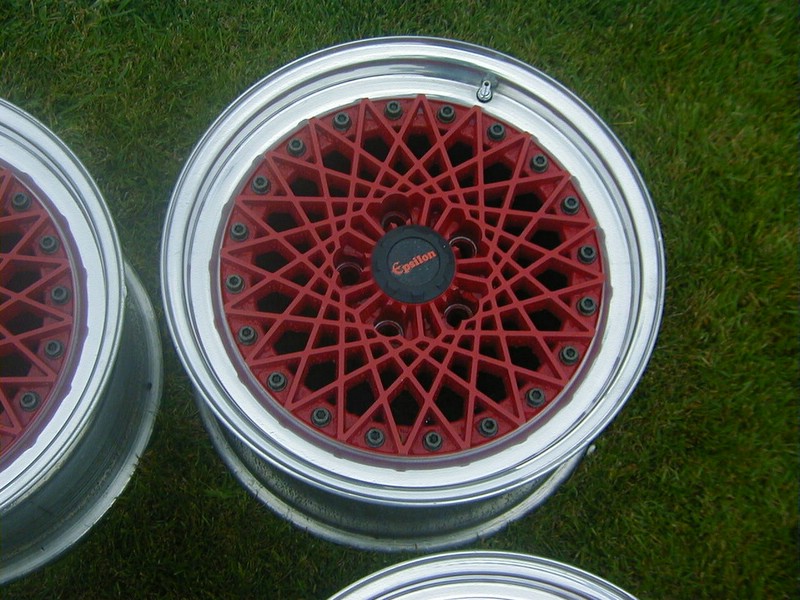
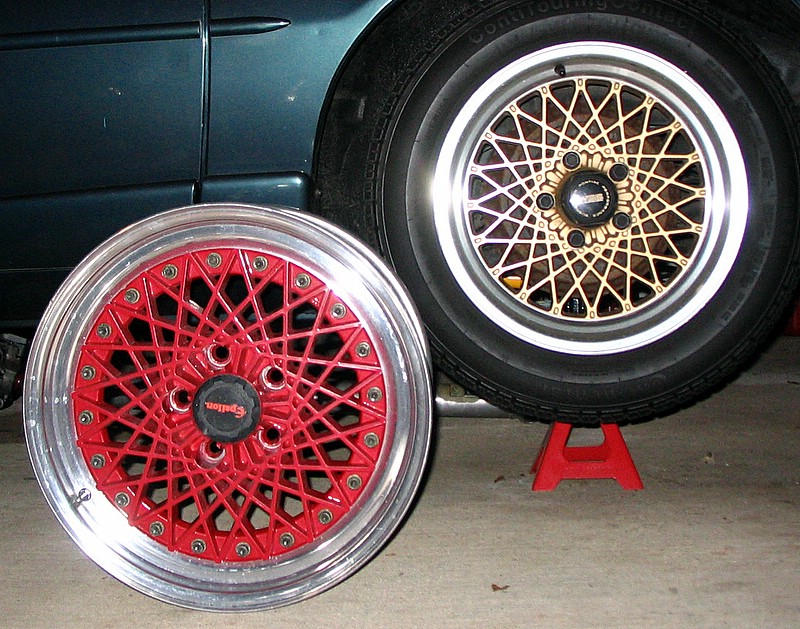
Got them in and did a comparison. They were really close. Same number of points and layout of holes. 17"x9.5" and a true 3 piece rim. After some research I found out these were used on some Calaway Corvette conversions in the late 80's / early 90's. Pretty rare rims in this size, I've seen quite a few 17x8 or 16x9 sizes for sale though.
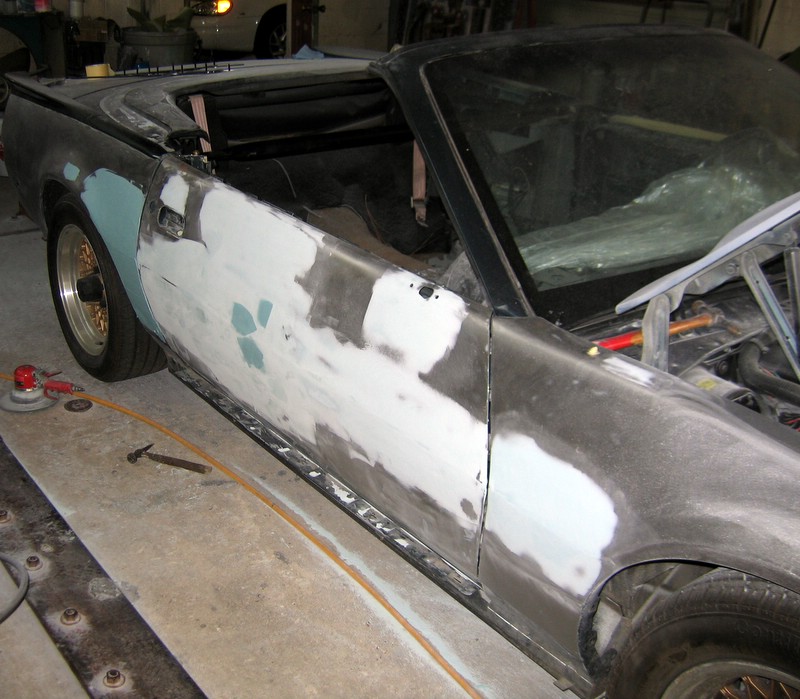
More filler! In the end there's actually a very thin layer. There's actually less filler then was on the door previously.
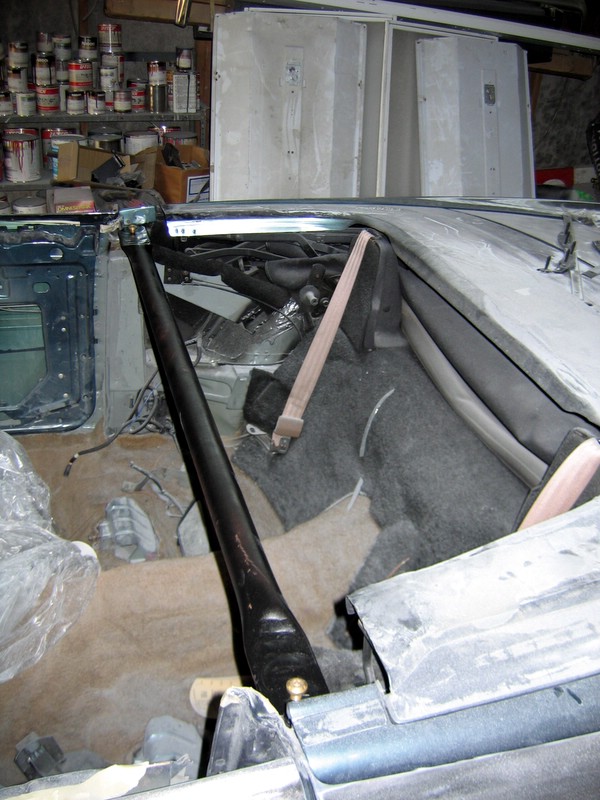
Test fitting the cross brace I had made. Tightens up the lack of a roof, plus I'm going to a 4-point harness and needed some place to mount the shoulder belts.
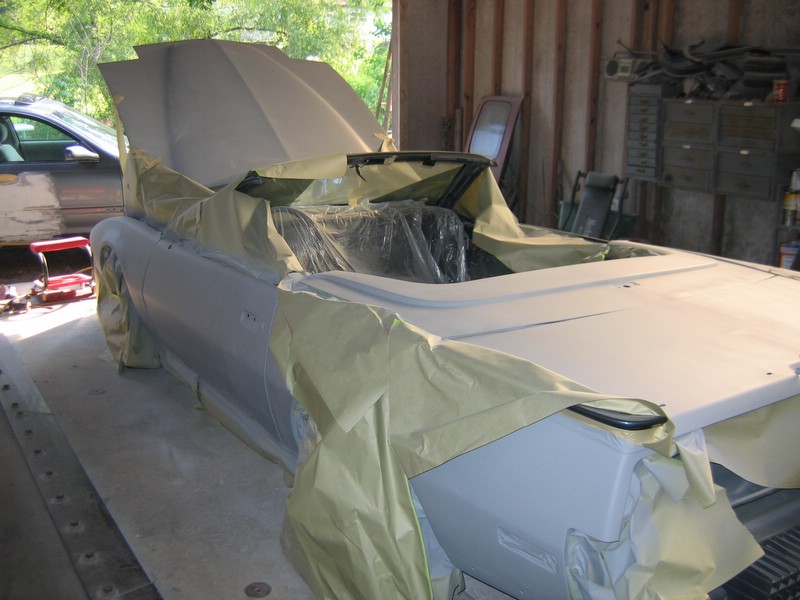
Here's a shot after a few coats of primer. I think my painter wound up with 8-9 coats getting the body as smooth as possible.
First night back from the body shop! The front end was the only thing they assembled. I had a big task on my hand.
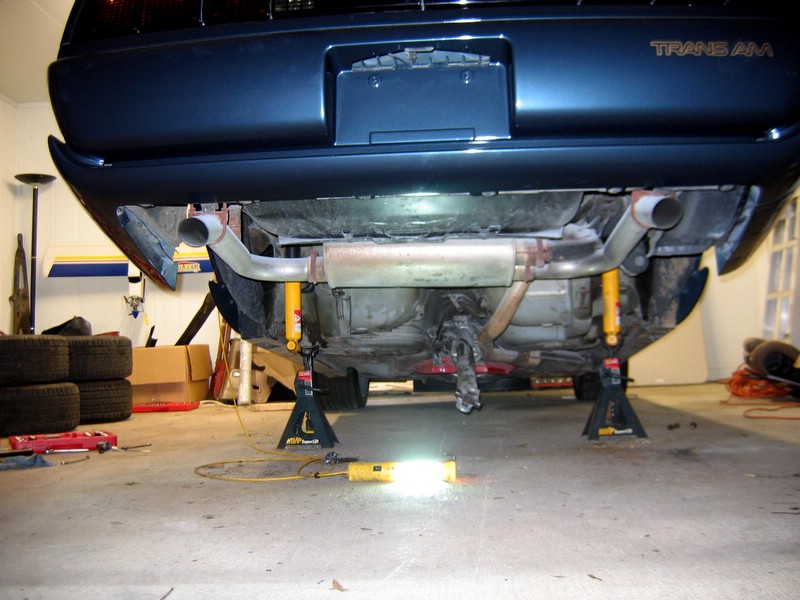
Rear shot on the same night. Amazing that's all still the original metal on the car.
Step one was to finish aligning the hood. The ASCD hood can be made to follow the body lines, it just takes a lot of patience. I wound up having to loosen every bolt on the front end and coming up with some unique solutions. Most brackets and the headlight mounts had to be made adjustable.
Got the centers back from the painter a few days later. Took forever to find the correct paint color for the GTA gold rims. We wound up painting the ram air grills the same color. This is a shot before I got the custom center-caps done.
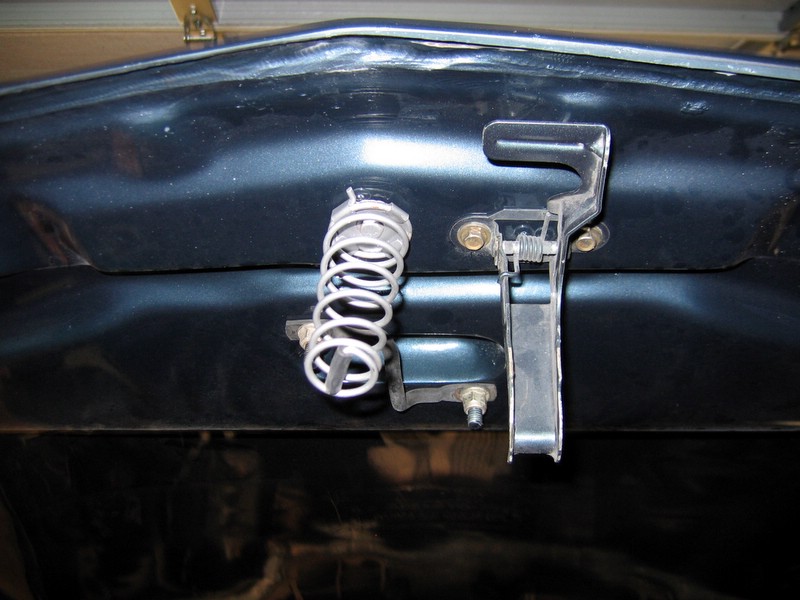
The stock hood has tabs that the spring goes in. ASCD provides a bolt hole?!? Not sure what their plan was, I wound up making a bolt-on plate with curved tabs like the stock hood.
Front end fully assembled, color matched Ram-Air emblems put on, and the new rims with spacers installed. (On the front at least)
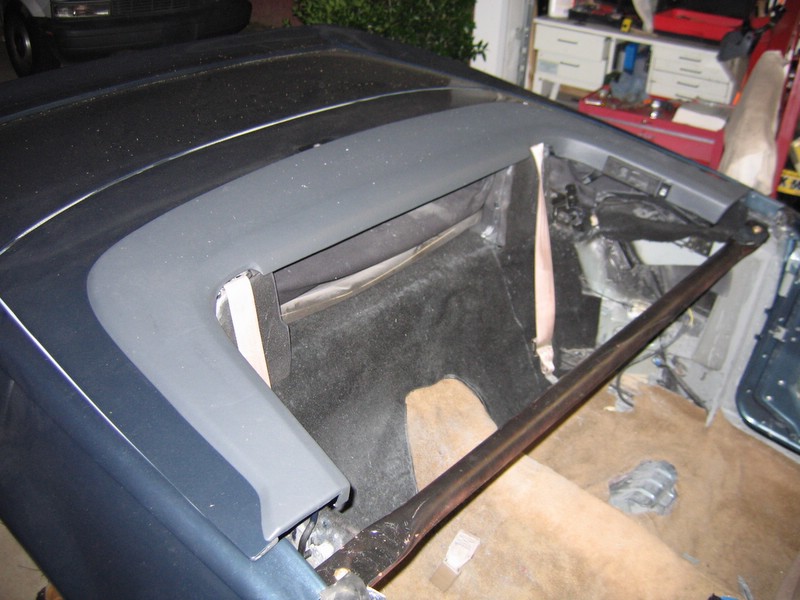
The stock tonneau cover is wrapped in black vinyl. This matched the stock black dash, but would clash with the gray 4th gen one that's going in. Here's a shot of the piece re-covered in gray vinyl, died to match the dash.
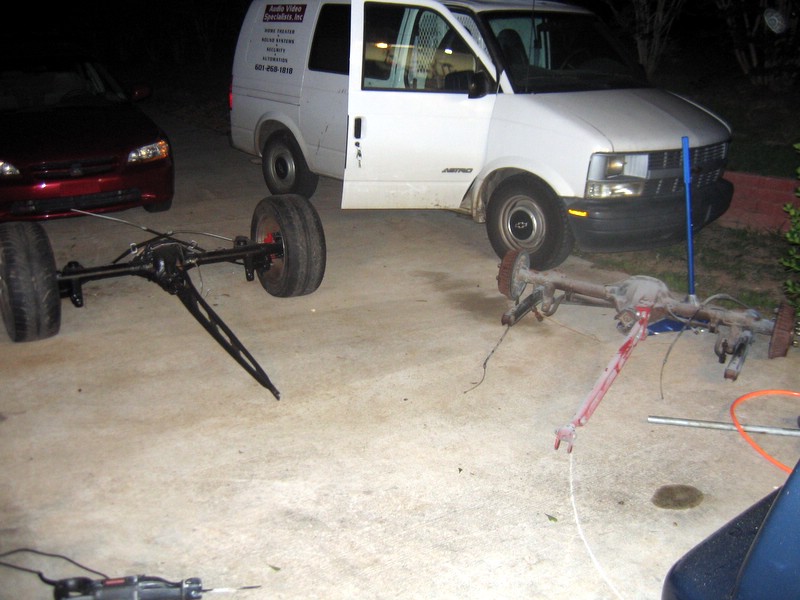
I couldn't install the rear rims until I swapped out the the 4th gen rear-end, so bye-bye drums.
Guess which one's the new one.. Went back to the stock torque arm as well. The Spohn one is pretty, but a pretty bad design for semi-street cars. It's so noisy you think the tranny has issues.
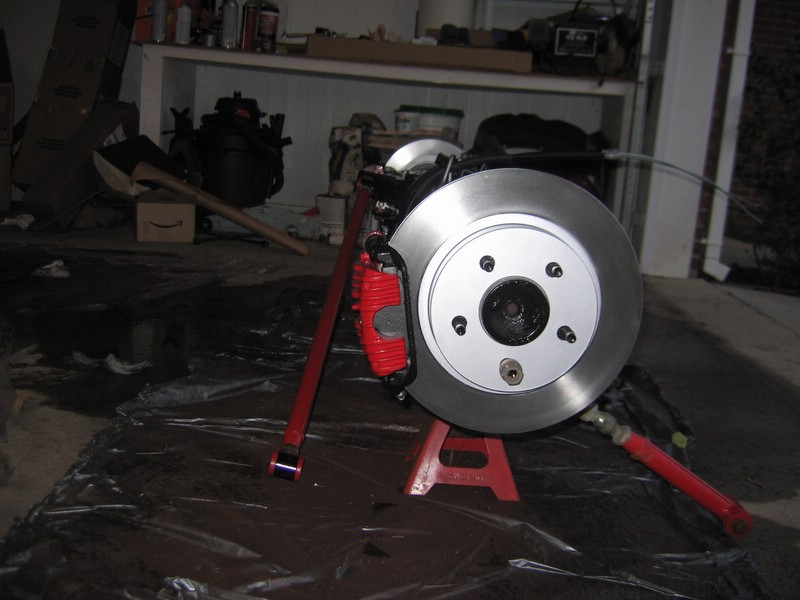
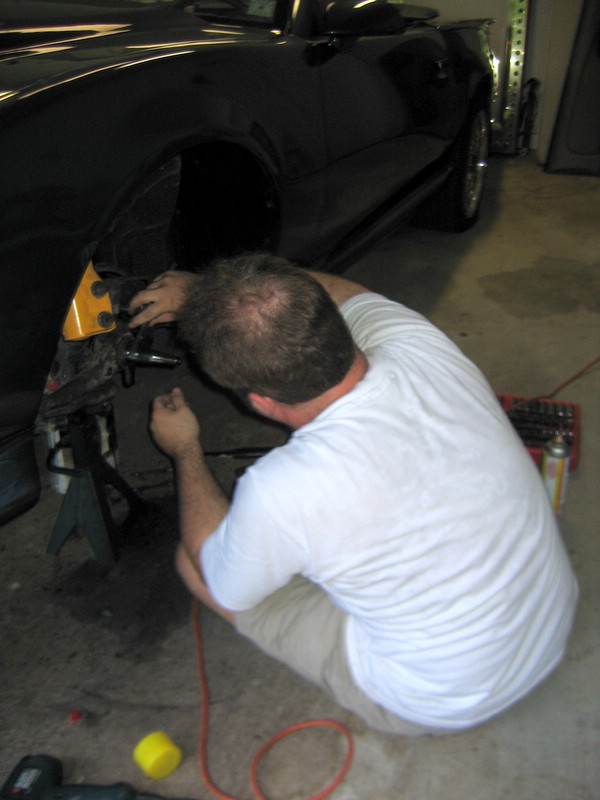
New discs in the rear with painted calipers and larger rotors then the front? That won't work. Candid shot of me drilling and tapping the spindles for Corvette C5 13" front brakes.
Finished install. Added an animation showing the steps involved. These new brakes are 2.5" wider then the stock ones.
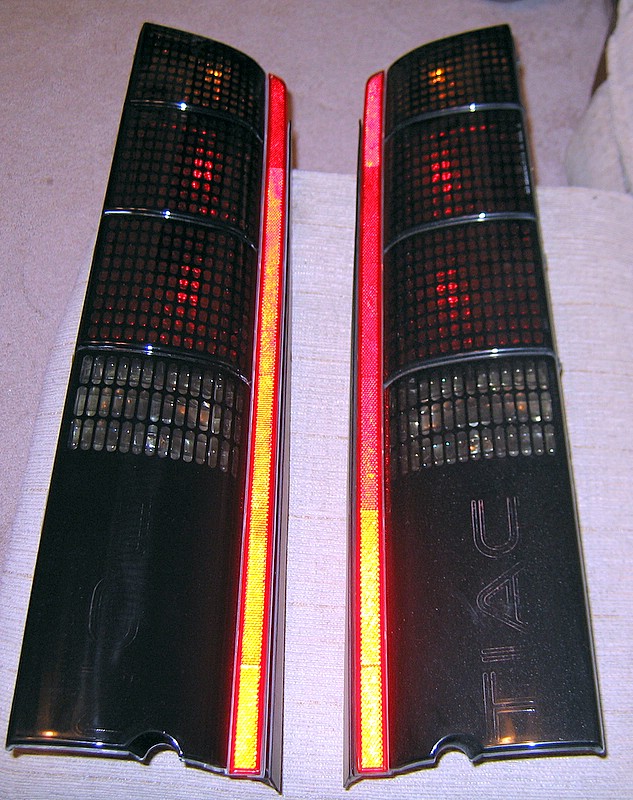
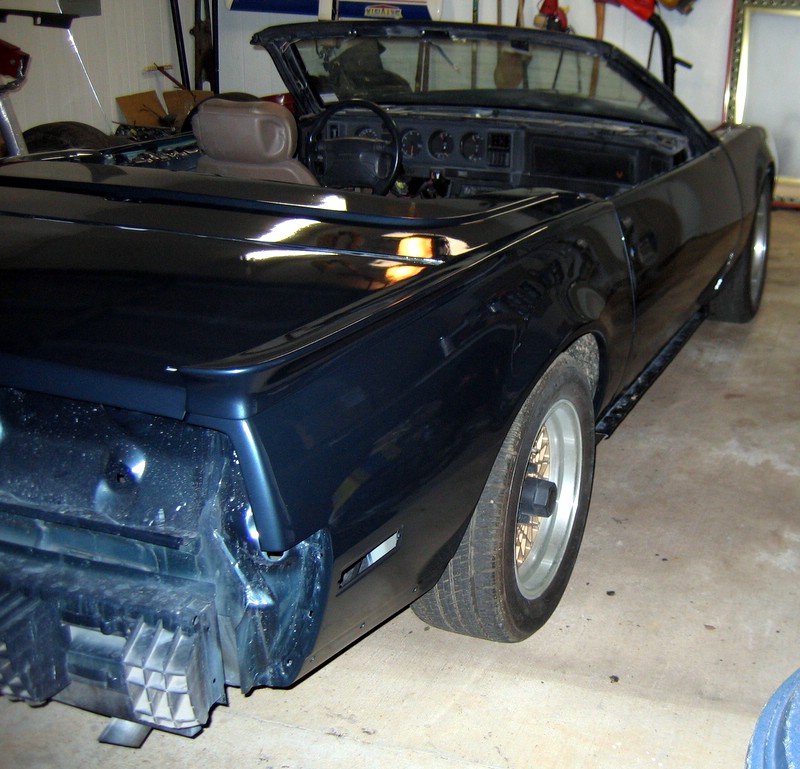
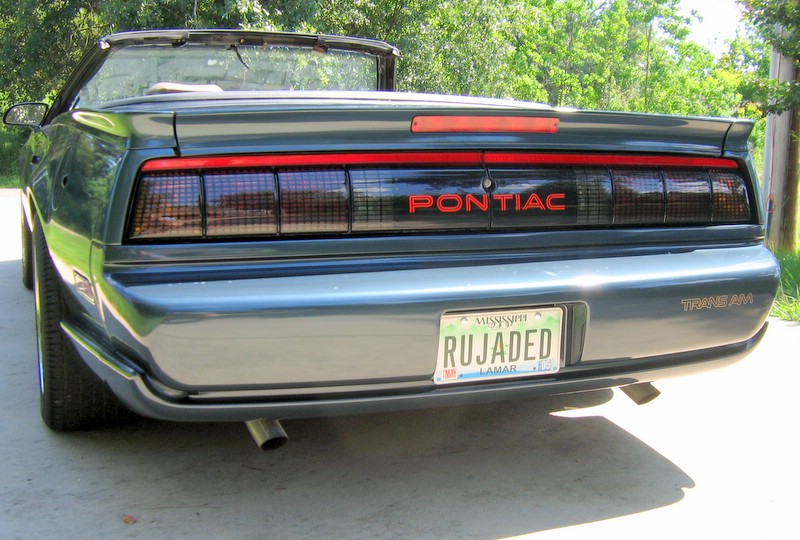
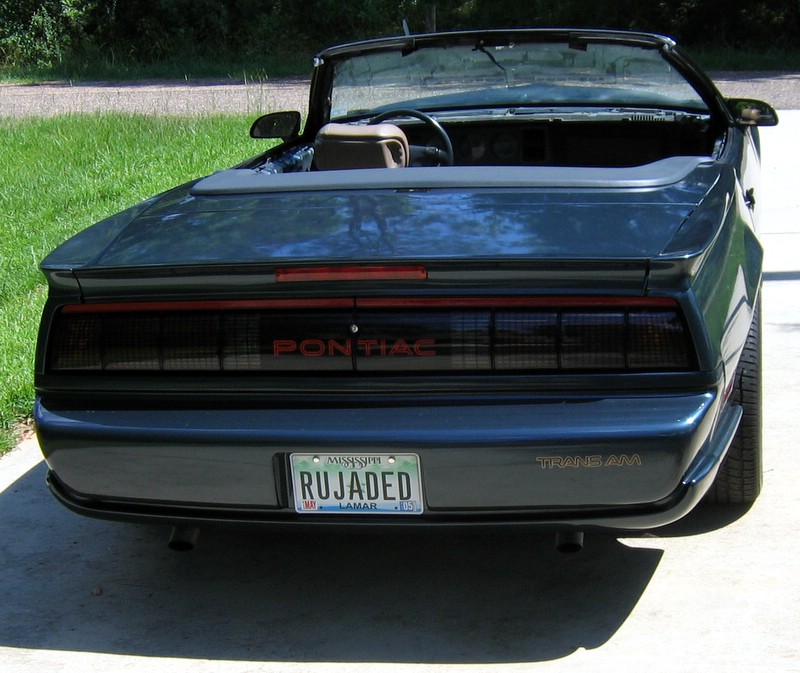
Some 'exterior finished' shots. Got everything installed, included the new PONTIAC letters on the taillights.
Good shot of the rim with the new center caps.
Pretty crazy all this metal was NOT straight 8 months ago.
Yeah, I haven't even started on the interior yet.
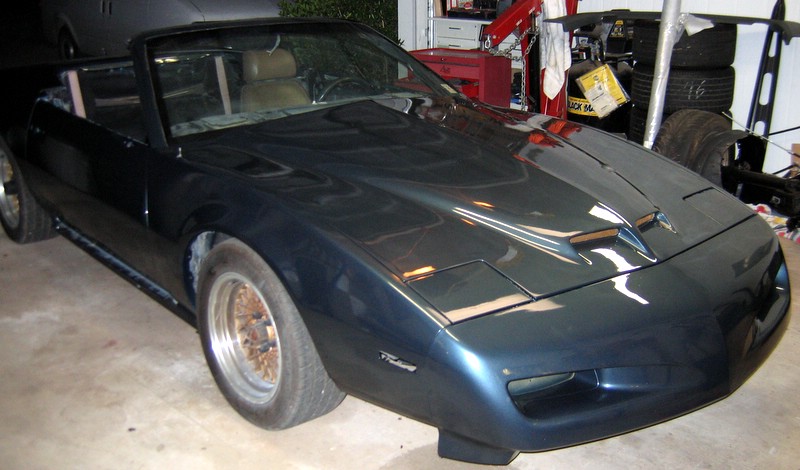
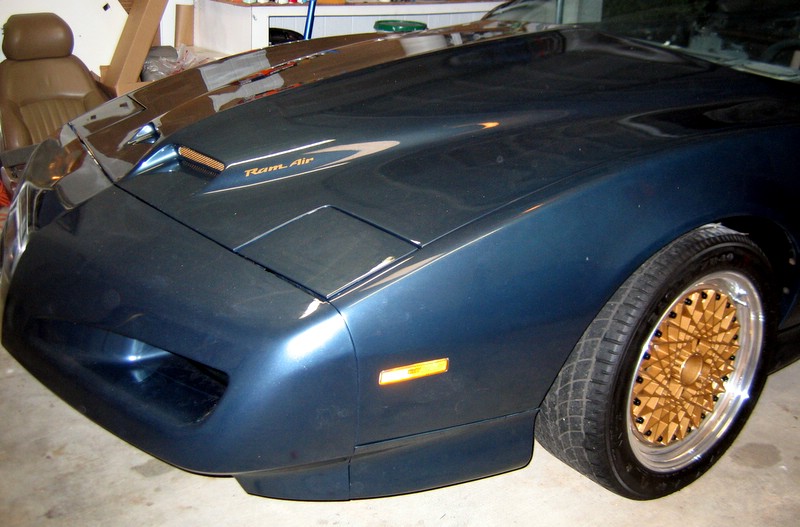
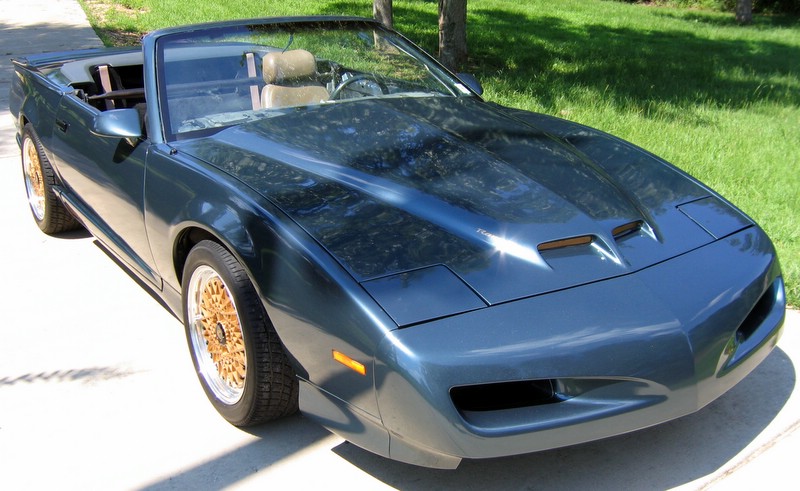
Good front shot. I think the painted 'nostrils' make the hood stand out a little bit more.
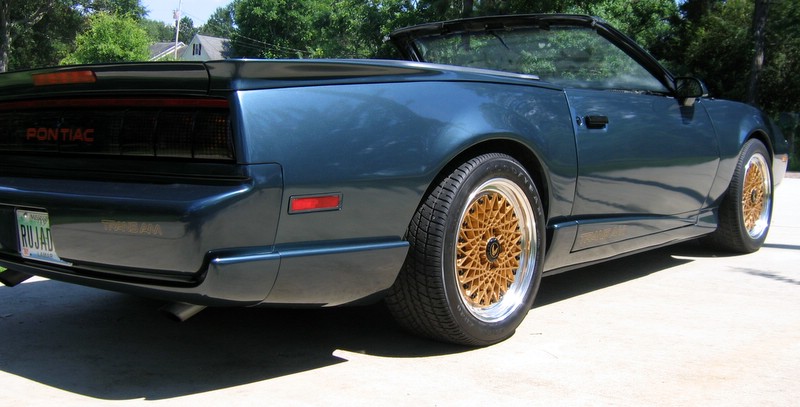
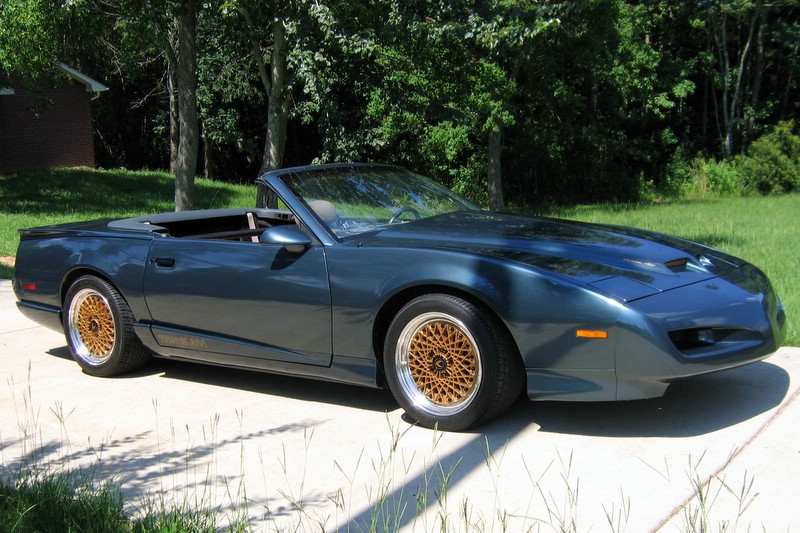
Full side profile. I thought about shaving the handles and locks, but I'm glad I didn't.
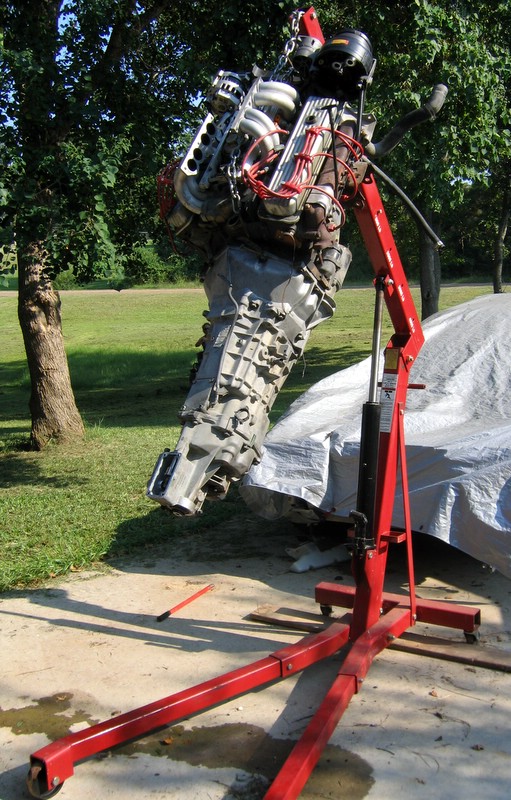
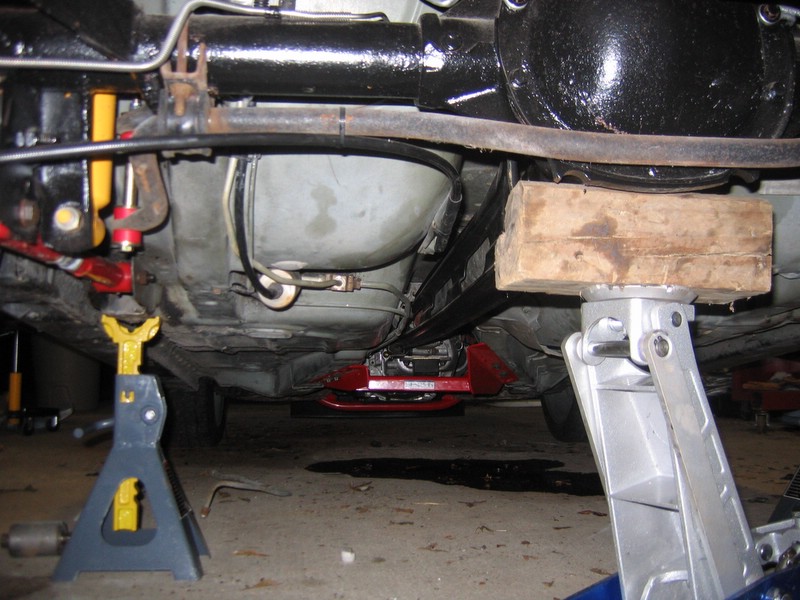
So I wasn't planning on parting another car, but when a deal on a 2000 Z28 came up I couldn't resist. When you can swap in an LS1 for almost nothing in the end, why not? I really need a new hoist, I could only reach the front of the engine with this one and not hit the bumper. Some how it had enough lift for the tail shaft to clear.
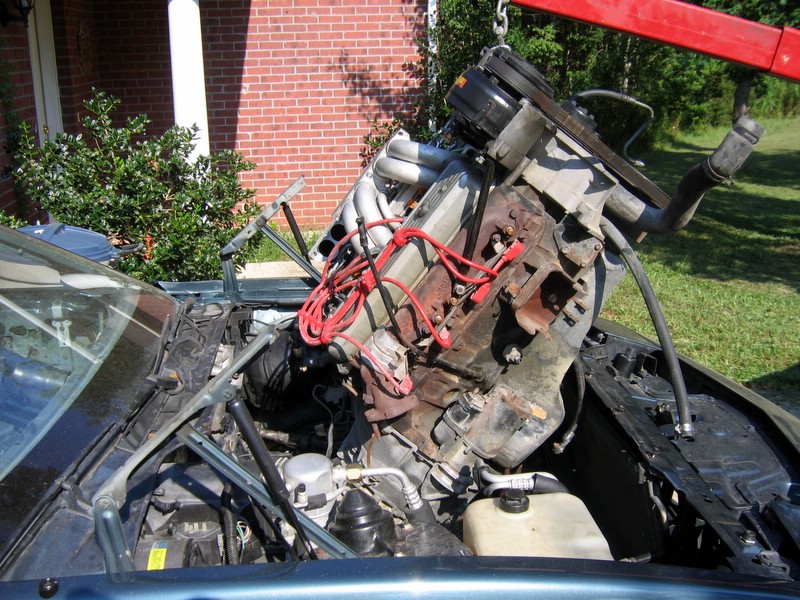
I was really expecting the hoist to snap before I could get the picture taken.
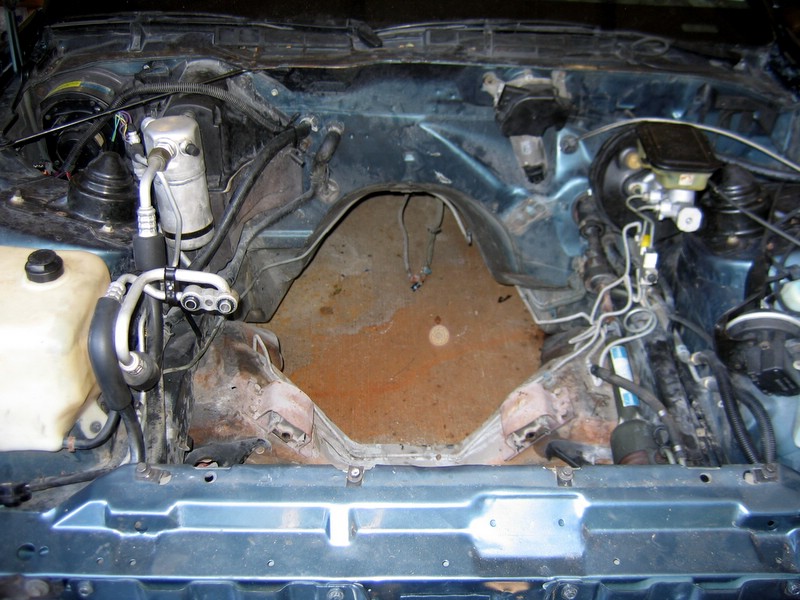
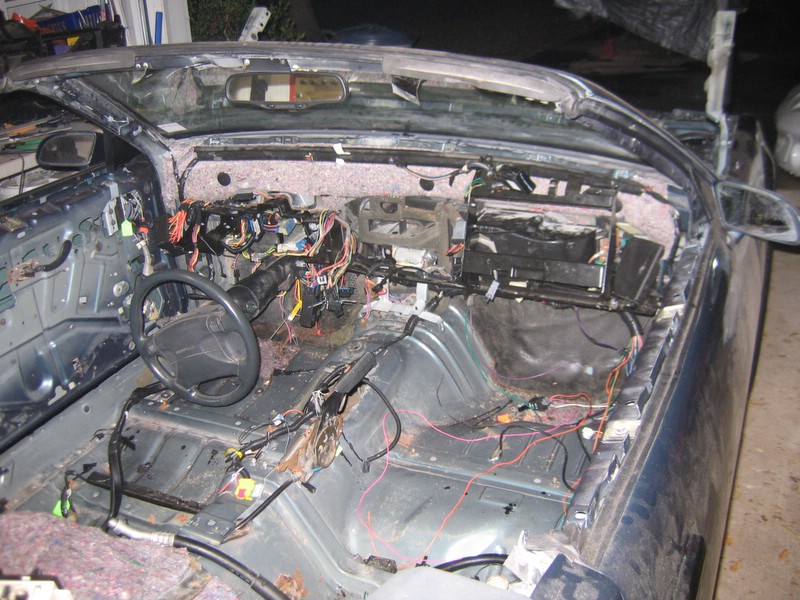
She's dirty and empty. If you notice, there's no body wiring either. More on that in a second.
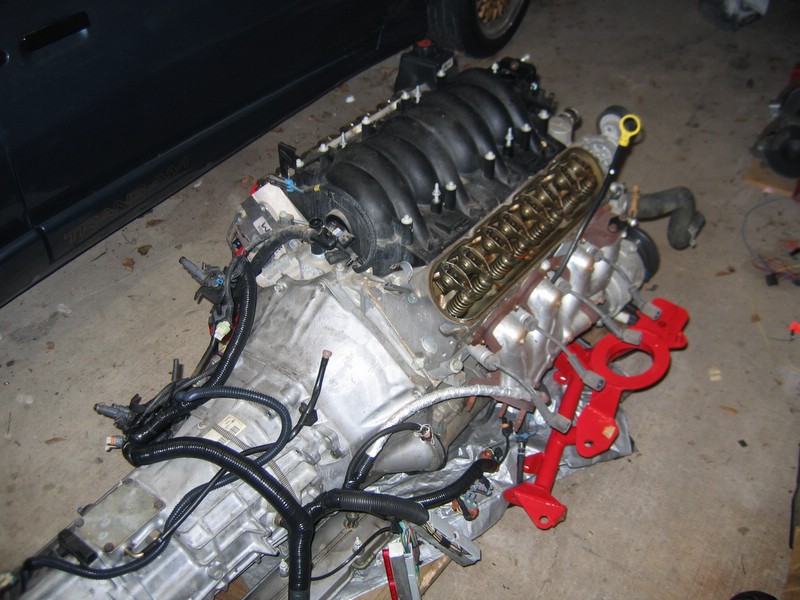
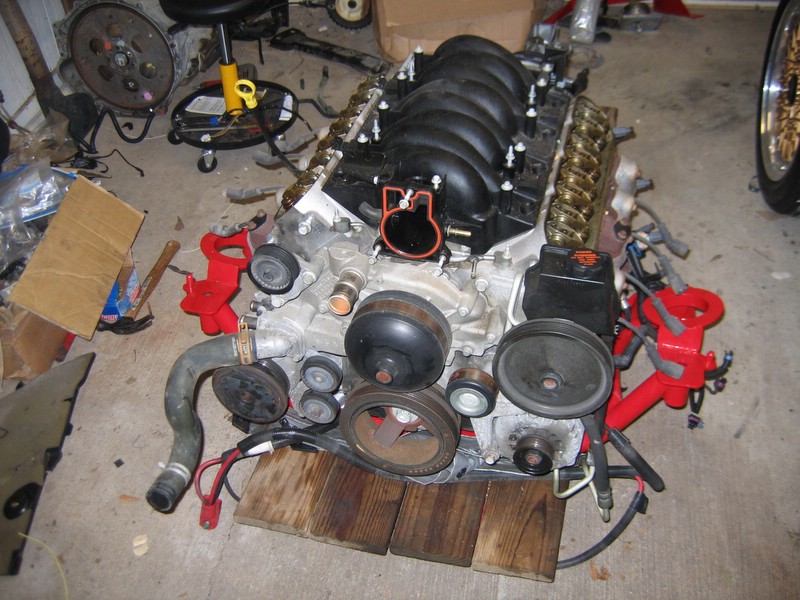
Donor engine. Much easier to remove this one, especially since I could cut the entire front support off the Z28.
So you have an entire car for a swap, what do you do?? Swap everything cool you can. Here you can see the 4th gen coolant overflow/battery tray in place. Also the 4th gen washer fluid tank hidden up under the nose. The brackets for it are un-painted here.

Here's a close up showing how well it flows.

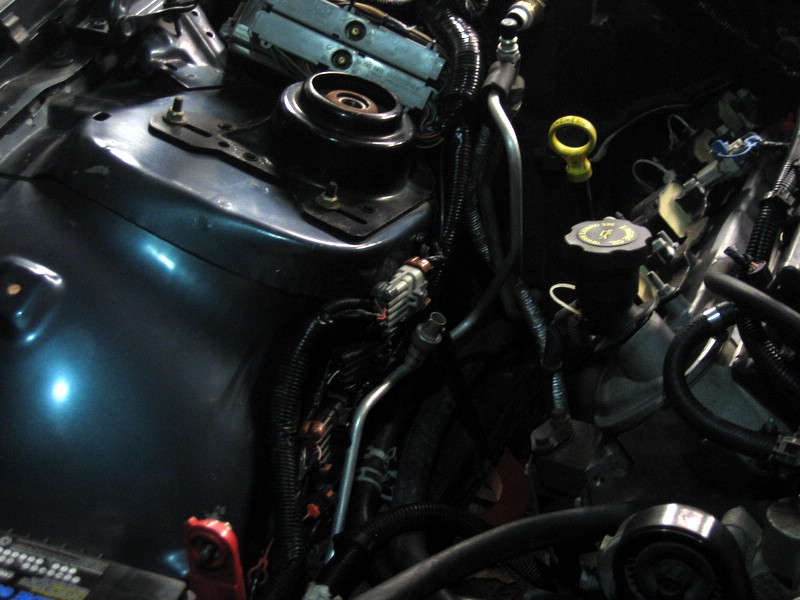
So back on the body wiring. The plan was for a 4th gen dash and I've got a 4th gen engine going in. Why not swap the entire wiring package over and make it easy (so I thought). The 4th gen body wiring is a lot neater package, having a lot of the relays and modules built into the fuse box. This area was cluttered with stuff stock.
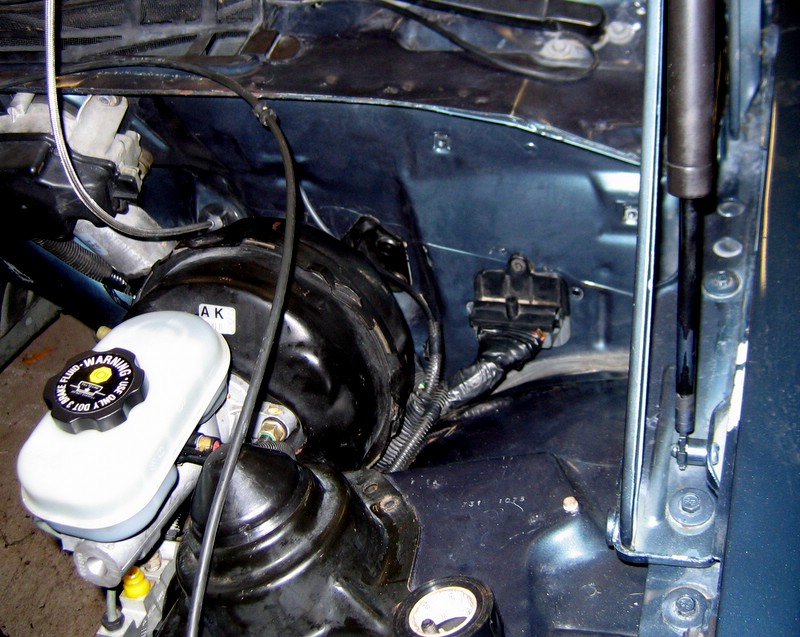
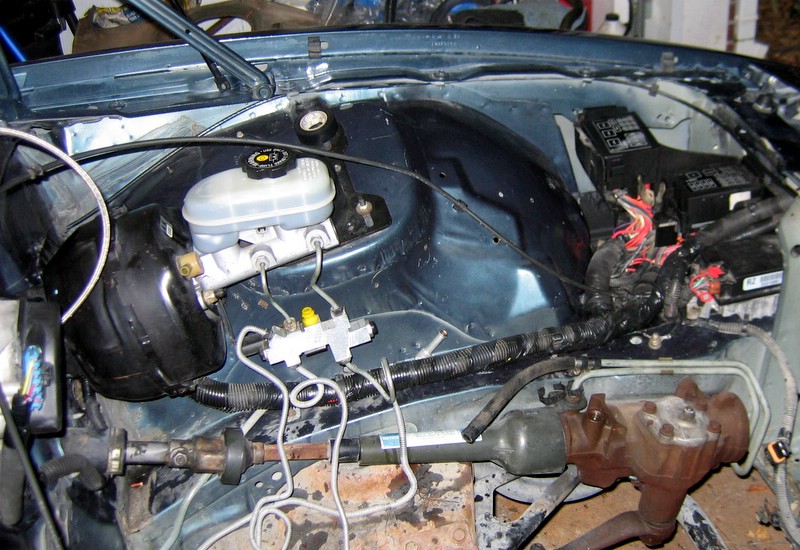
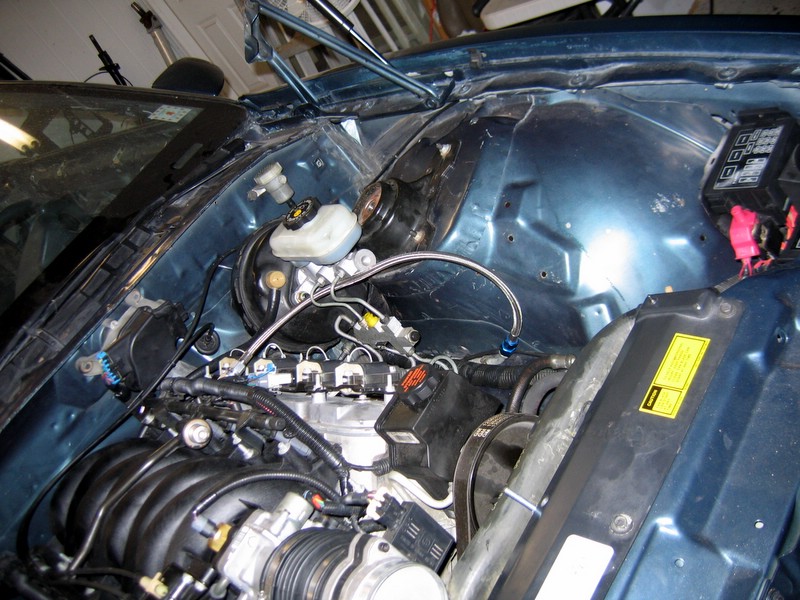
Nice shot of the 4th gen master cylinder and wiring. The new fuse/relay center is a nice convenience.
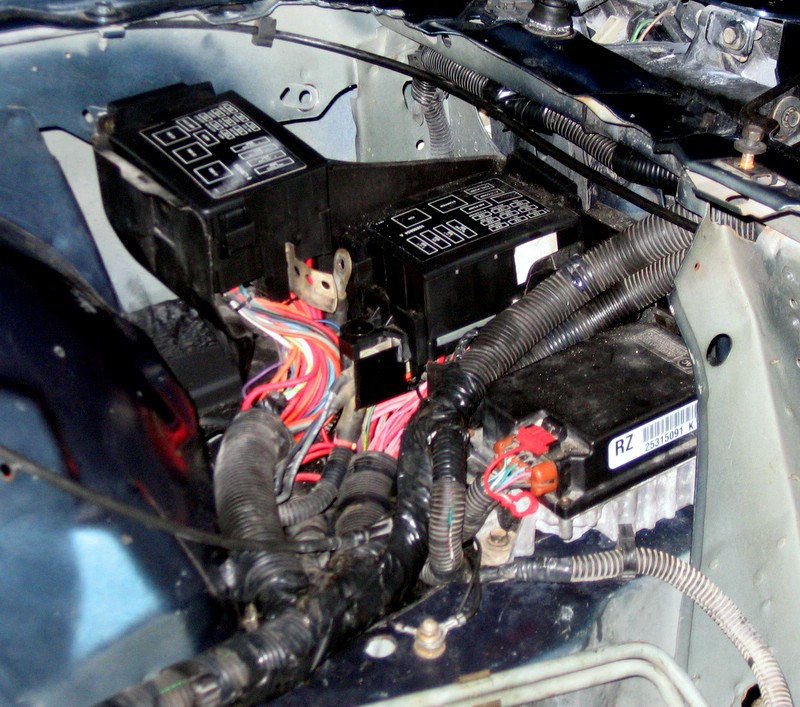
Close up showing the layout. The 4th gen cruise is on the lower right. All electric now, no more ugly vacuum based controller.
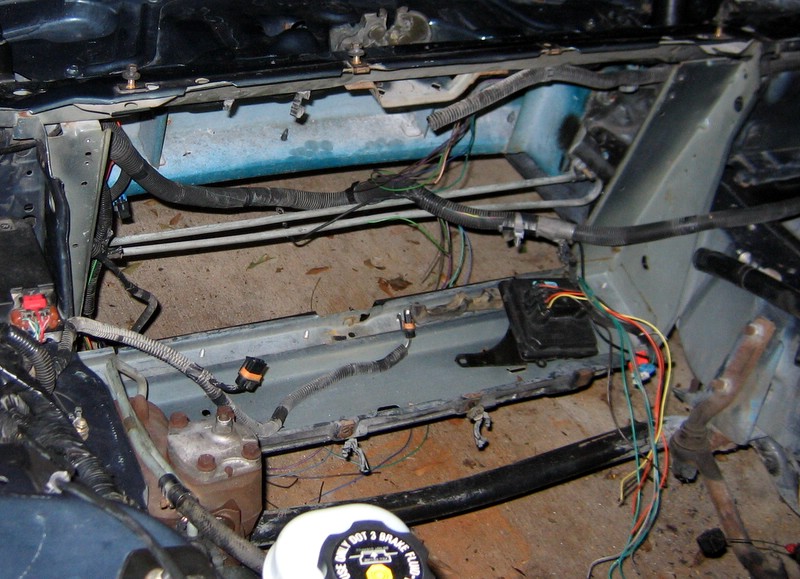
Remember the 'easier' statement I made. First surprise: a camaro doesn't have pop-up headlights! Here's a shot with the old headlight to body wiring, the new body to headlight wiring, and the headlight door module. Trying to figure it out without running more wire back to the dash was fun.
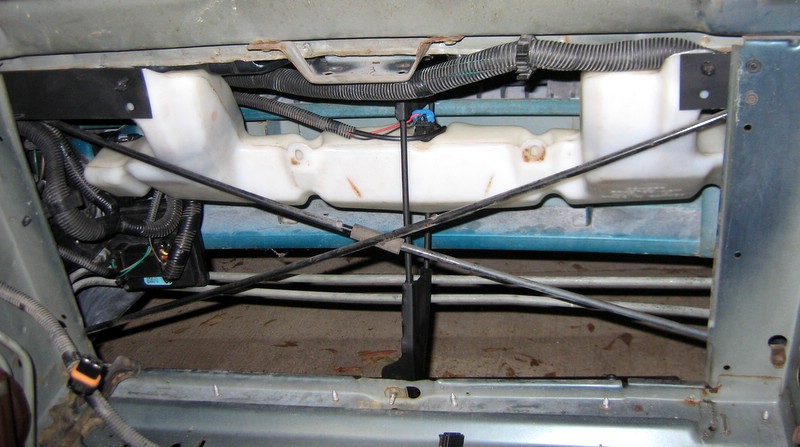
All brackets and positioning on the new washer fluid tank is done. You can see final placement and wiring of the headlight module to the lower left.
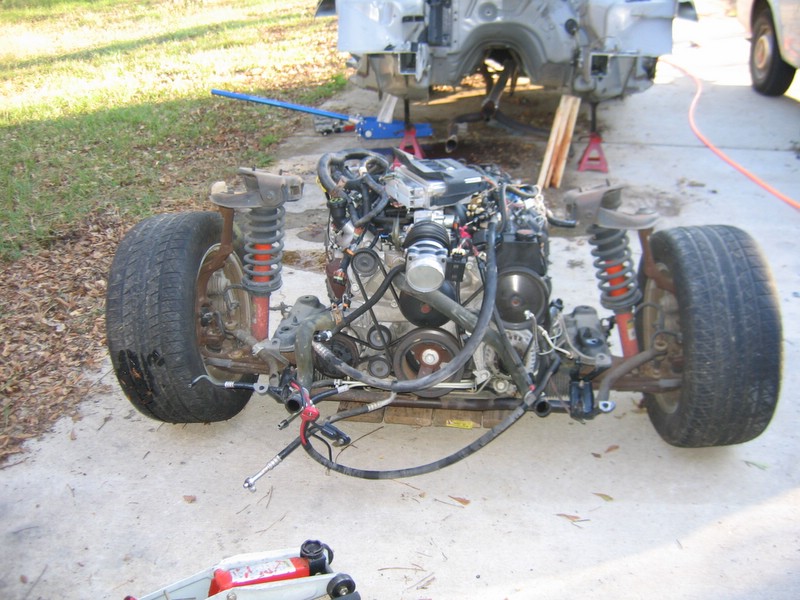
Here's a shot of the engine resting in the new tubular cross member. Just got done swapping in a new cam shaft, springs, push rods, timing chain, LS6 oil pump, LS6 intake, LS6 PCV system, you know the basics.. ;)
I think the wiring mods are finished here too. I removed all emission wiring systems, removed all the auto tranny wiring, added all the T56 wiring, and re-pinned what was needed for the T56.
I did a test fit with the camaro dash since it was trashed. This let me get all my brackets bent and cut without messing up the TA dash that's going in. You can all ready tell how much it modernizes the interior.
I left the dash brace in and added the interior 4th gen wiring. Fun oh fun. It's going to be worth it in the end, but man is it a lot to keep track of. Aside from re-pinning some connectors and changing some out, the only things that were not compatible with the new wiring was the wiper system and HVAC. The wiper system is a stand alone harness now connected directly to the steering column, the HVAC system I totaled converted to the 4th gen style. The 3rd gen had most of the relays and resistors near the blower box under the hood. Now everything is within the dash.
I went ahead and swapped in the 4th gen gas tank too. The newer ones are plastic, hold two more gallons, and I wouldn't have to worry about figuring the fuel system out up front. In this pic you can see where the 4th gen filter and 't' tie into where the 3rd gen filter went.
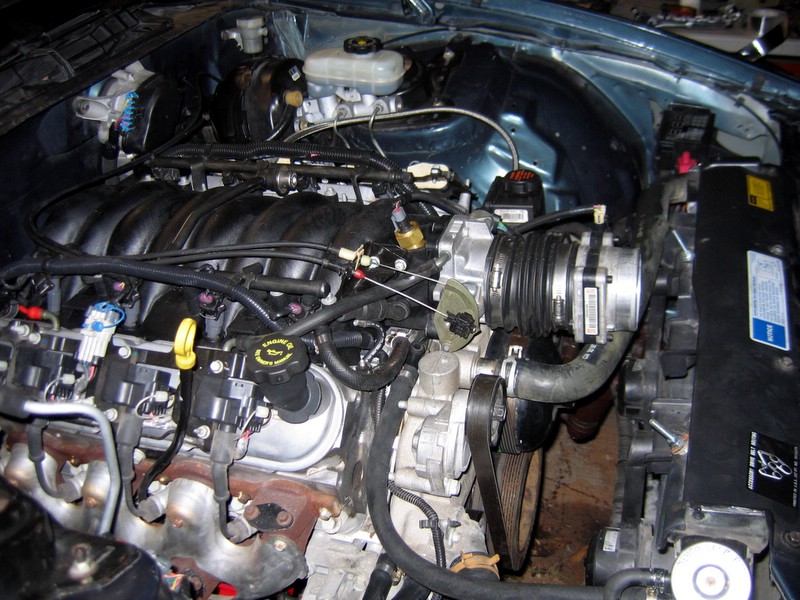
4th gen body to engine connectors mounted in place. Looking more like a stock engine now
Getting closer! The 4th gen only uses a single fuel line to the front. I removed the other 3rd gen lines and just got a braided adapter hose up front.
I wound up getting the LS6 intake modified for EGR. Since I deleted EGR and would have no room for the intake temperature sensor in my air-box, it was a nice fit.
Another side shot, amazing how well everything fits.