A chronological history of my:
Jade Green / Grey 1992 Trans Am Convertible
Page 2
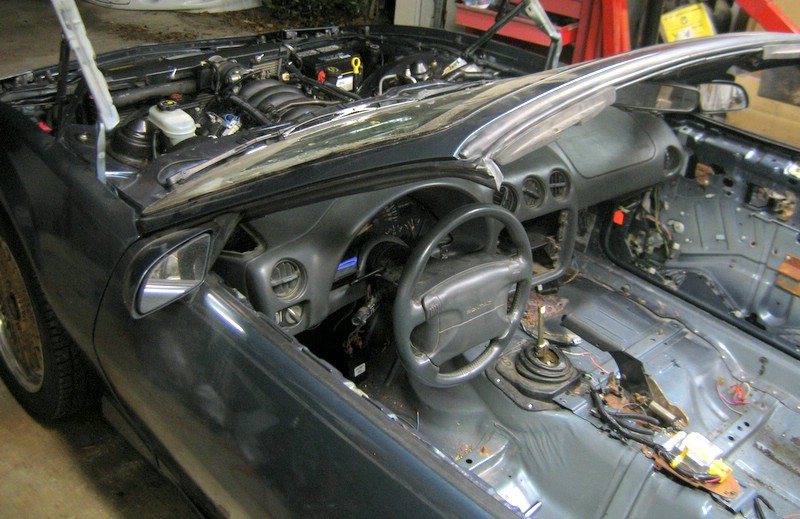
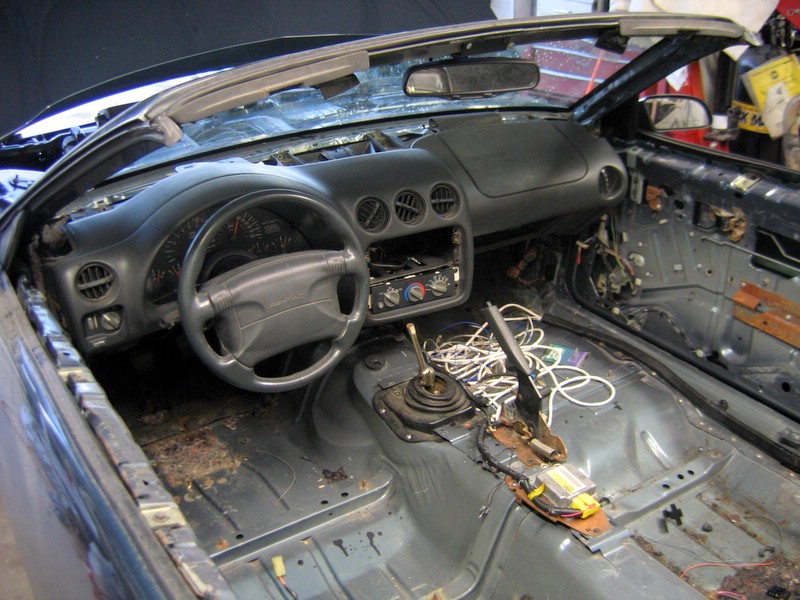
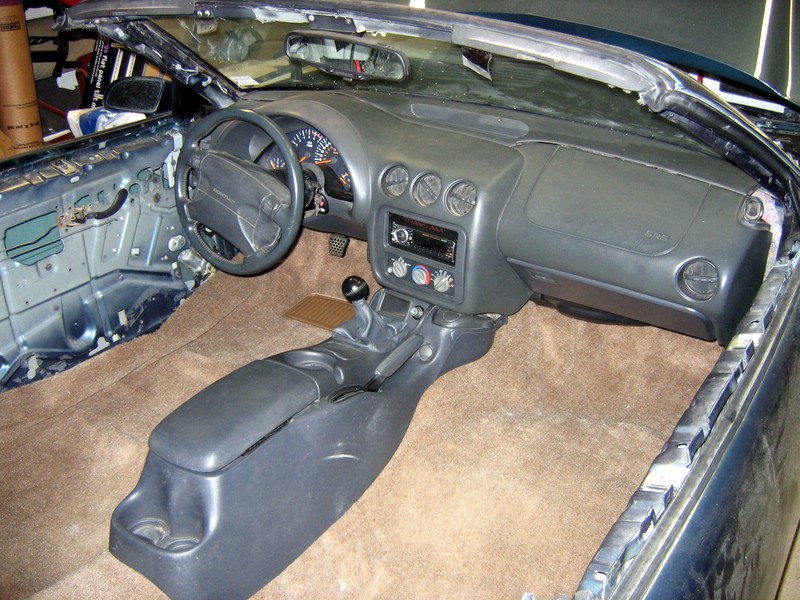
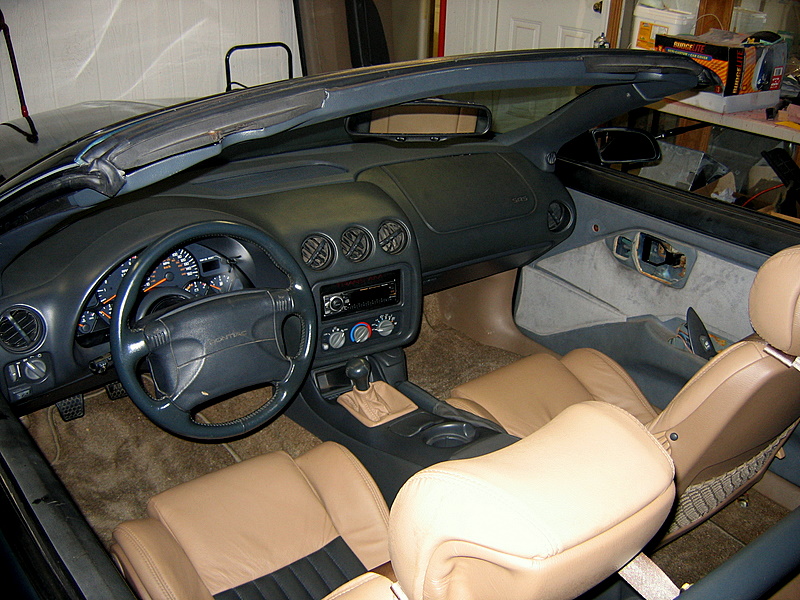
The TA dash is finally in, along with the gauge cluster. I only drove the car once without the dash in, not much fun at all.
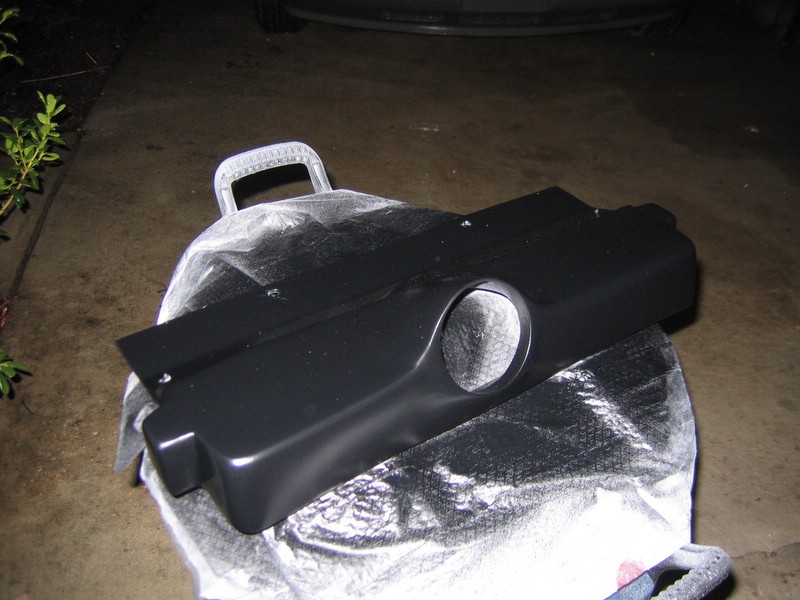
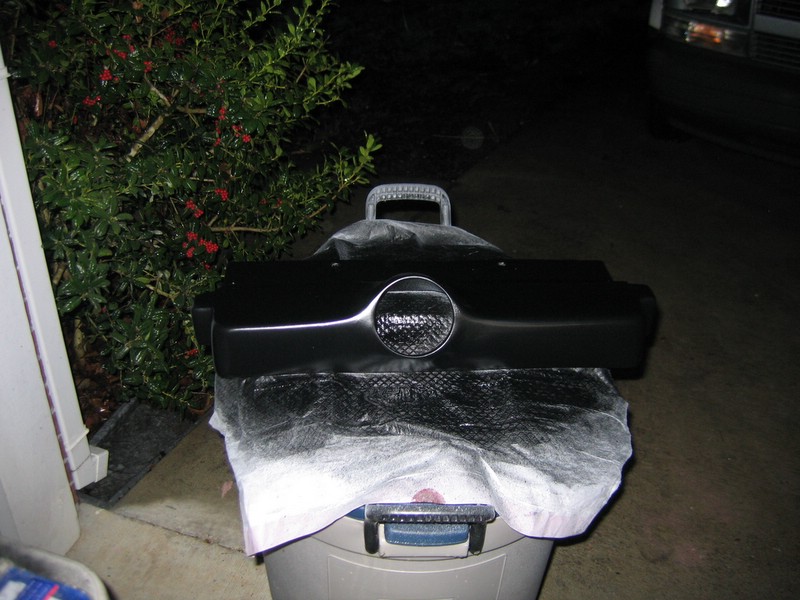
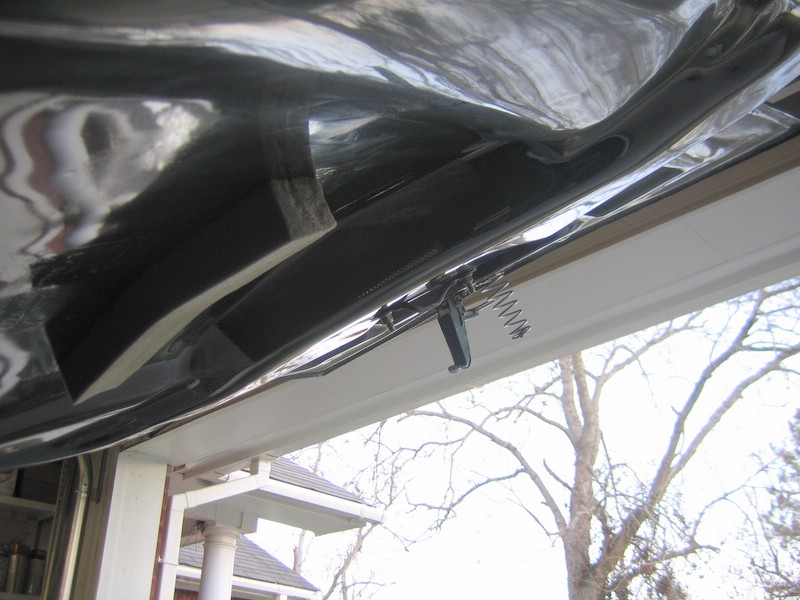
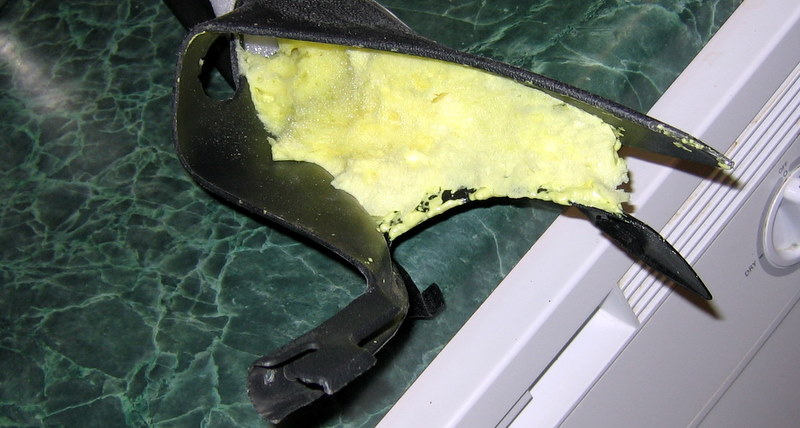
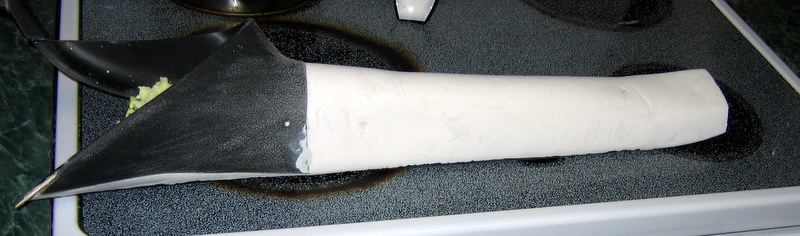
The ASCD hood is not a true ram-air stock. I purchased a RAII air-box based on some recommendations. It wasn't really going to work without modifications. After trying a few different things, I decided it was time to make my own. What you see below is the top of the RAII filter box, the bottom of a 4th gen whisper lid, and part of a stock radiator hold down.
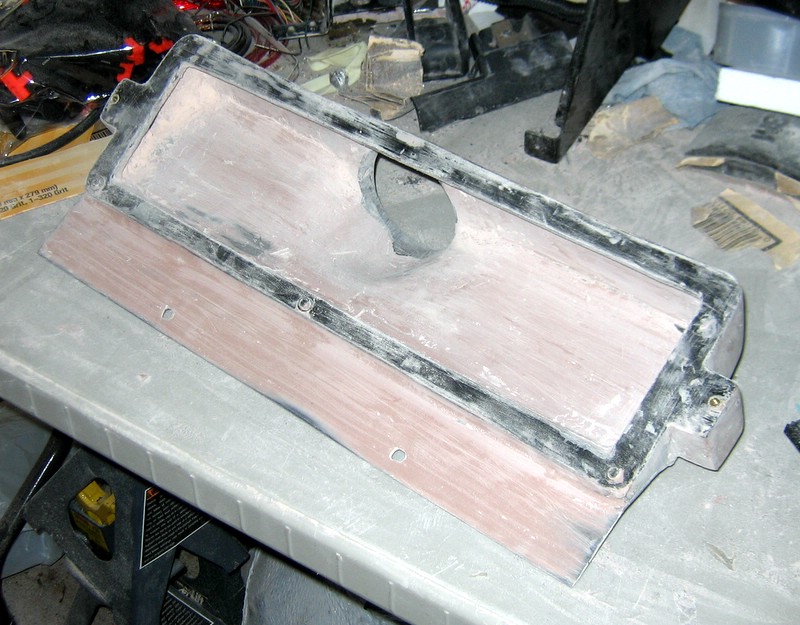
It's not pretty in it's rough shape, but hopefully you can appreciate how much molding went into this.
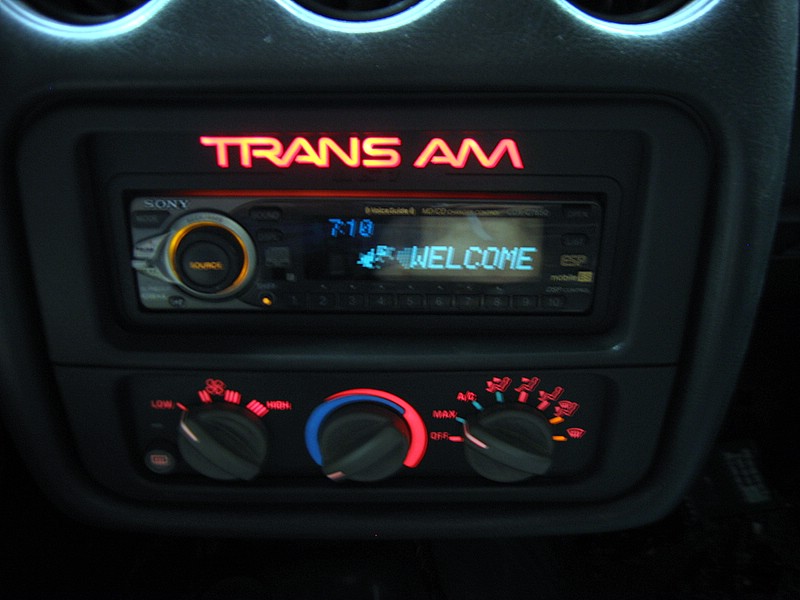
Finally got all the 4th gen HVAC wiring in place and tested. Also getting the rest of the interior harness sorted out. Wound up going ahead and adding new wire for a stereo. I couldn't go through all this and leave the stock system could I?
Finally my custom radio mount comes in! Yes that's an old Sony radio, back when they still made quality pieces.
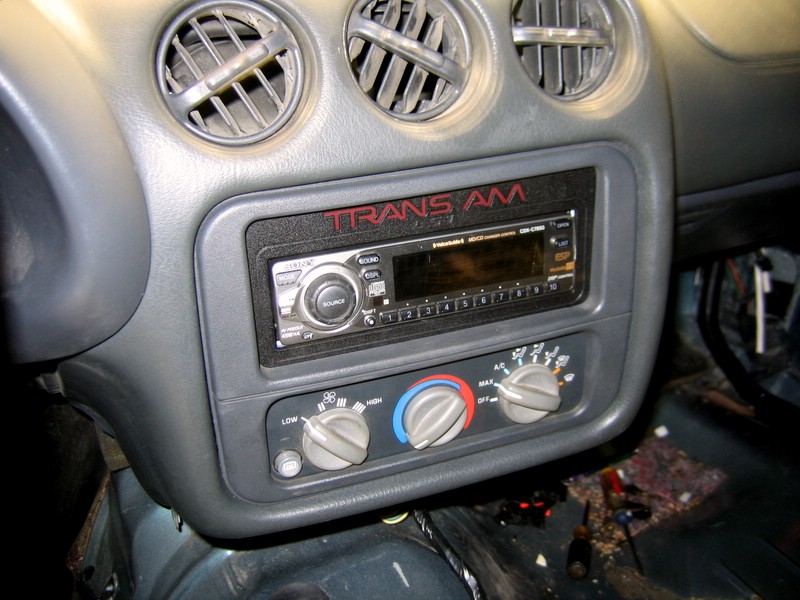
The best part. I had them special cut it for the third-gen style logo since its normally a 4th gen radio kit.
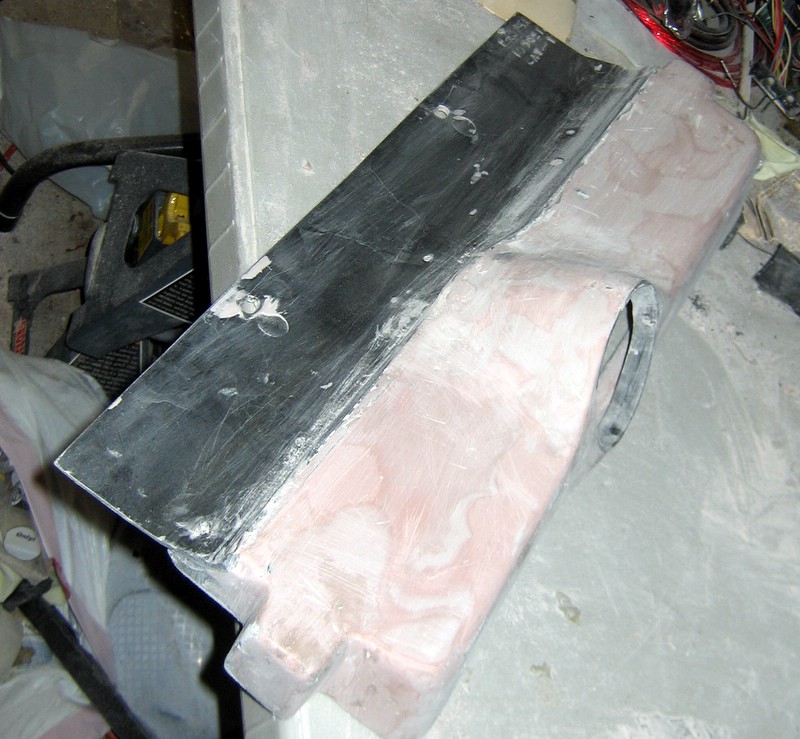
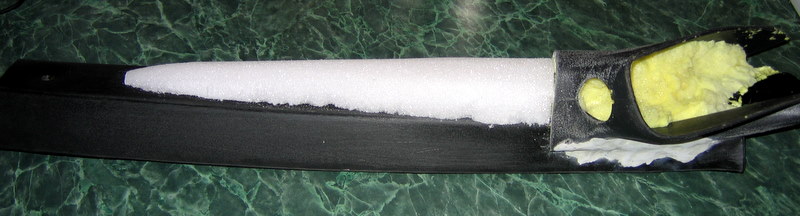
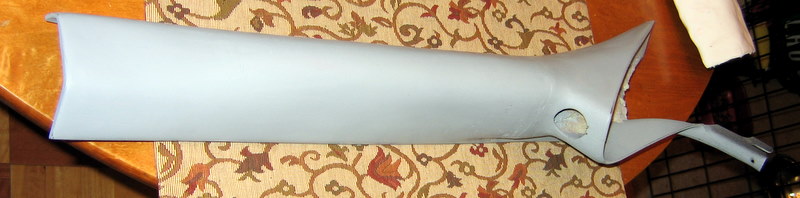
Finished the air-box. Just getting it painted. I actually purchased a table to paint on, it somehow turned into parts storage all ready.
Side shot.

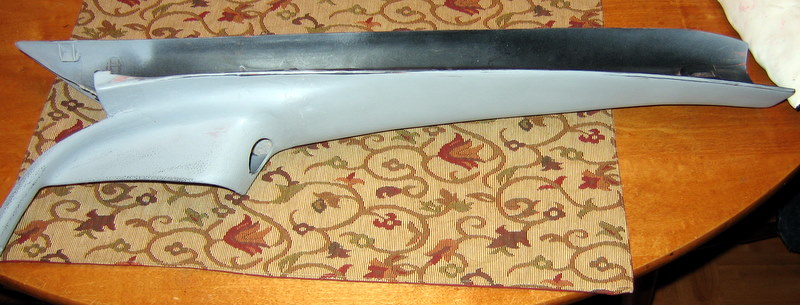
And another one. It took forever to get a good smooth piece.
Power wire/fuse for the stereo added. I tried to make it blend in.
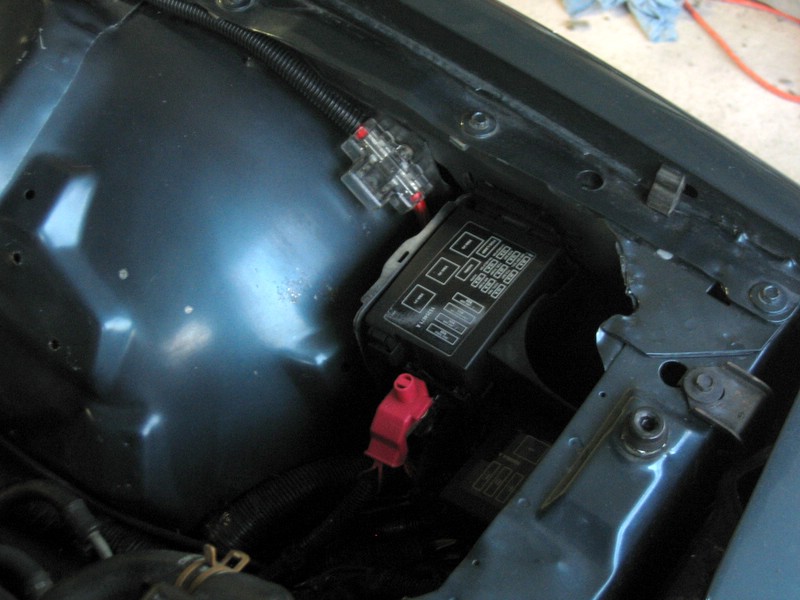
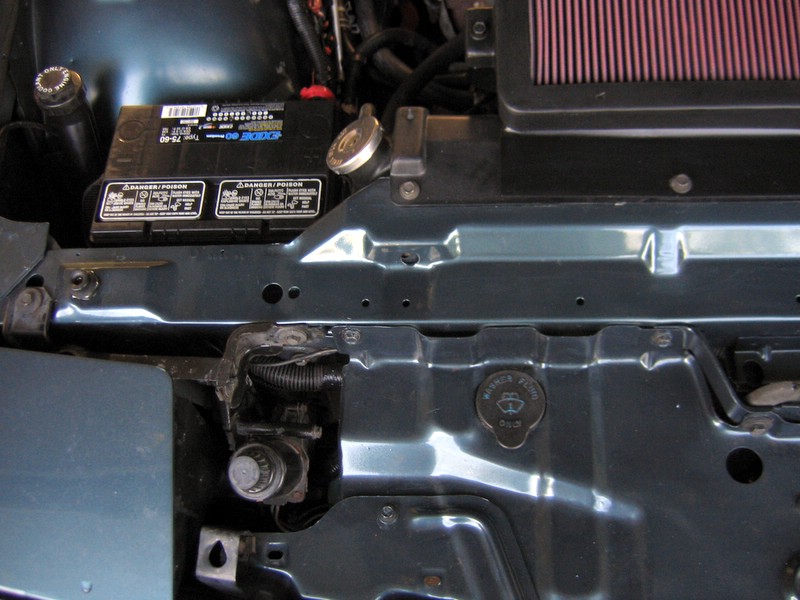
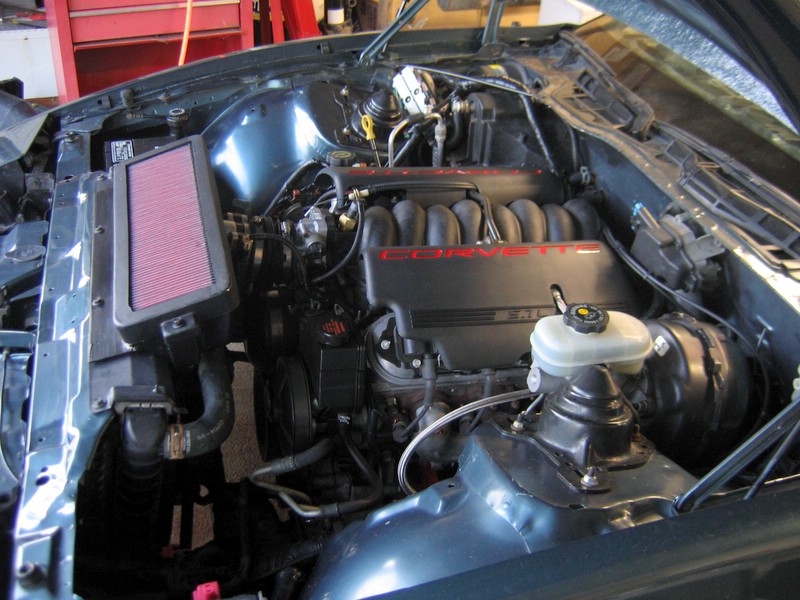
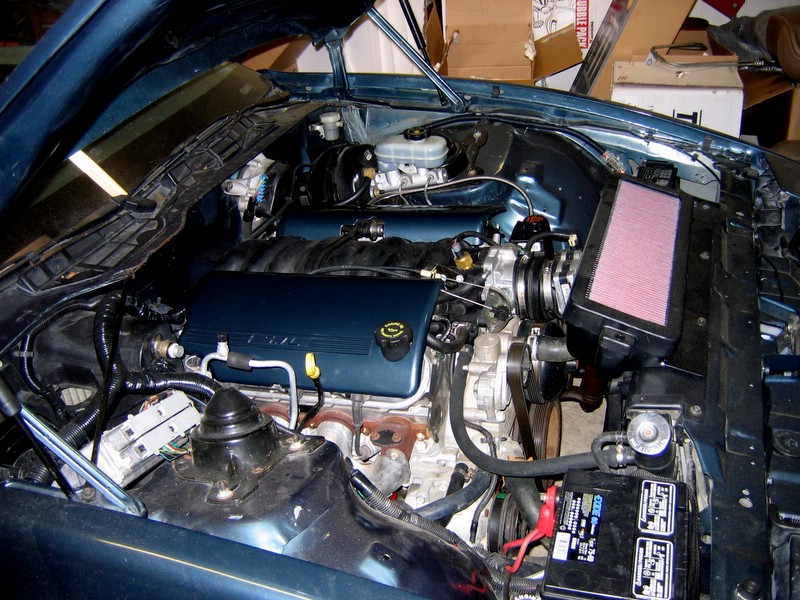
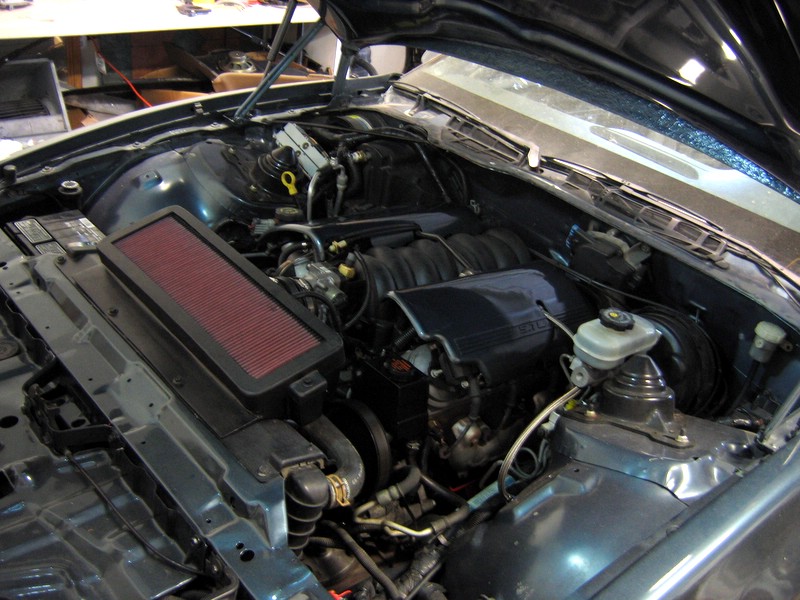
Finished engine bay. The covers will be filled in and painted body color.
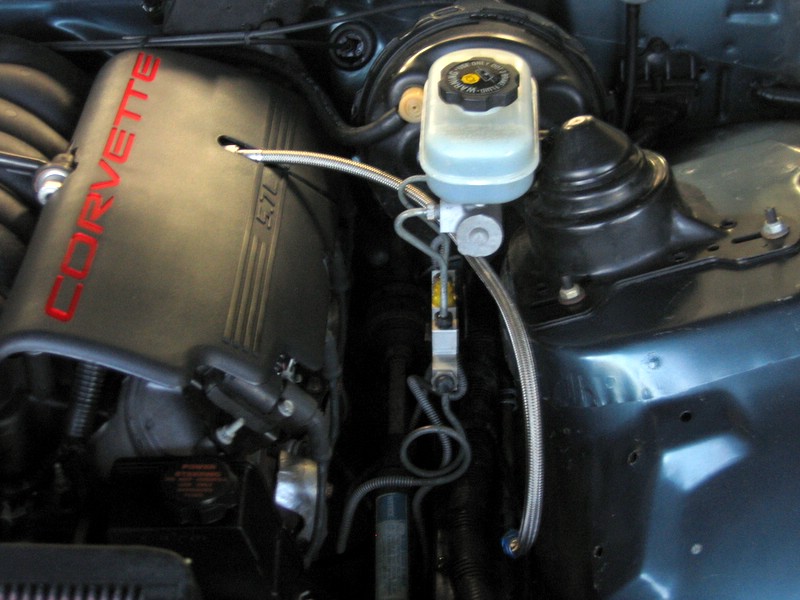
The little cap is all you can see of the 4th gen washer fluid tank. A lot nicer then the big white tank that used to sit on the fender.
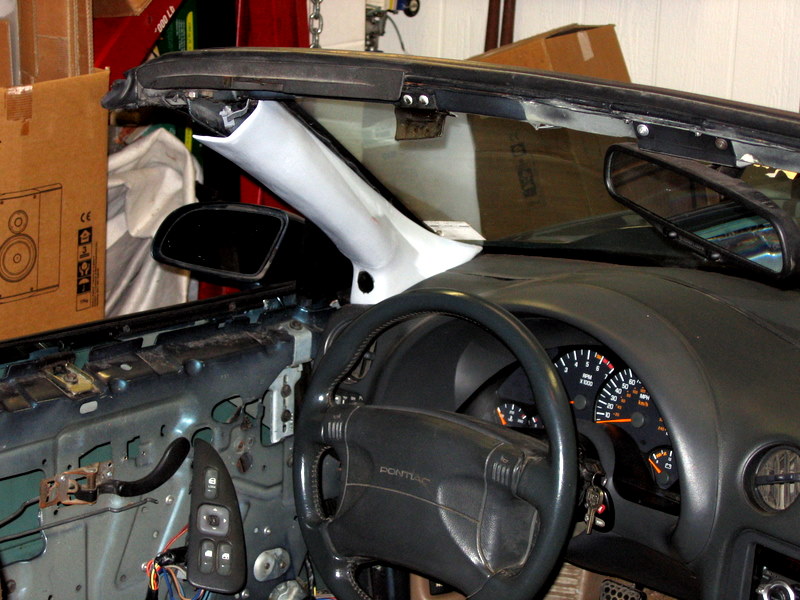
Cutting a big hole in a $500 hood is not easy. Foam seals to the back side of the air box. It's not a 100% seal all around, but is a direct shot in.
Not too shabby eh?
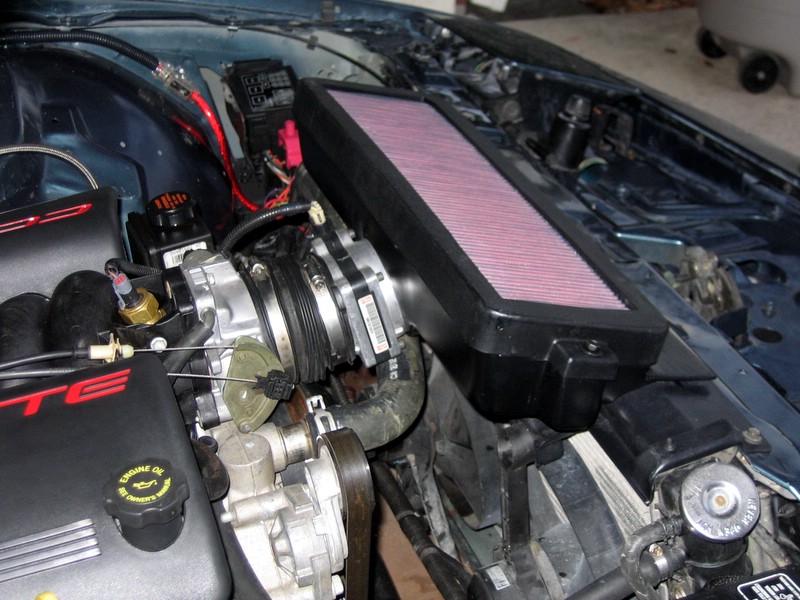
Best shot of the engine bay so far.
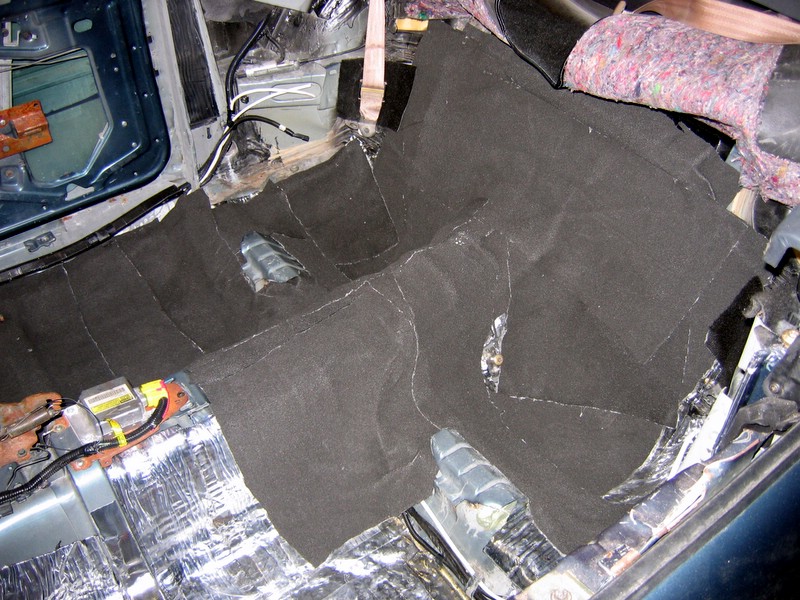
Finally we get back to the interior. 2-3 layers of RAAMmat deadener on the floors. All edges were covered in aluminum tape (that's why it looks really nice). Only thing this helps is my pants, I kept getting asphalt on them sitting on the mat. You can only ruin about two pairs before the wife gets ticked.

Only took 2-3 days working a little bit at a time.

Now 2-3 layers of high-frequency absorbing ensolite. This stuff is pretty neat and works well. Only downside is it has to be glued down, and I hate spray glue.
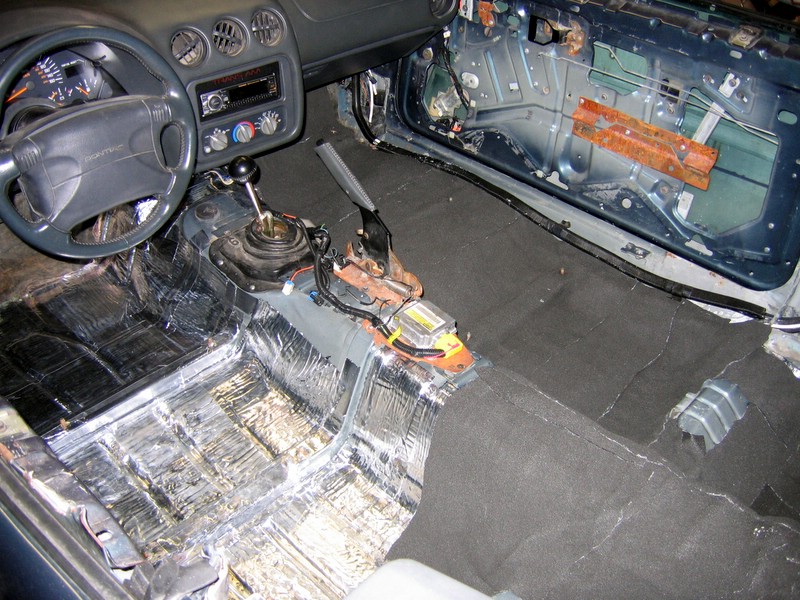
One of the hardest parts was keeping all the bolt holes clear. I'm sure I'll find one I covered up anyway.
First new carpet installed.
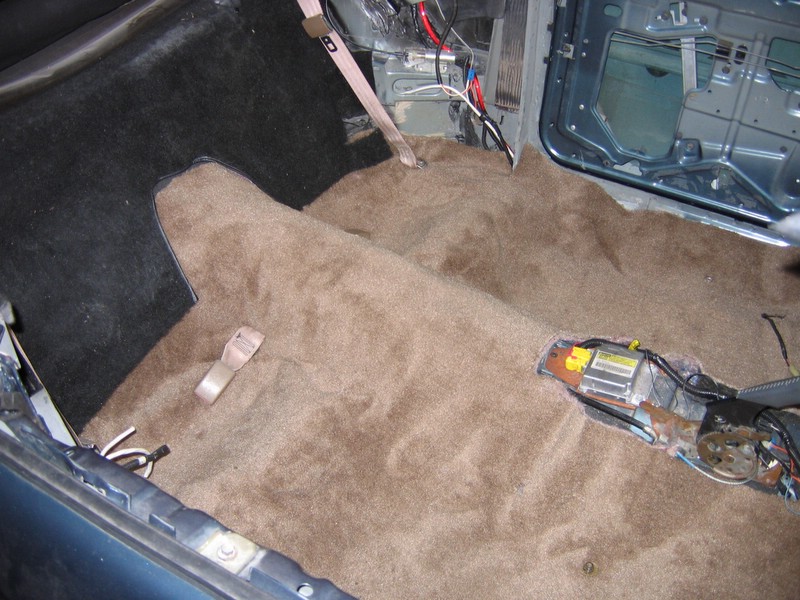
The flash makes the carpet a little orange. This shot is more of the true color. I got a little happy on some of my cuts and it turns out the 4th gen door sills don't cover as much as the 3rd gen ones. Had to reorder the carpet again. Turns out better any way, as I could go through and cut less in other areas as well.

The new-new carpet is in, plus the center console. Just installing the console changes the look of the interior. It's starting to look like a car again. I need to find a gray shift knob and another dash pad. Those things crack all the time and I was proud I had saved this one for a year without issues. It's on the car for a week and cracks. It took 5 cuts to get it to fit right, I think I'll try fixing this one before cutting another.
Finally got my paint coil covers back from the painter. Filled the Corvette logos and painted body color. First shot with flash showing to color match.
Next shot, other side, no flash. This doesn't exaggerate the dirt as much. I really need to get some parts cars out of the way and get some daylight shots again.
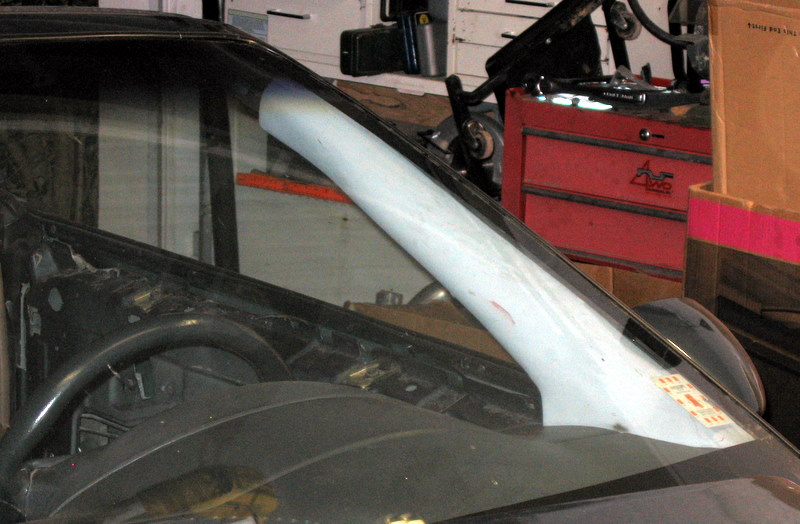
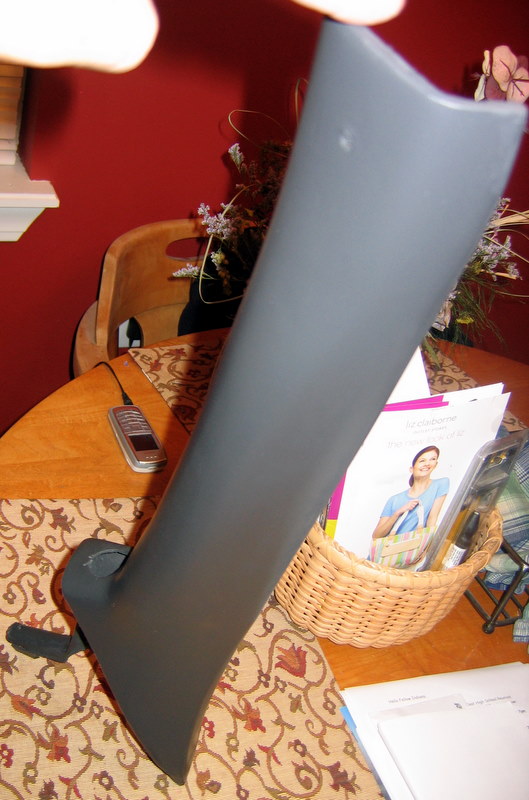
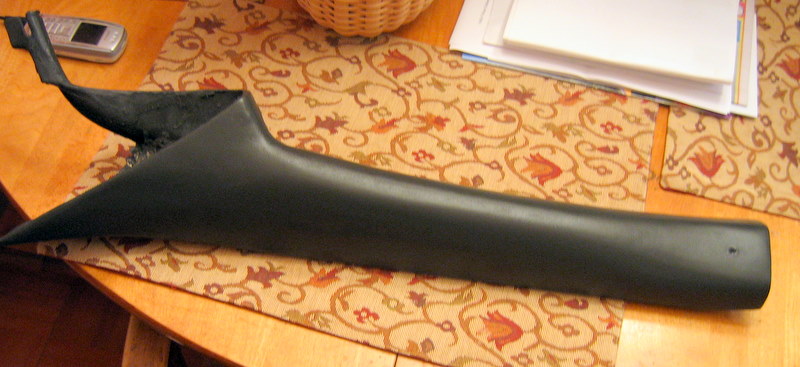
So, will the 4th gen a-pillars fit? Nope, not gonna happen. Now I know we've all heard 'stories' about how someone trimmed a bit here and bended a little bit there, but I've never seen a picture. It probably didn't turn out. I've also heard of someone merging the old and new ones together, but again no pictures. The only good solution I've seen is capping the exposed edges of the dash off and just using the old pillars. Won't work for me for two reasons: 1) With the vert I really need side window defrost, 2) the 4th gen a-pillar and kick panel combo covers up the gaps on the sides of the dash really well (like it's designed to on the 4th gens).
So I'm going with merging the two together. I told you I hate fiberglass right? I installed the old pillar, cut the new one until it would fit over the old one and the dash, then ran screws through it at various angles to hold the two in place. Remove them from the car and start glassing. Remove the screws when its supported enough.
Back side.. Luckily the vert pillars are cut near the top, so I don't have a big piece to worry about.
Yes the 4th gen kick panel / sill plates will work. It takes some trimming and my secret ingredient (more later), but it will work. The sill plates are a hair shorter then the old ones so I had to epoxy some extensions from the rear plastic. This will all be smoother together and covered in vinyl.
Long time, no updates. I got frustrated trying to get the a-pillars right and moved onto other things. I did get the exhaust finished up. I had a local shop fabricate most everything and wound up having to redo the back section. I'm not extremely happy with the y-pipe but at least it works.
The goal was to have 2.5" from the stock manifolds back to a 3" Y, then 3" all the way back with ground clearance. I purchased a stainless y-pipe kit for a 4th generation LS1. I knew out of the box is was not going to fit but; it had the correct flanges for the stock manifolds, it had a a pre-made Y section that had the stock tranny hanger in place, and the rest was in about 6 pieces. I wanted the exhaust shop to have to only fabricate small sections of pipe and nothing major. So here's the result:
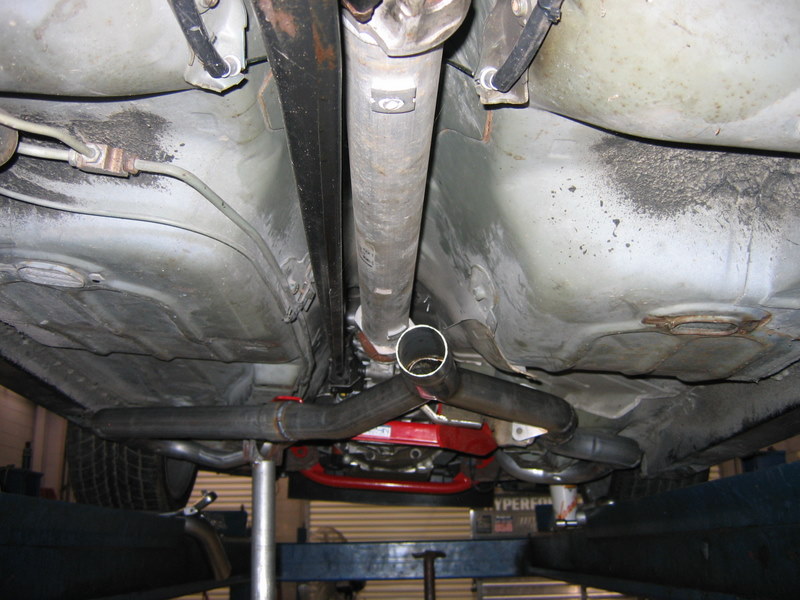
I scrape the tranny crossmember as is, and most solutions run lower then it. So I'm happy with the routing of the pipes, but the bends! The exhaust was a quasi trade, and in fact I never paid for it, but take pride people.. I knew I wasn't going to get mandrel bends, but I was expecting one bend when only one bend is needed. You can see in this picture how several small bends were used instead of one gradual one.
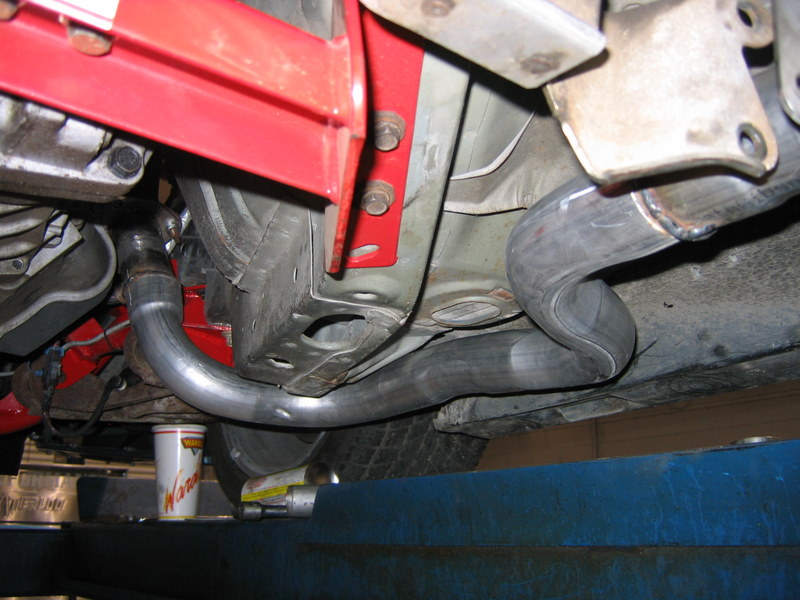
Here's a shot of the other side detailing it's route.
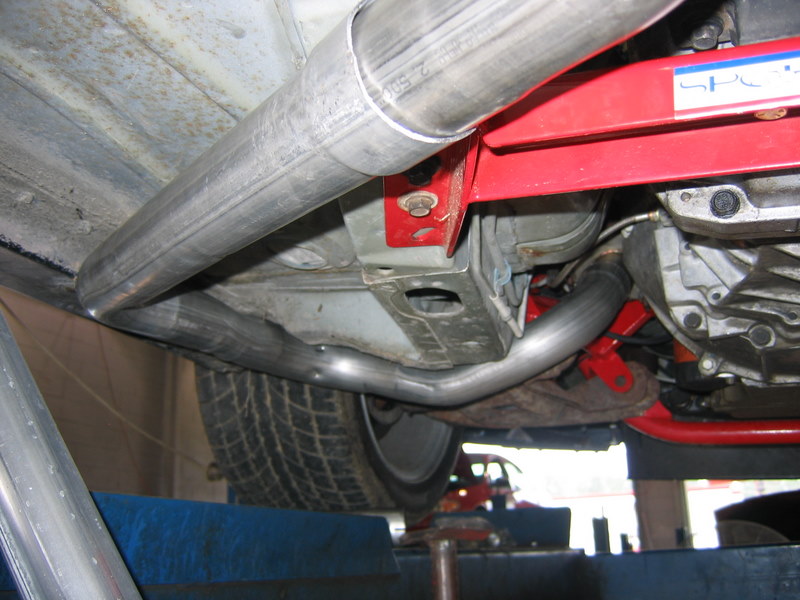
What you don't see in the pictures is where I had to remove the y-pipe and beat a section down on each pipe to clear the car. So again, I'll keep this design, but take it to a real exhaust shop and pay them to recreate it properly. I do have good ground clearance though.

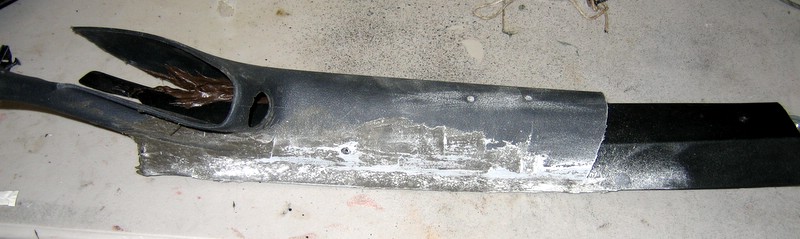
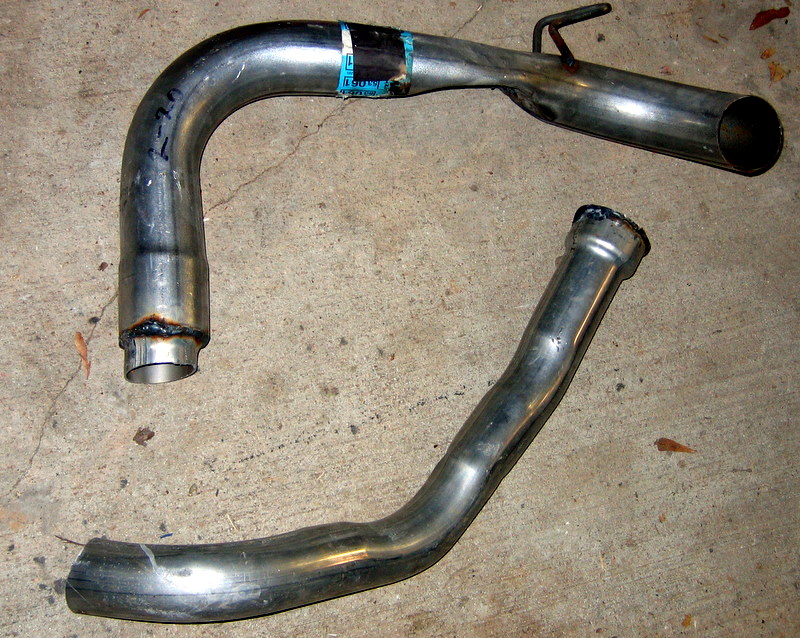
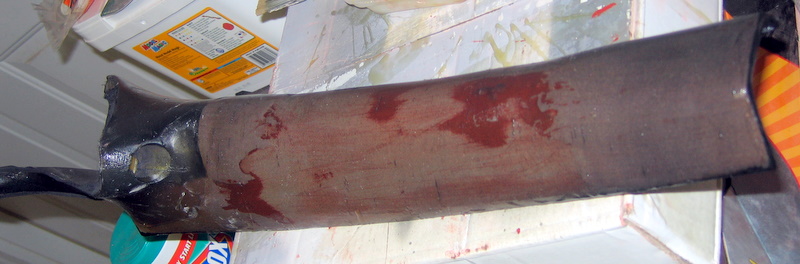
I don't have any pics of the rear section as it was horrible. I purchased a 3" mandrel bent over the axle section so they wouldn't have to make one. I had a 3" cutout. Even had the muffle and tips. All the had to do is connect the Y section to the over the axle, putting the cutout in between. I received a 2.5" pipe stretched on the ends to fit the 3" pipe, the cutout pointed down lower then anything else on the car, and the over the axle pipe flattened to 1". The over the axle pipe was massaged to clear the stationary panhard brace (not the bar). In addition everything was welded, so the exhaust was one piece from the manifolds to the tips. I cut everything off and started over. It's now 3" all the way back, the cutout is in the rear seat hump, the over the axel pipe is still 3", and everything has nice 360 degree clamps. I'll get pics of that later, but here's a piece I cut out of the old.
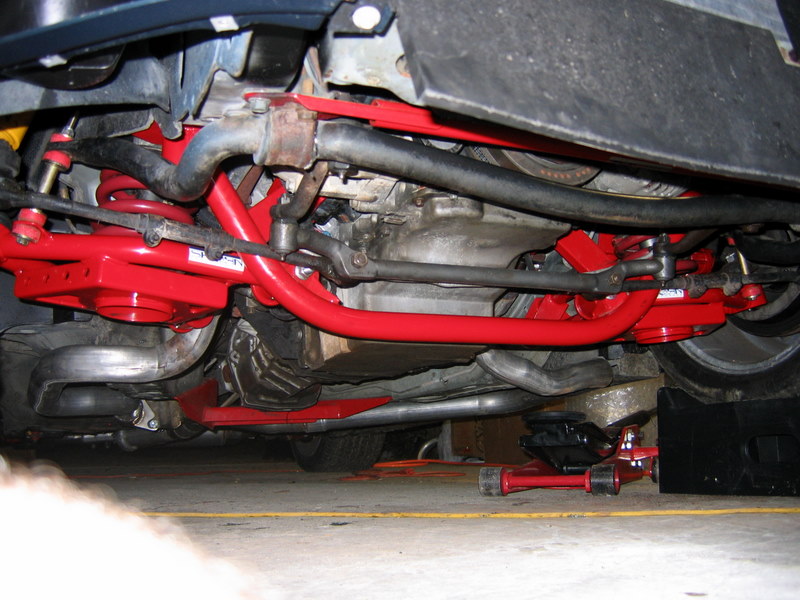
I did get some new goodies in last weekend. Tubular a-arms with spring perches and a steering brace from TDS.
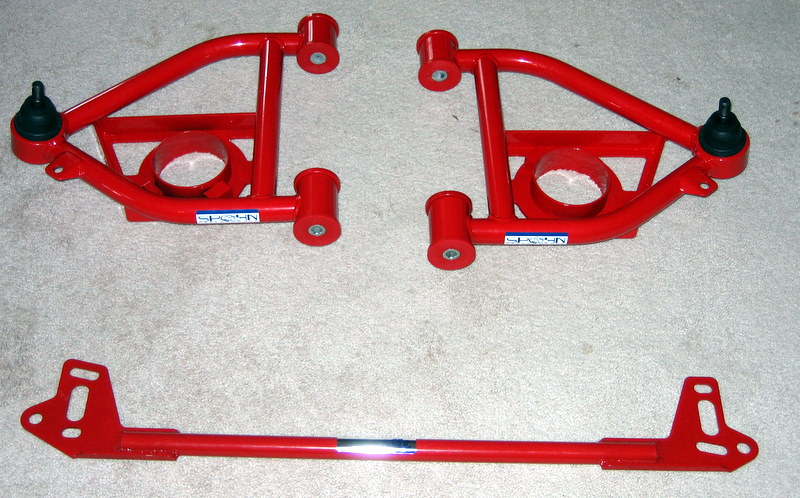
Steering brace was cheap and I needed a new set of headlight motor brushes. The control arms I did not want to buy. More cost with little benefit. Unfortunately my 'works with stock a-arms' crossmember only works if you don't mind the metal-on-metal scraping sound. My choices were these, or a torch and hammer. When you add in the old ones looked horrible and a needed new bushings and ball joints it was a no brainer.
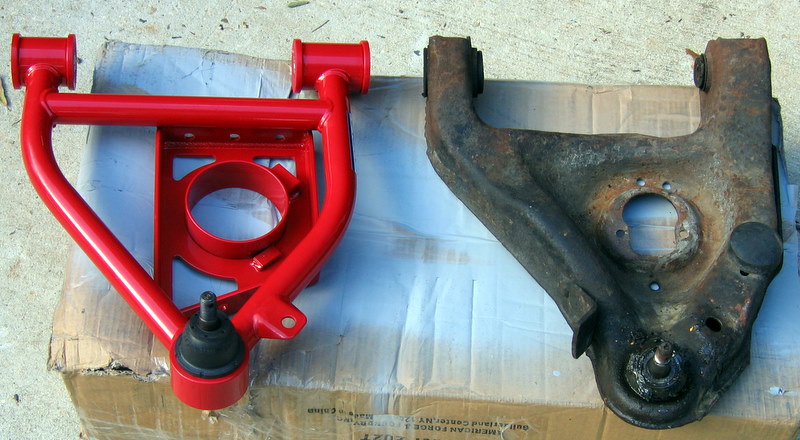
Thankfully they bolted in a lot easier then the stock ones.
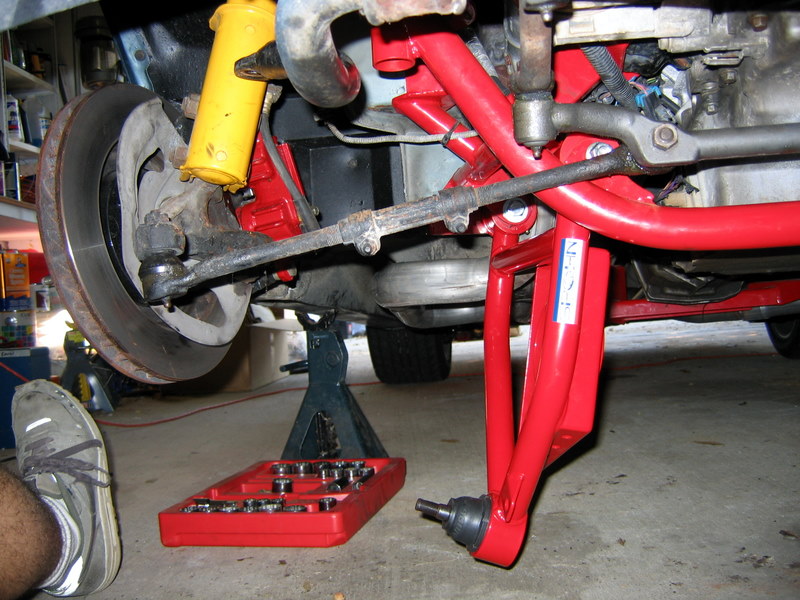
I had to modify the Ground-Control weight jack perches to work with this setup. The cross-member is designer to hold springs using the inner diameter. The weight jacks are designed to sit in the stock cups and have the same outer diameter as the springs. With the old arms I just flipped the jacks around letting them sit in the lower cups. With the new arms I had to let the spring sit in the bottom, so to keep the jacks from sliding around I welded some 3/8" rod to the inside of them to mimic the inner diameter of stock springs. Even with not wanting to do it, I have to say it really finished out the bottom end well.
Back to the a-pillars. Molding the two together is still the answer, but I left too much of the new pillar. It put too much pressure on the unit when installed and kept breaking the joints. So I cut the 4th gen pillar down until it just consisted of what's needed to match the dash. I installed the 3rd gen pillar then slid the 4th gen one on the dash. Some long sheetrock screws held the two together. Removed from the car I used some expanding foam to 'glue' the two together. The foam holds the two in place, but at the same time is easy to clearance and modify. Once dry I removed the screws.
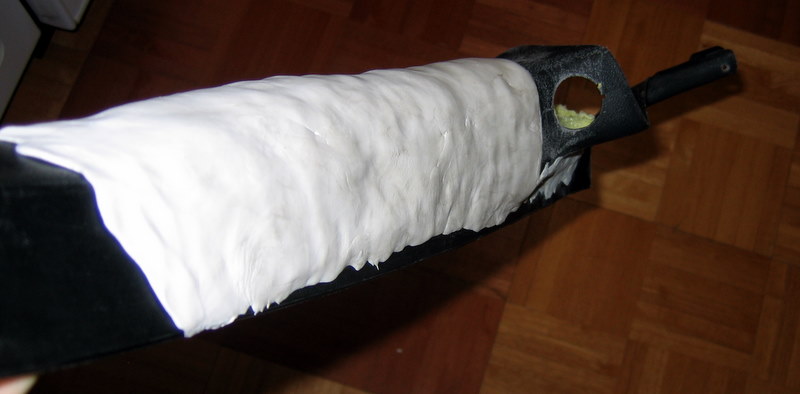
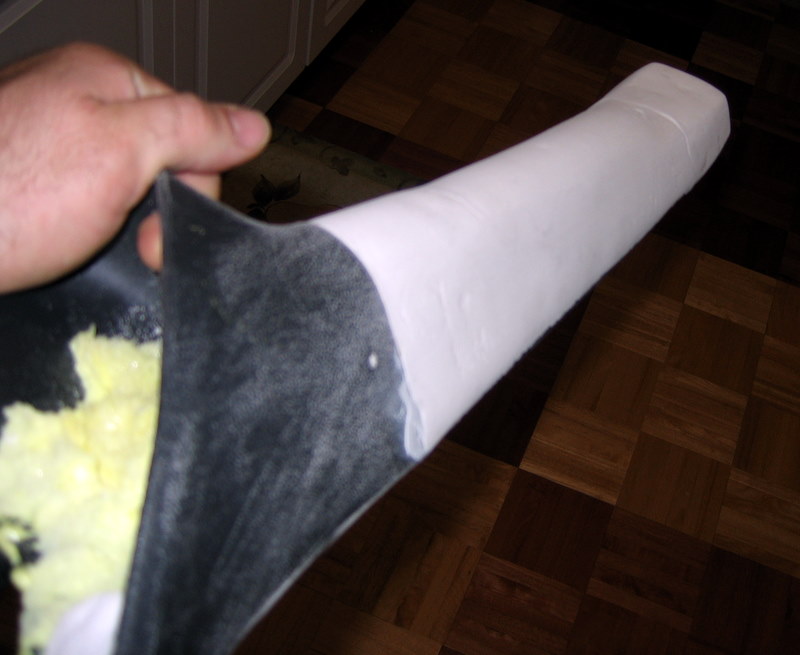
Once I verified the piece can be installed and removed without tweaking or problems I started to mold it together. First step is to glue some styrofoam cut from a cone shaped piece. This gives the curve and helps cut down on the amount of filler.
I sanded the plastic to help the next part stick. I needed something that I could get in bulk, molded easy, got hard without having to bake it, and was easily sanded. I found that in Crayola's Model Magic. It molds like Playdoh but gets harder the longer it's exposed to air. It's hard to get the stuff smooth by hand, so here's the first rough coat.
While the box said it was hard in 24 hours, it actually took more then a week for it to get solid. I would start sanding it down and some of the more soft sections would start flaking off. It also turns out the magic slay doesn't feather too well so I had to extend it out to all the edges. Here's the result after that and the initial sanding.
Once tested in the car I found the area near the windshield didn't extend as far as needed. I started filling in this area with more magic clay. You can see where I added some toothpicks to extend the clay beyond the plastic on the left.
Time for bondo! Here's after a couple of glazing coats and some filler primer.
You can see the old pillar here with all the new stuff molded on.
It still needs a few waves filled in for it to be perfectly smooth. Trying to get someone who can cover this is vinyl is becoming an issue. I'm thinking of learning how to sew and doing it myself, but I have considering vacuum forming a very thin piece of acrylic over the piece and just texturing / painting it. Here's how it looks in the car.
A view from the outside show's how well it blends.
The main reason for all this is to keep the side defrost, fill the typical gaps on the sides of the dash, and merge with the 4th gen kick panels.
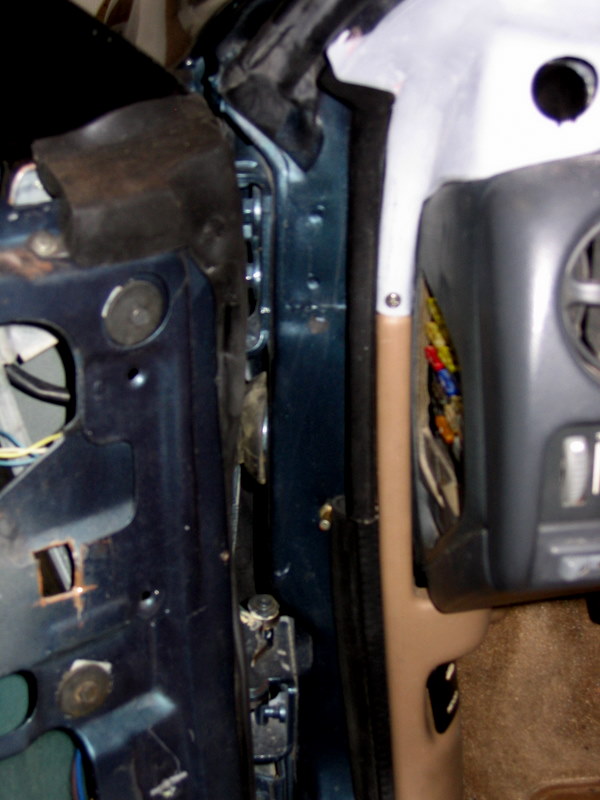
To use the 4th gen kick panels I took some 4th gen door seals and cut them to fit the area. There's now a double seal on the lower section of the door, but there's no down side to that. Here's a close up of where everything comes together near the dash.
Ok, doesn't look like it's possible to cover the a-pillar in vinyl like I want. I'm going to have to texture and paint it. Unfortunately, it was designed for vinyl and is not crack resistant. Here's a picture of one wrapped in panty-hose and then covered in fiberglass resin.
Got me some SEM spray texture and a can of SEM color spray and I went to town. The texture was not what I expected. Most of it would rub off with your hand, yet they want you to sand it with 320 grit paper to "get the proper look". You can't control it well enough to maintain a consistent look.
I'm not the happiest with the outcome, but it doesn't look bad in the car. I'll have to see how consistent the other side turns out. Something tells me I'll be sanding this one down and re-doing it.
All right! Got my leather shift boot, brake boot, and arm rest cover in from Redline Goods today. Amazing quality and fit. Stock there isn't even a brake boot and the arm rest is hard plastic.

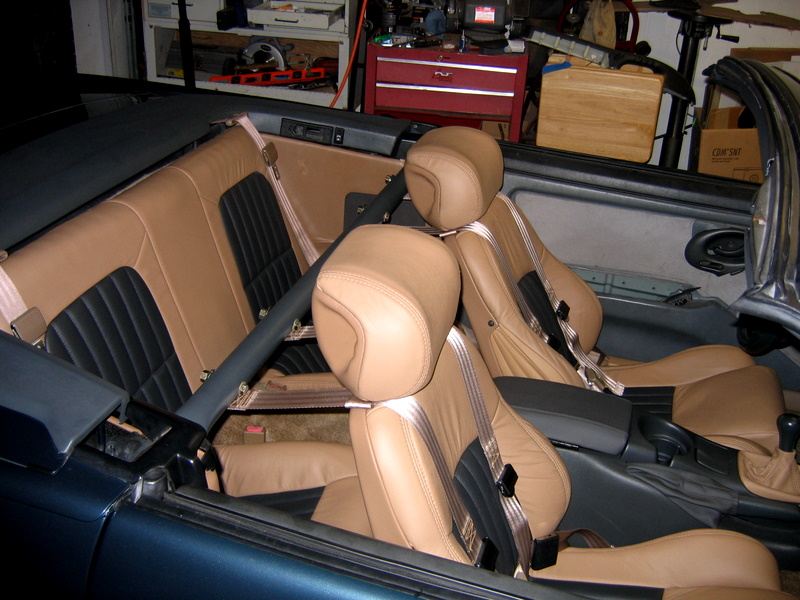
The other side showing the full brake boot. My leather seat covers are in production, so the interior is coming together. I ordered a matching tan shift boot with my seats as well, I'll have to see if the contrast looks better then the gray.

Got a package from Leatherseats.com today! Looks good.

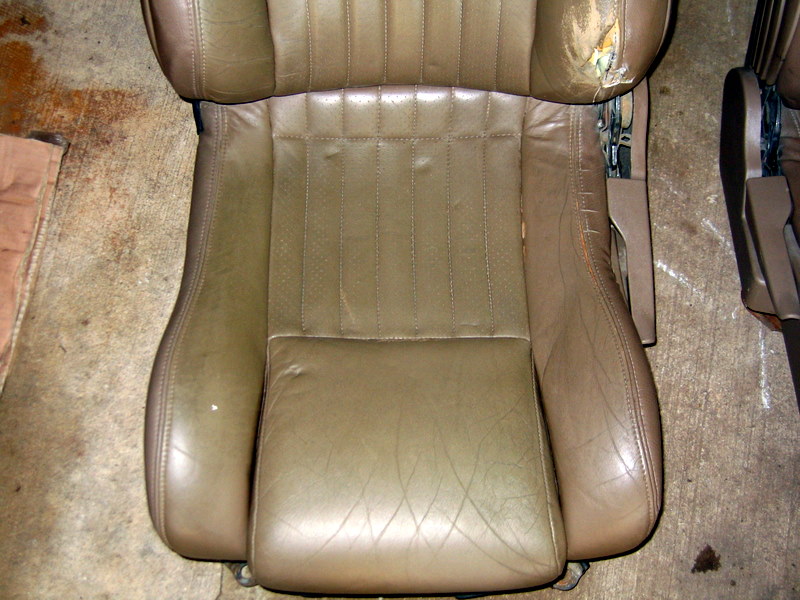
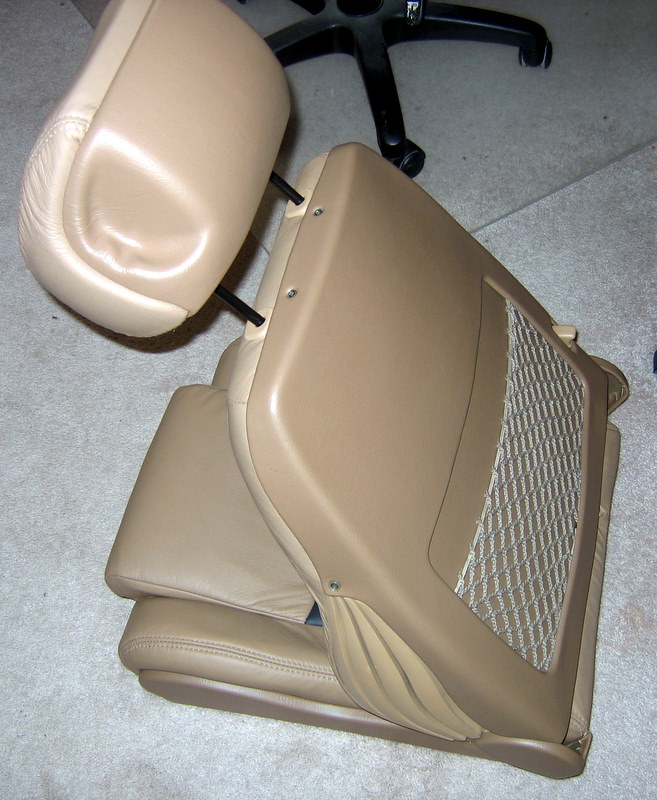
The stock tan was more dark brown (with a hint of a reddish tone). The new tan is closer to a pure tan, inserts match the dash/console. Here's the original passenger seat. You can see the factory uses vinyl for the outer edges as it hasn't faded as much as the centers. My new seats use 100% leather everywhere.
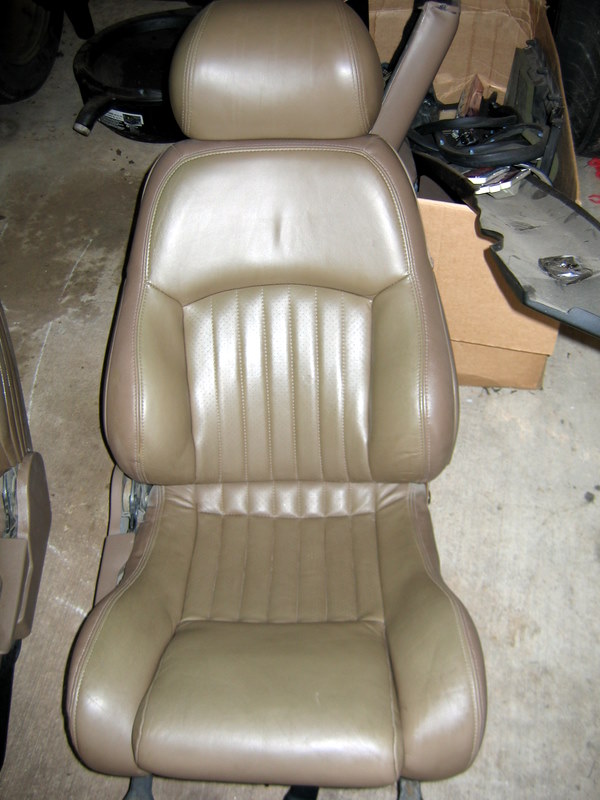
The passenger seat didn't look too bad, but the driver's side needed help.
I ordered 12 yards of vinyl that's dyed the same color as the leather. I'm going to wrap as much of the tan plastic to give it a more luxurious look. I want to avoid painting the plastic as much as possible.
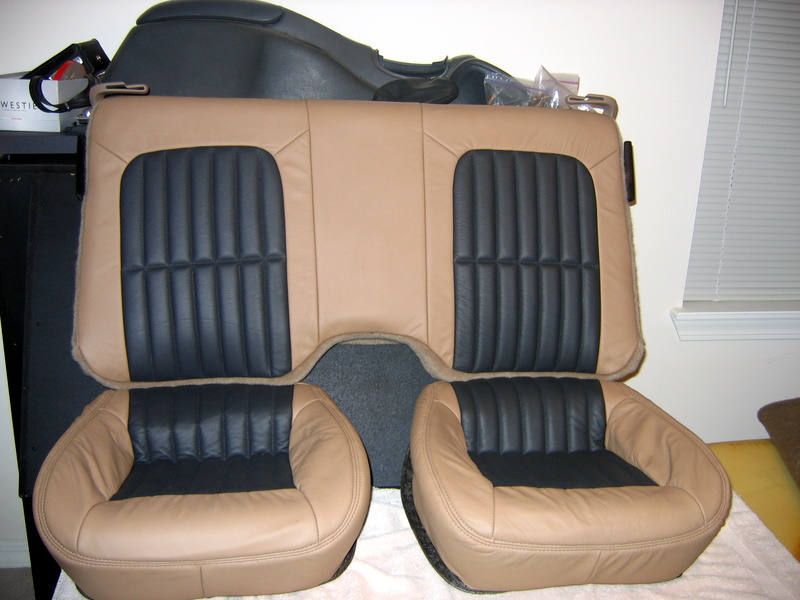
Here's a shot of the rear seats. The upper section is finished, the bottoms are just thrown on (but not attached). Most factory style two-tone seats have the front seats like I wanted, but have the insert color going from top to bottom on the rear seat. I had them make the upper rear seat a Camaro pattern (which stops the insert below the top, like my front seats) and do a custom pattern on the lower rear seats.
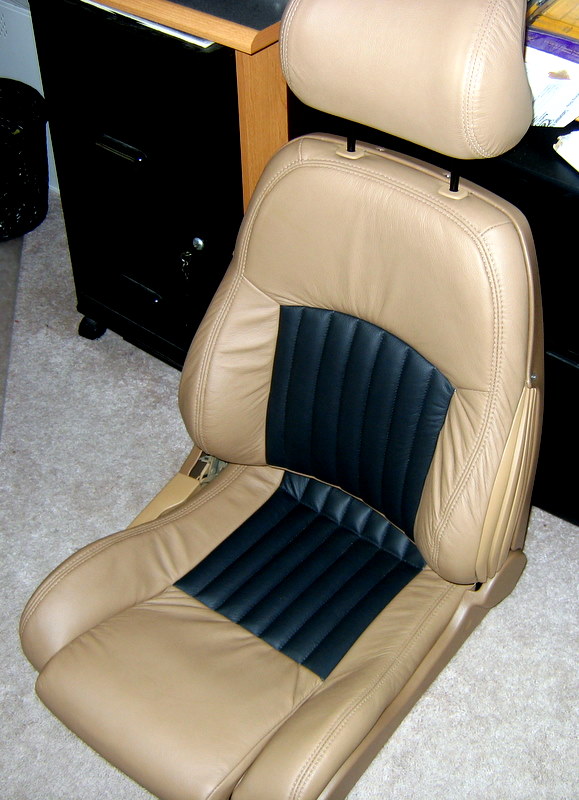
I got the front passenger seat finished. The flash makes the colors a little bright, but I'm extremely happy.
I was able to do things with vinyl I never thought possible. I was initially planning to just cover the seat backs with the matching vinyl and ran out of my favorite spray glue (V&S) halfway through. Against most recommendations I went and got some 3M 90 glue. I wound up messing up one of the seat backs with that junk (lucky I have spares). It's hard because you have to spray both sides of everything you want to stick and stick it within 5 minutes. You get overspray everywhere and complicated items are out since it might take 10 minutes just to gets the curves right.
I did some research and found where some were recommending DAP Weldwood contact cement. Downside is you have to wait 20 minutes after you apply it before you can stick it. The upsides are: you can wait up to 4 hours to stick it, you brush it on and only have to brush it on exactly where you need it, and once it's stuck it's not coming off easy. So sure it's not forgiving, but you can do it 1" at a time and wrap some crazy pieces.
Pretty much everything on the seat is wrapped except for the side bolters that are sewn on. Even the backside of the headrest! With this contact cement I think I can wrap the a-pillars and not even have any seems! Again, never-mind the flash effects, everything matches in color.
Success! My new love of contact cement has led me to try the impossible. I hadn't textured and painted the passenger side a-pillar yet, so I figured why not try and wrap it in one piece of vinyl?
While it may look similar to the textured and painted pictures above, I have to admit I had picked the best pictures to show it off. In person the vinyl wrapped piece is a hundred times better. I also fixed the crack in the dash pad and wrapped it in vinyl as well (plus I cracked/fixed the pad two more times wrapping it). I had to Dremel out the defrost vent to make a smooth appearance, as soon as I get a new vent and install it back in the car I'll have pictures. Here's a full flash shot of the a-pillar:

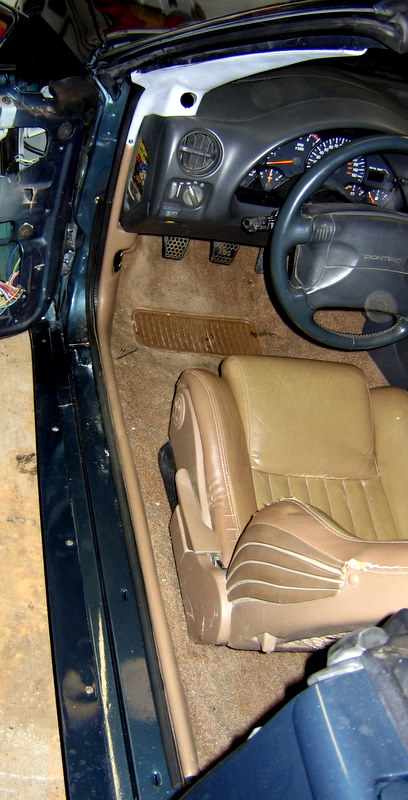
All right! A-pillars, dash, seats, & rear panels are back in the car!
As you can see I changed the shift boot out for a leather one that matches the seats. I've got to tweak the dash pad a little bit as covering it in vinyl changed some of the mounting points. I still have to wrap the kick panels and rear trim pieces, as well as fill in and paint the upper pieces that cover the harness bar (currently black). Not to mention create and then wrap the door panels.
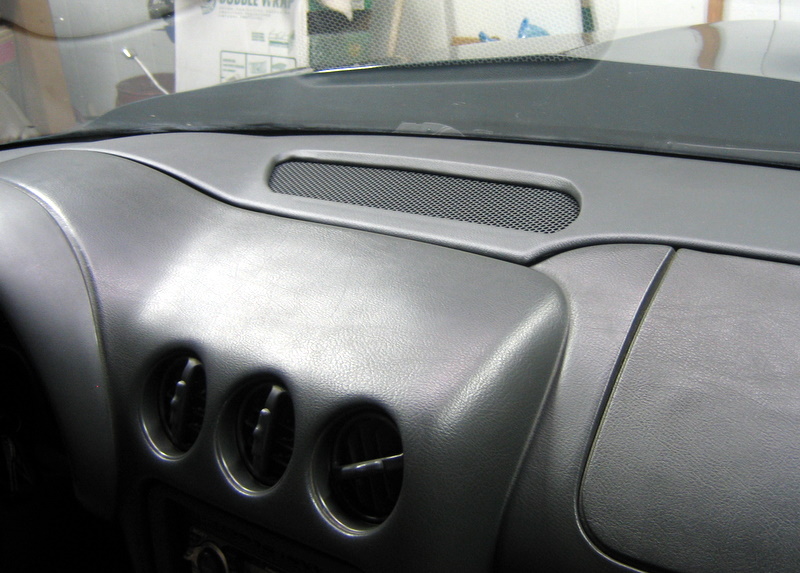
Forgot about the dash pad info! The pad is relatively easy to wrap in vinyl, not nearly as challenging as the back of the headrests. The problem is the center defrost vent is molded into it and impossible to wrap. I've seen plenty of attempts, but none are worth mentioning. Here's what the vent looks like stock:

So I had to dremel out all the slats, and then smooth the edges around to contour into the underside. To fix the crack I had (and two other cracks I put in it wrapping it), I drilled small holes all along both sides of the crack. Then I super-glued the crack together to hold it temporarily. On the back side of the pad I then sanded it with 80 grit and put a couple of thin layers of fiberglass. I threw some tooth-picks across the crack into the resin just for good measure too. Honestly a single layer of fiberglass over the whole panel wouldn't be a bad idea, but I think I've taken care of the trouble areas.
To replace the vent I purchased a 3U Middle-Atlantic vent panel and cut it to shape. Any thin 'vent' type material will do fine. Glue it to the back of the panel after you wrap it. Here's a good view of the finished piece in the car:
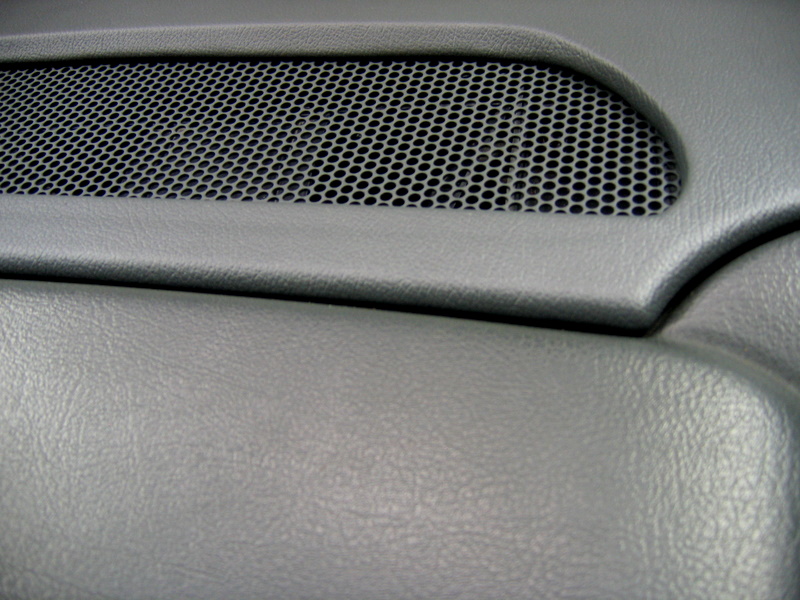
Here's a close up of the vent, also notice how well the vinyl texture matches the stock dash.
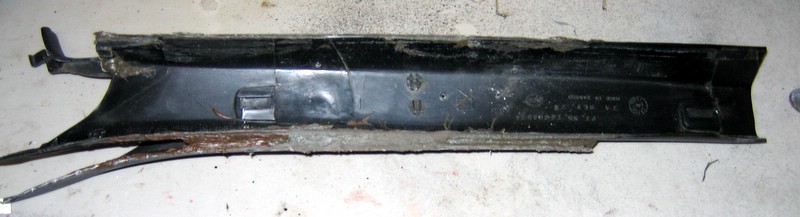
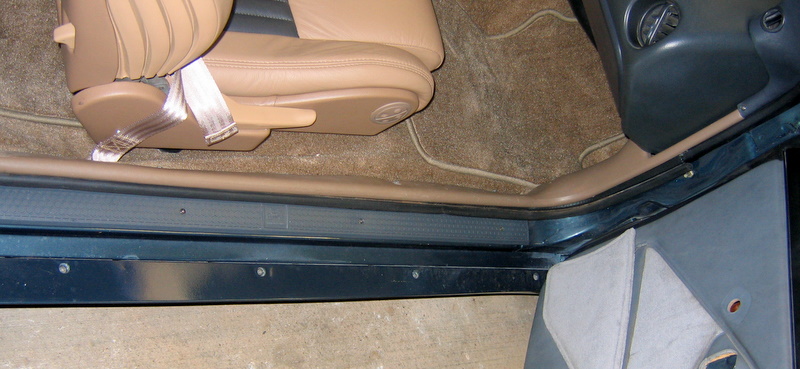
Don't think I've shown a picture of the modified 3rd gen sill covers. I cut off the piece that the 4th gen kick-panel and seal all ready covers, and it slid right in under the seal.
Just started looking and noticed it's been two years since I've updated this. Quite honestly not much has happened. Took a year to get my shop built and moved in. I tried upgrading the rear to 4.10 gears while still in the garage and managed to make the car immobile. I decided it was difficult enough to do a gear change that I would wait until I got moved in the shop before attempting to fix it.
Opportunity came along and I picked up a never used (but not new) Summers Brothers 12-bolt for 3rd gen cars.
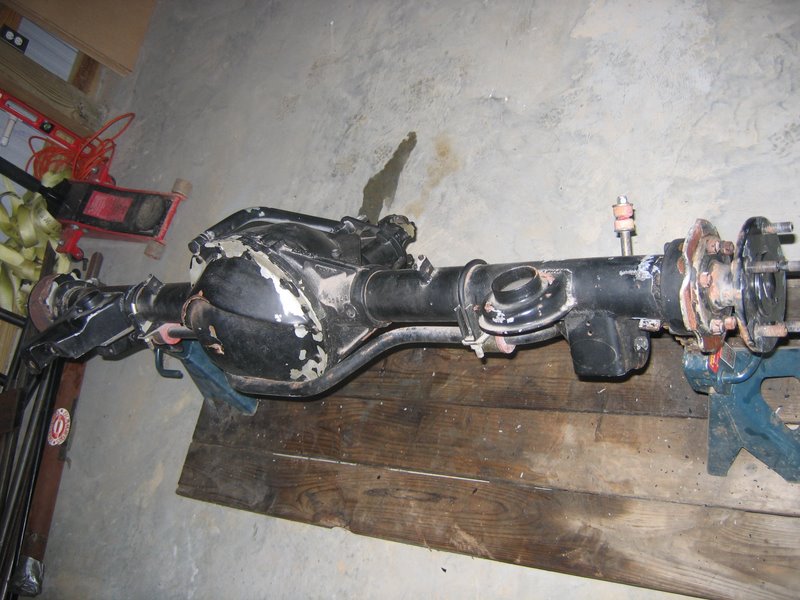
FYI, you can't paint zinc coated parts and expect it to stick. While I'm sure the rear end looked great right after it was painted, I had to strip the entire thing to redo it.
I got an awesome deal on the rear-end, but quickly realized that everyone modifies the 12-bolt to fit other cars differently. When you add in that Summers Brothers hasn't made this rear in over 15 years and the person responsible for making it is no longer there, you will have a hard time changing anything out. The backing plates were setup for the 82-88 disc brakes, and I wanted to keep my 89+ PBR's.
The rear all ready came with 3.73's, better bearing cap, Eaton posi, and c-clip eliminator axles.
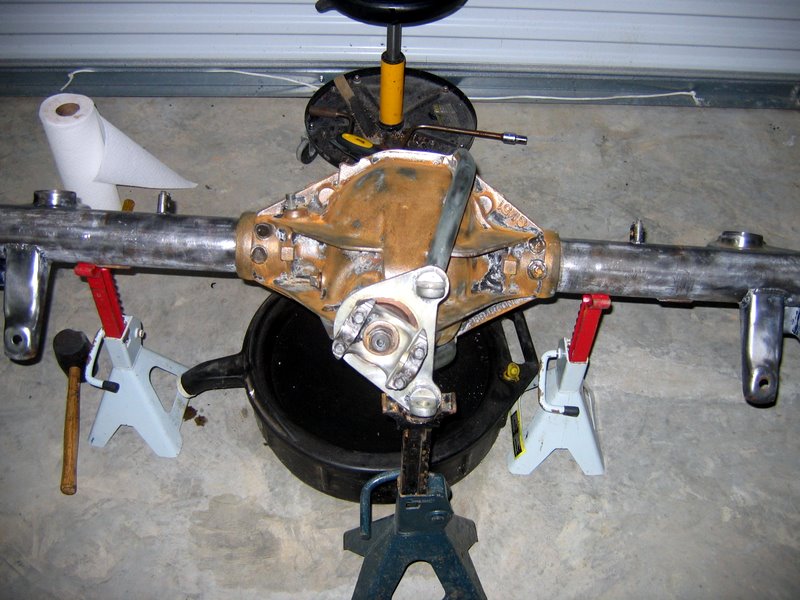
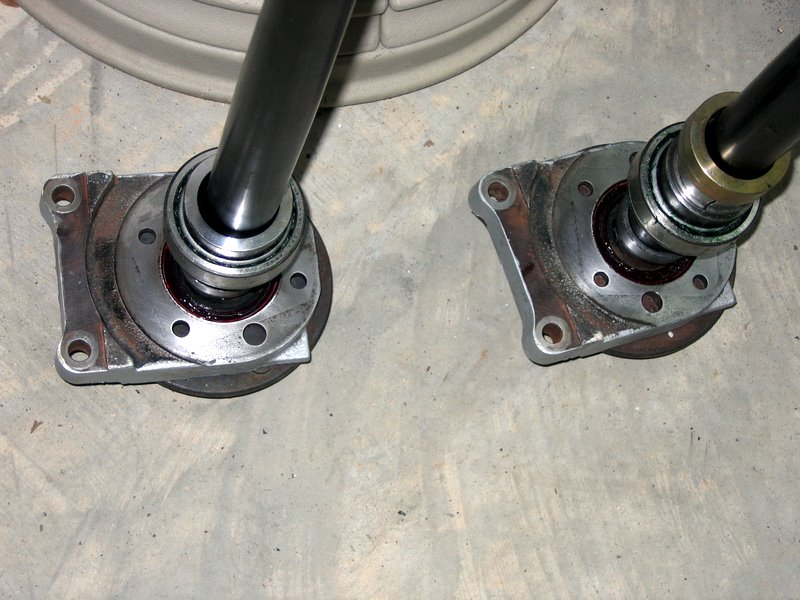
The way the c-clip gets eliminated is by changing the outer bearing to a conical style to hold all the forces on the axle, adding an end on the rear to hold that bearing and sandwich the backing plate, and finally a pressed on one-time-use collar to keep the axle from pulling out. The bad thing about this is that you have to cut-off that collar to change the backing plate out. The other issue I had was that the seals that came on the axles had too small of an outside diameter to fit in the newer backing plates. I had to cross-reference the seal to get specs on the inside diameter and style of seal and then find a listing of seals with the same inside specs but larger outside specs. The next size up seal was actually too big so I had to grind out the backing plate to make the seal fit.
Here's a picture with the new seals and backing plate installed, but the (cut) bearings and collar.
Unfortunately Summers Brothers were absolutely no help in locating the correct replacement bearings and collars. Luckily Mark Williams Enterprises was able to supply a replacement kit that would work with my end caps. A few new holes in the backing plates and the axles were installed.
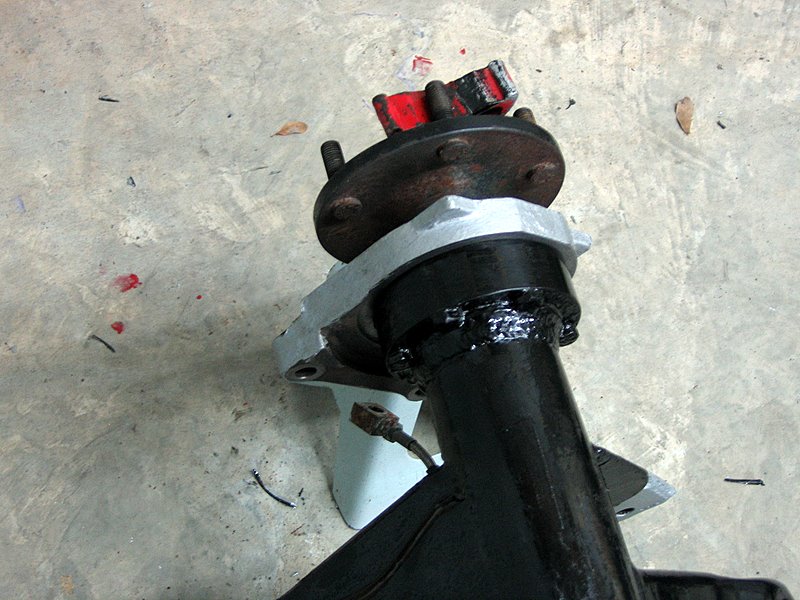
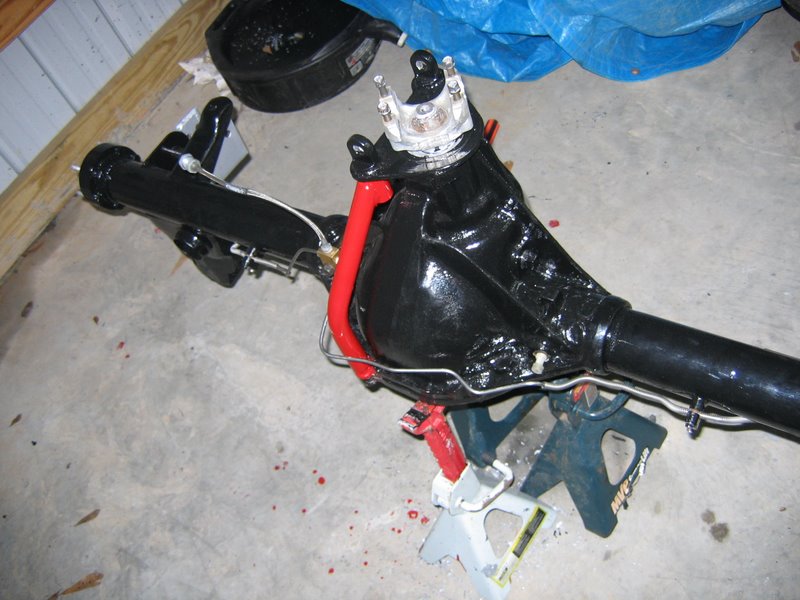
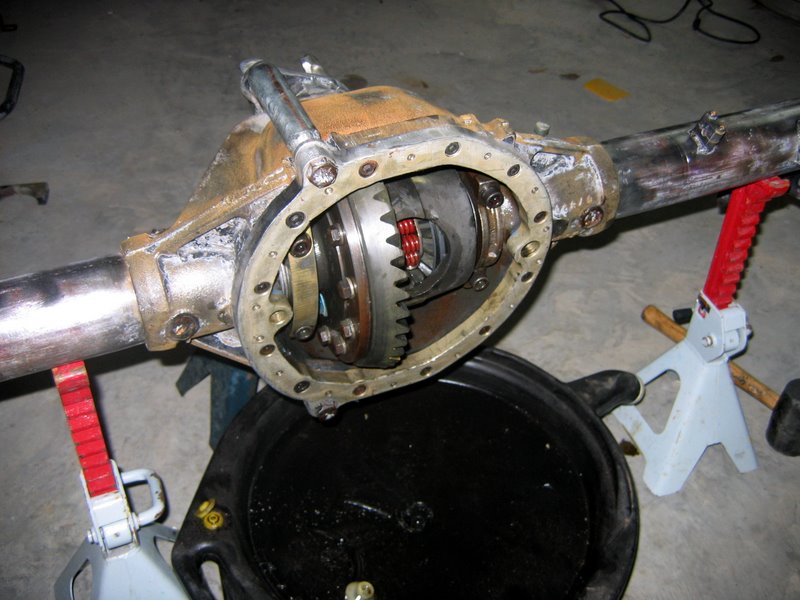
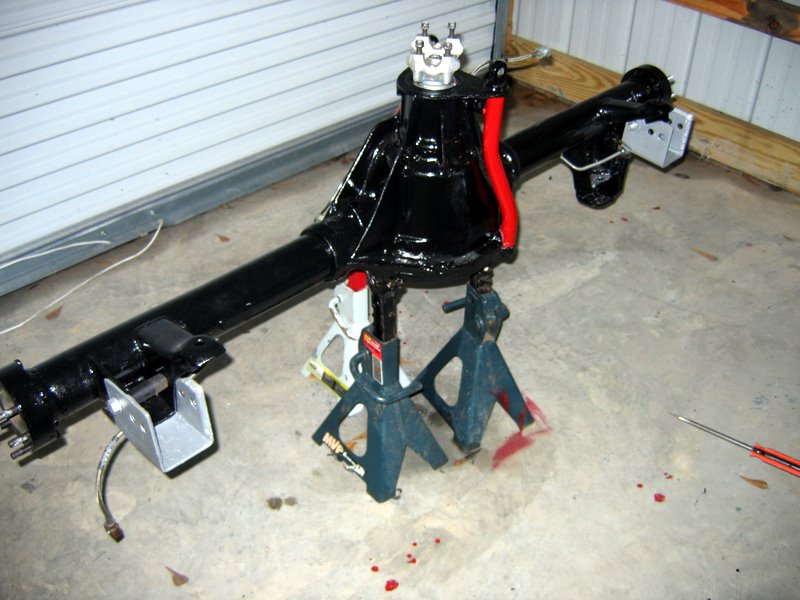
The entire rear was finished off with some Rust Bullet primer and paint. Brake lines, brakes, and LCA relocation brackets were saved from the old rear.
It didn't end there. The torque arm design that I had to use was made in the 80's. There was no planning for a 3" driveshaft. I had to change to the older style torque arm mount and the torque arm mounted upside down. This kept the angles the same but moved the front of the arm over about .5". That's enough to keep it off the driveshaft. The torque arm mounting on the actual rear uses a spacer ring on the backside. This pushes the rear cover far enough out to hit the sway bar. I had to pick up some sway bar lowering mounts and longer end-links to make it clear. The guy I got it from had set the 3.73's up himself and said they were good. Since he never drove the car with it, he didn't know how far off he was. I couldn't get a good pattern on those Richmond gears and wound up ruining the threads on the pinion taking it out for the 15th time. So in went a set of Motive 4.11's which I got a perfect pattern on after only 4 attempts.
Unfortunately I don't have any pictures of all that yet, so here's another picture of the painted rear.